As I continue my maternity leave this month, I wanted to share this recipe from Kristina, the writer behind The Greening of Westford. I am a huge fan of coconut oil; it was my belly butter of choice during my nine months of being pregnant. This is an easy recipe and I hope you find it useful!

If you are looking for more natural replacements for beauty products, I have THE ONE!  Coconut oil is an amazing ingredient.  You can cook with it and use it as part of your beauty routine! It is becoming a regular item on grocery store shelves as well.

This little mixture can be used as a moisturizer, eye makeup remover and eye cream.

Coconut Oil Moisturizer
Ingredients

1/2 cup Coconut oil
1/2 tsp Vitamin E (optional)

Directions

Place the coconut oil and vitamin E in a bowl.   Whip with an electric mixer until it is like whipped cream or frosting (about 5-10 minutes).

Vitamin E oil is used as a preservative.  However, if you don’t already have some, don’t bother.  Coconut oil has a pretty long shelf-life as is.   Some people find it easier to melt the coconut oil first, and then whip it as it cools.  If you prefer this method, you can melt the coconut oil in your microwave or over a double boiler.

Place in a pretty jar and you are done!

Uses

I put this on my body as a moisturizer after showering.  When I remove my eye makeup at night, I put a small amount on my eyes and wipe the make-up away.  A little remains which moisturizes that delicate skin around your eyes beautifully.

In the summer, this mixture may turn to liquid.   You could store it in the fridge to keep it more solid, but totally your preference.  In colder months, you may have to scrape at it a bit, but it melts quickly with the warmth of your hands.

Have you tried coconut oil in other beauty treatments?

About the Author

Kristina Greene is the founder and editor of The Greening Of Westford blog.  She focuses on practical eco-friendly actions anyone can do to save time, money, aggravation, oh, and the planet!  Connect with her through her blog, facebook and twitter.

When I first saw this collection of ebooks I was pretty excited. I already have some of them so was familiar with the authors. This ebook library is pretty big, and each book isn’t for everyone. However, there probably is at least 4-5 books that you can learn from making the price of the package worthwhile. It’s a homemaking theme, so it covers food, budgeting, parenting, schooling, marriage, health, blogging, holidays and more. It’s not just for my eco-friendly readers, but for any mom, sister, grandparent, newlywed or blogger that is interested in building up her home-keeping resources. (I should say dad, brother or grandfather too, right.)

Why am I buying the ebook bundle?

I am already a fan of ebooks. They are with me on the go in my iPhone or iPad, plus I have others organized on my laptop. When I download a bundle, I have everything go to my laptop. Then I pick and choose as needed and email it to myself to open in either my Kindle app or iBooks app so I have it when I’m waiting at a doctor’s office or traveling.

The reason I’m buying my own bundle is because I wanted these specific books for myself. I’ve seen them advertised and now is the right time to purchase them, plus the balance of the library.

The cost of these four books alone is $34.91 so the low bundle price of $29.97 already gives me a deal, plus I’ll get all the free products too. Keep reading to the end of the post (sorry it’s really long!) and the freebies are noted at the end.

Some of my favorite ebooks I have already read and would recommend:

The Details

For 6 days only, more than 75 widely-known bloggers and authors in the homemaking sphere have joined together to offer 97 of their most popular eBooks and eCourses, valued at just over $600, for the incredibly low price of $29.97!

More than anything, our goal for this sale was for it to be, well… ultimate! We firmly believe that you will not find a more comprehensive collection of homemaking resources anywhere on the web, and particularly not in this price range. For this low price, you gain access to every single one of these resources, so that you can customize your own collection to contain exactly the ones you want and know you’ll use.

This library of homemaking helps include topics such as mothering, organization and cleaning, recipes and kitchen helps, home education, spiritual growth for both moms and kids, home décor and DIY, pregnancy and baby care, frugal living, health and fitness, and even work-from-home and financial tools.

To sweeten the pot, we’ve also teamed up with 10 companies to bring you over $140 in bonus offers, giving you an affordable opportunity to get products you’ll use and love for only the cost of shipping, or in some cases, entirely for free!

What’s Included in the Sale?

When you purchase The Ultimate Homemaking eBook collection  you will get instant access to any of the 97 eBooks and eCourses listed below.

PLUS over $140 of FREE Bonuses

The Ultimate Homemaking eBook collection comes with more than $140 of FREE Bonuses from 10 companies that we know you’ll love. More on these bonuses below.

Please note: This collection is only available from 9 a.m. EST on April 29th to 11:59 p.m. EST on May 4th. There will be no late sales offered.

Home & Property {Cleaning, Organizing, Decor}

31 Days to Clean by Sarah Mae @ SarahMae.com ($4.99)
Getting it Together: Your Guide to Setting Up a Home Management System that Works by Kayse @ kayse pratt ($3.99)
Pulling Yourself Together: Implementing a Cleaning Routine that Sticks by Becky @ Clean Mama ($10.00)
Simple Living by Lorilee @ Loving Simple Living ($2.99)
NOT a DIY Diva by Melissa @ The Inspired Room ($3.99)
One Bite at a Time: 52 Projects for Making Life Simpler by Tsh @ Simple Mom ($5.00)
28 Days to Hope for your Home by Dana @ A Slob Comes Clean ($5.00)
Organizing Life as Mom by Jessica @ Life as Mom ($9.00)
Clean Enough: Simple Solutions for the Overwhelmed by Jenni @ Live Called ($4.99)
10 Steps to Organized Paper by Lisa @ Lisa Woodruff.net($5.00)
Handmade Walls by Jamin and Ashley @ the handmade home ($9.95)
Easy Peasy Chores: An Easy-to-Use Chore System That Brings JOY Back Into Family Chores by Alina Joy @ The Good Old Days Farm ($17.99)

Educational Children’s Resources

Princess Training by Richele @ Under the Golden Apple Tree ($3.99)
The Armor of God by Richele @ Under the Golden Apple Tree ($2.50)
My Bedtime Learning Book by Richele @ Under the Golden Apple Tree ($1.00)
Think Outside the Classroom by Kelly @ Generation Cedar ($6.97)
Raising Rock Stars — Kindergarten Bundle by Carissa @ 1plus1plus1equals1 ($10.00)
The ABC’s For Godly Boys Curriculum by Lindsey @ Road to 31 ($8.00)
The ABC’s For Godly Girls Curriculum by Lindsey @ Road to 31 ($8.00)
K4 Curriculum by Erica @ Confessions of a Homeschooler ($15.00)
Write Through the Bible (print) by Trisha @ Intoxicated on Life ($5.00)
Write Through the Bible (cursive) by Trisha @ Intoxicated on Life ($5.00)
Balcony Girls (books 1 & 2) by Sandy @ Reluctant Entertainer ($19.90)
The Dig for Kids: Luke (Volumes 1 and 2) by Patrick, husband of Ruth @ The Better Mom ($5.98)
Music: An Essential Ingredient for Life by Ryan @ Resound School of Music ($6.99)

Budgeting {Finance & Time}

From Debtor to Better by Barry @ From Debtor to Better ($10.00)
Tell Your Time by Amy @ Blogging with Amy ($2.99)
The Homemakers Guide to Creating the Perfect Schedule by Amy @ Raising Arrows ($4.99)
Your Grocery Budget Toolbox by Anne @ Authentic Simplicity ($7.99)
Finding Financial Freedom by Kelly @ Generation Cedar ($5.97)
Become a Frugalista in 30 Days by Susan @ The Confident Mom ($3.99)

In the Kitchen {Recipes and Cooking}

Crock On by Stacy @ Stacy Makes Cents ($5.00)
Real Food, Real Easy by various bloggers @ The Humbled Homemaker ($9.95)
Wholesome Mixes by Kristy @ Little Natural Cottage ($4.00)
20-Minute Meals by Leigh Ann @ Intentional by Grace ($4.99)
Restocking the Pantry by Kresha @ Nourishing Joy ($9.99)
Money Saving Mom’s Guide to Freezer Cooking by Crystal @ Money Saving Mom ($3.99)
Simply Summer by Kate @ Modern Alternative Mama ($7.95)
Do the Funky Kitchen by Laura @ Heavenly Homemakers ($4.95)
Real Food Kids: In the Kitchen plus 1 month access to select Real Food Kids eCourse videos by Wardeh @ GNOWFGLINS and Jami @ Eat Nourishing ($20.00)
Seasonal Menu Plans on a Budget: A Month of Meals from My Humble Kitchen to Yours by Diana @ My Humble Kitchen ($4.99)
Just Making Ice Cream by Marillyn @ Just Making Noise ($12.00)
The Curative Kitchen by Susan @ Handy Pantry ($20.00)

Pregnancy & Baby Care

First Bites by Hilary @ Accidentally Green ($9.99)
Confessions of a Cloth Diaper Convert by Erin @ The Humbled Homemaker ($9.95)
Stress-Free Baby Shower by Sara @ Your Thriving Family ($4.00)
Unbound Birth by Jenny @ The Southern Institute ($2.99)
My Pregnancy Journey by Mindy @ Simply Designs ($9.99)
My Buttered Life Baby Edition by Renee @ Made On Hard Lotion ($5.00)
The Minimalist Mom’s Guide to Baby’s First Year by Rachel @ The Minimalist Mom ($5.00)
Redeeming Childbirth: Growth & Study Guide by Angie @ Redeeming Childbirth ($3.99)

Holidays & Special Events

Festive Traditions by Jill @ Modern Alternative Kitchen ($7.95)
Holiday Mixes: Gifts in a Jar by Kristy @ Little Natural Cottage ($4.00)
Flourishing Spring by Michele @ Frugal Granola ($5.95)
Family Camping Handbook by Katie @ Kitchen Stewardship ($6.95)
Truth in the Tinsel by Amanda @ Oh, Amanda! ($7.99)
Plan a Fabulous Party by Mary @ Giving Up on Perfect ($4.99)
iPhone Photography: The Visual Guide by Alli @ Alli Worthington($9.97)

Spiritual Growth

Pursuit of the Proverbs 31 by Amy @ Amy Bayliss ($3.99)
The Best of Visionary Womanhood by Natalie @ Visionary Womanhood ($5.00)
God’s Word in my Heart: A Scripture Memory Learning Guide with Verses {all 4 versions} by Jenn @ The Purposeful Mom ($3.99)
Kept: a 13-Week Inductive Study on 1 Peter by Lara and Katie @ Quench Bible ($4.99)
Love Like Him: an 8 week Inductive Bible study on 1 Corinthians 13 by Lara and Katie @ Quench Bible ($2.99)

Marriage & Romance

Rekindling Romance by Jason & Jami @ A Biblical Marriage ($4.99)
Good Wife’s Guide by Darlene @ Time-Warp Wife ($2.99)
31 Days to Build a Better Spouse by Ashley @ Ashley Pichea ($4.99)
31 Days to Great Sex by Sheila @ To Love, Honor and Vacuum ($4.99)
Entangled: Recognize Your Emotional Affair by Amy @ Amy J. Bennett ($4.99)

Motherhood

The Heart of Simplicity by various authors @ The Heart of Simplicity ($9.99)
True Christian Motherhood by June @ A Wise Woman Builds Her Home ($7.00)
Hula Hoop Girl by September @ One September Day ($4.99)
When Motherhood Feels Too Hard by Kelly @ Generation Cedar ($4.97)
Mindset for Moms by Jamie @ Steady Days ($4.99)
From Cube to Farm by Heather @ From Cube to Farm ($2.99)
4 Moms of 35+ Kids Answer Your Parenting Questions by various authors @ 4 Moms, 35+ Kids Parenting E-book ($7.99)
That Works for Me! by Kristen @ We are THAT Family ($8.00)

Health & Fitness

100-pound Loser by Jessica @ Muthering Heights ($4.99)
Honoring the Rhythm of Rest by Danielle @ Domestic Serenity ($2.99)
42 Days to Fit by Brandy @ The Marathon Mom, Emma @ Real Fit Moms and Stacy @ A Delightful Home ($4.99)
Healthy Homemaking by Stephanie @ Keeper of the Home ($12.95)
Personal ePlanner by Jennifer @ ListPlanIt ($5.00)

Beauty

Frumps to Pumps by Sarah Mae @ SaraMae.com ($4.99)
The Cottage Mama’s DIY Guide by Kristy @ Little Natural Cottage ($4.00)
Simple Scrubs to Make and Give by Stacy @ A Delightful Home ($3.99)
The No Brainer Wardrobe by Hayley @ The No Brainer Wardrobe ($7.99)
Embracing Beauty by Trina @ Trina Holden ($9.00)
Reuse, Refresh, Repurpose by Kristen @ The Frugal Girl ($3.99)

Working from Home & Blogging

Your Blogging Business: Tax, Talk and Tips by Nikki @ Christian Mommy Blogger ($4.99)
The Bootstrap VA by Lisa @ The Home Life {and Me} ($12.99)
How to Grow Your Blog and Manage Your Home by Jacinda @ Growing Home ($4.99)
How to Have Your Cake and Eat It, Too by Mandi @ Life Your Way ($12.00)
Simple Blogging: Less Computer Time, Better Blogging by Rachel @ Small Notebook ($8.00)

Ecourses

Learning in Love: The Preschool Years by Renee @ FIMBY ($7.99)
Homeschooling from the Heart by Renee @ FIMBY ($7.99)
Grocery University by Carrie @ Colorado Bargains ($24.95)
Vibrant Living Strategies for Moms by Lisa @ Well-Grounded Life ($59)
You Can Do This! The First Five Steps to a Real Food Kitchen by Laura @ Heavenly Homemakers ($5.00)

PLUS, You will receive FREE Bonuses from these companies…

A FREE Two-Month Membership to Fit2B Studio (for new members) or $20 off a Yearly Membership (for current members), where their wholesome workouts for the whole family are tummy safe and particularly target Diastasis Recti (split abs). ($19.98 value. No shipping restrictions.)

A $15 store credit to TruKid. With products like their aware-winning sun care, they are dedicated to providing all natural skin and hair care for kids, babies, and now pets. ($15.00 value. Standard shipping applies. International shipping available.)

Your choice of incredible natural products like sea salt and clay for FREE. Choose from the Redmond Trading Earthpaste Bundle ($24.90 value) or the Facial Mud Bundle ($26.90 value). (Standard shipping applies. Continental US only.)

Your choice of a FREE heirloom sourdough starter or FREE yogurt starter from Cultures for Health, the leading supplier of starter cultures and supplies for making cultured and fermented foods ($12.95 value. US & CAN addresses only. Standard shipping applies.)

Your choice of: a FREE 3-Month Subscription (for new accounts) or 30% off a One Year Subscription. Plan to Eat is an online menu planner that uses your recipes, scheduled for the days you want them. ($15.00 value. No shipping restrictions.)

A FREE Culinary Herbs Assorted Seed Pack Check just in time for spring planting from www.wheatgrasskits.com, a living whole foods company. ($11.95 value. Standard shipping applies to all US states and territories- no international shipping for seeds.)
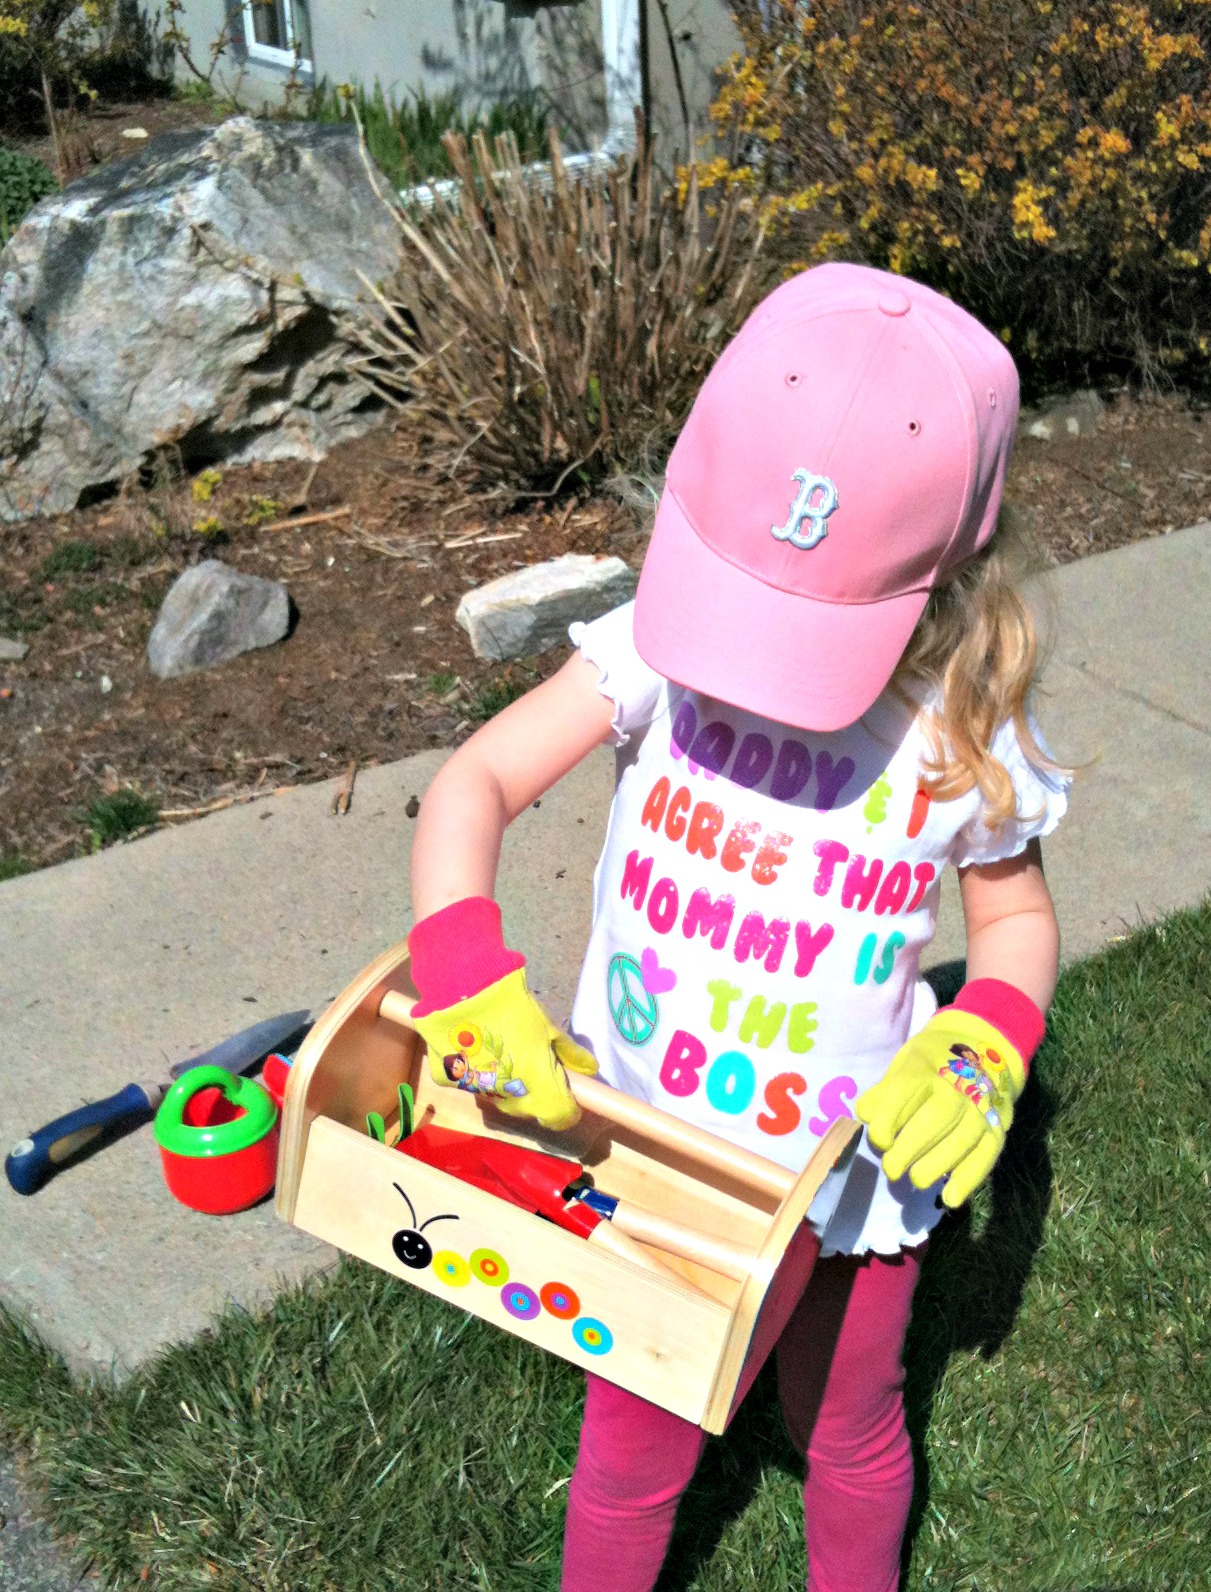
Get $10 off Union28’s original “my husband rocks” tee. Their marriage apparel lets you celebrate your spouse in style. ($10.00 value. Standard shipping rates apply. International shipping available, but free shipping only available within USA.)

A $10 store credit plus 1 FREE lip balm from Bee All Natural. Their whole body products nourish and heal, and are made using only the highest quality, food grade, organic ingredients. ($13.49 value. Standard shipping applies. International shipping available.)

A FREE 2 oz. bottle of your choice of liquid herbal formula from TriLight Health. They specialize in fast acting, great tasting natural herbal remedies. ($12.95 value or more. Standard shipping applies, within the USA only.)

Your choice of 3 FREE ePlanners OR a 3-Month FREE Membership to ListPlanIt, whose mobile lists will help to organize your life. ($15.00 value. No shipping restrictions.)

The fine print:

Bonus Offers

  • Each bonus offer can be redeemed once only per eBook Bundle purchase.
  • For each bonus offer, transaction numbers or proof of purchase may be required at the time of redemption.
  • All bonus offers are free gifts from the bonus sponsors, are their sole responsibility to provide, and are subject to availability.
  • All bonus offers expire at midnight on May 19th, 2013 (2 weeks from the last day of this sale).

General

  • It is your responsibility to download and back-up your purchase within the 1-month download time-frame. With proof of purchase, we can renew download links up until August 1st, 2013. After this date we will no longer have access to the books and will not be able to provide any new links to download.
  • Due to the nature of this sale, there will be no refunds available. However, we would invite you to read our Frequently Asked Questions page to learn more about the file types, the download process, how the bonus offers work, etc.

Please note: This collection is only available from 9 a.m. EST on April 29th to 11:59 p.m. EST on May 4th. There will be no late sales offered, so make sure that you get your bundle right away!

This post includes affiliate links, and I make a portion of the sale of each ebook bundle. Thanks for your support of this site!

Call it Project Simplify. Call it nesting. What I really call it is getting rid of the junk. This week’s Project Simplify focus is on “piles.” Pretty vague, but I know we all have them. Some of those piles had been there for just too long, so this week I tackled, sorted, purged and organized them. The hot spots getting organized were my gift wrap stash, the nursery desk, and the closet under the stairs.

Organizing the Gift Wrap

This turned into a fun project for me. While not all of our gift wrap is green, I do try to reuse a lot of the gift wrap that comes through our house. The biggest collection of gift wrap are the gift bags, both large and small. I found the perfect 3-Drawer organizer that could organize the gift wrap and tissue paper.

Organize Your Gift WrapI cleared out our gift wrap stash a few months ago, but after the holidays and the kids birthdays I needed to sort through it all again. I was left with good quality tissue paper, small and large gift bags, ribbons and bows. Going forward, I like the eco-friendly gift wrap line from Jillson Roberts.

Organized Gift wrap RandomRecycling.com

The Closet Under the Stairs

Feels very Harry Potter doesn’t it? This little room under the stairs is in our basement. We had it build in when we redid the basement a few years ago. It became a bit of a catch all: gift wrap, baby stuff when not in use, extra bedding for guests, and my wedding dress. (Still don’t know where to keep that huge box!) Everything got cleaned out and I have a new plan for the space. Look for the big reveal next week!

Under the Stairs Closet Project

For Part 2 of Project Simplify this week, check out the post where I create a Quiet Kids Activity Desk.

For more organizing ideas, head over to the collection of posts on Simple Mom’s week three round up of “pile” projects.  You can see all of my other Project Simplify posts here. Up next week~ the put off project! You know you have one…

Disclosure: Some affiliate links are included in this post. I’m sharing this over at TidyMom and at OrgJunkie too!

Today’s Project Simplify post is sponsored by Listia, a new online site where you can give away the items you no longer need or want. When someone chooses your item, you earn credits that can be used to buy something you can actually use.

It’s the second week of Project Simplify and the target area are closets. Organizing closets seems to be a bit challenging lately as we are still in limbo between the winter and spring season. I decided to focus on the other closets that needed attention, the laundry closet, pantry, and linen closet.

As the nesting phase begins before the new baby arrives, I find myself in purge mode. If I haven’t used it in the past year, or with the last baby, then it’s time to donate it. Once you get into this mindset, it’s so easy to keep going and clear through the clutter from room to room. I finally finished reading Organized Simplicity and it has helped me focus on what I really want to keep and what is just “noise.” Space is going to get a little tight in our house so I want to make sure what we hold on to really is usable and special.

The Laundry Closet

Laundry Closet RandomRecycling.com

I used my favorite chalkboard contact paper and my craft punch to label the first row. The shelves went in last year but I never really set-up a good system to keep things organized. It’s all fine and good to clean up a space, but unless you create a process that you can maintain, it’s not going to stay clutter free.

Laundry Organization RandomRecycling.com


The Pantry Closet

Pantry Before RandomRecycling.com


I purchased the elfa closet door organizer from Container Store for this project. I love that I could install it in 5 minutes and didn’t need to drill into the door. I think I have room for one more wide bin shelf to give me even more storage space.

Pantry Closet After RandomRecycling.com

The Linen Closet

I was amazed at how much stuff has accumulated in our linen closet. There were things in there we haven’t used in four years. Time to let go.  My motto was not to move, but to remove. Out went the extra sheet sets we no longer needed and the extra blankets we no longer used. Our local Community Council got a big donation of bedding, towels and curtains today. A few other things will go on Listia. The linen closet is not super pretty yet, but there is space.

Linen Closet Organization RandomRecycling.com

For more organizing ideas, head over to the collection of posts on Simple Mom’s week two post for Project Simplify. You can see all of my other Project Simplify posts here. Up next week~ piles! You know you have one…

On Listia, you can give away useable stuff you don’t want or need.When someone “buys” your items, you earn credits, which you can redeem for goods offered by other users.  Or, if you are trying to live simply and give back to the world, you can donate your credits to charity. I like that you can search by what’s local, which makes it more like a Craig’s List or Ebay service. As you participate in Project Simplify this month, you can list the items you no longer need, earn credits, then pick out something you can actually use. All opinions shared here are my own.

Also sharing this with OrgJunkie.

After I mentioned making our own foaming hand soap in yesterday’s post about household cleaners, more than a couple people have asked how to make it.

Here is the super easy recipe I use to make the foaming hand soap. I use Dr. Bronner’s Magic Soaps Pure-Castile Soap as the base.  This product got an A from the EWG Healthy Cleaning Guide. Tea tree oil is also a great addition because it has antibacterial, antiviral, antifungal and antiseptic qualities.

I reuse the foaming hand soap dispenser from CleanWell.  This line of products is a favorite and when I need a fresh bottle.  They have antibacterial soaps without triclosan, which is a big environmental hazard.

DIY foaming hand soap recipe

Foaming Hand Soap Recipe

Keyword: Soap

Ingredients

  • 2 tablespoons Castille Soap
  • 2 drops of Tea Tree Oil
  • 2 drops of Essential oil I use lemongrass currently

Instructions

  • Add ingredients to empty foaming hand soap dispenser (about a 9 oz size). Fill the balance with water and shake gently.
Tried this recipe?Mention @emilyroachwellness or tag #erwellness!


DIY foaming hand soap recipe


This is a super cheap way to keep up with the kids overuse of the foaming hand soap.  I have found Madison “cleaning” the bathroom sink with half the bottle.  At about 25 cents a bottle, I don’t have to stress about it.  Plus, there’s no sodium lauryl sulfate, triclosan or synthetic fragrance involved in her cleaning project.

If you can handle making your own hand soap, now you can move on to making your own bubble soap for kids!

Happy washing!

Disclosure: Some affiliate links are included in this post. 

How to Host a Canning Party with Friends

Please welcome my guest writer Mary who shares her experience of hosting a canning party, plus her recipe for Sassy Tomato Salsa.  Many hands make less work.  Leave a comment and share what you would make at your canning party.


When veggies are ready to be harvested, we need to take advantage of this large influx of ingredients to make delicious things to eat.  Buying these by the bushel really cuts down on the cost and it’s easy to put up a few bushels at a time but it’s definitely more fun when you do it with friends.  I’d like to share with you about one canning party I hosted at my house one summer.  As a side note, before we begin, there are quite a few sites that offer free printables for canning and even specialized invitations for your party.  Make it as fancy or relaxed as you see fit….the whole idea is to have fun!
I gathered friends I knew either loved to can or wanted to learn.  We chose the items we wanted to can that day and divvied up the ingredients amongst ourselves.  This also included what we would need for lunch and of course, the wine we’d consume *smile* but sharing the cost of things can really reduce the cost of taking on a large project like this.  Tomatoes by the bushel can be purchased at farmer’s markets, vegetable stands or sometimes even grocery stores.   Roma, or paste, tomatoes make the best tasting salsa because they are meatier.


Canning Fun
We set up stations in my kitchen, in my garage and even outside.  Tasks were divided with 2 people at each station and it was proven again that many hands make light work.  The first station worked with the tomatoes, the first step of the process.  After washing the tomatoes, place them in boiling water until the skins split, remove them from the water and plunge into a sink of ice water – this stops the cooking process and allows the skins to peel easily.  All the vegetables that are included in the making of the salsa had to be chopped into small pieces and this was done both by hand and using the food processor.  Once all the ingredients were assembled, they were put into large stock pots to cook.  Since there were six of us working together, we wanted to make sure we each had at least 6 pint jars of salsa apiece so we were cooking a large amount of ingredients and it had been divided into four large stock pots.  We set up a camp stove outside to cook two of the pots and two were cooked on the stove in the kitchen.  As preparation had taken most of the morning, while the salsa was cooking we stopped for a lunch of all the yummy stuff to eat everyone had brought and of course, bottles of wine.  It takes at least 2 hours, if not longer, to cook the salsa down to the consistency needed so we had a good bit of down time.


How to Process
You need to prepare the jars to be filled so they need to be washed in hot, soapy water and then placed in boiling water to sterilize the jars.  Since you are doing a large amount of jars, it`s easiest to place them into a warm oven to hold the jars since you`ll have too many to hold in the canners.  You will also need to place the lids and rings in large saucepans to sterilize them and it also softens the rubber on the lids, so they will seal.  Remove a jar from the oven and fill up to an inch from the top.  You need to remove the air bubbles from the jar and you can use the handle from a spatula, a plastic lettuce knife or anything similar that you can run around the edges of the jar to make sure the bubbles are moved from the food.  Wipe the top of the jar to remove any signs of spills as this will prevent the jars from sealing properly.  Remove a lid from the hot water, place on top of jar and then screw a ring into place but not only hand-tighten.

Place jars in the canner, which has water boiling in it, and continue until canner is full.  Once the water reaches a boil again, place lid on top and set timer for 15 minutes.  As we had 4 canners going at one time (two outside and two inside), we had jars coming out at different times.  Place the processed jars on old towels to cool and as they cool, you should hear the most delightful “ping“ coming from the jars as they seal.  You can also check this by pushing on the top of the jars, if they don`t give to the touch, they are sealed but if they move up and down, this means they aren`t sealed properly and should be kept in the refrigerator for eating soon.

Disclaimer
Please note that some people may tell you that this recipe needs to be pressure canned but rest assured that the increased vinegar that is noted in the recipe makes it safe for water bath processing.  Also, there are many vegetables that do need to be pressure canned but that would need to be covered in another post.  My most important caution to everyone is to be sure and check current canning and preserving books for assistance as many of the old methods aren’t safe for today’s safety standards.  You may also find someone who says “well, that’s the way my mother did it and how I’ve always done it.”  This is strictly your decision on how to proceed but methods were updated for very good reasons and I feel safer following them.

Please note that the recipe will need to be adjusted to the amount you want to prepare.  This particular recipe makes 8 pints so we made 4 batches of it in order for everyone to have 6 jars to take home with them (there were 5 of us).


Sassy Tomato Salsa

Author: Emily Roach

Ingredients

  • 8 cups tomatoes peeled, seeded, chopped and drained
  • 2 ½ cups chopped onion
  • 1 ½ cups chopped green pepper
  • 3 – 5 chopped jalapeños
  • 6 cloves minced garlic
  • 2 tsp cumin
  • 2 tsp pepper
  • 1/8 cup canning salt
  • ¼ cup chopped fresh cilantro
  • 1/3 cup sugar
  • 1 cup vinegar
  • **See note if using a Boiling Water Bath

Instructions

  • Mix all ingredients, bring to a boil, boil; boil for 30 minutes (or longer to better marry flavors). Pour into hot jars. Wipe tops of jars to remove any lingering food, place lid on top and hand tighten rings.
  • Process in a Boiling Water Bath for 15 minutes.
  • Makes 8 pints.
  • This can also be processed in a pressure canner but for simplicity sake, I’m only providing the directions for the water bath process as it’s a little easier for a first-time canner.
Tried this recipe?Mention @emilyroachwellness or tag #erwellness!

About the Author
I am a mother and a Nana who presently lives in southern Ontario, Canada, only 15 minutes from Niagara Falls.  I came to live in Canada by way of Kentucky when I married a wonderful Canuk – unfortunately, I lost him almost 5 years ago.  I have tried to lived a fairly frugal life most of my life, a lot of it while raising my two boys by myself for a long while.  Now that I’m widowed, I find myself putting those skills to use again and am finding I’m searching for a more simple life as well.

Helpful items for the Canning Party:

**I prefer wide mouth jars when I can find them.


A few months ago there was a great conversation on our Facebook page dealing with life without a microwave.  I haven’t taken the plunge yet but I was intrigued by my guest writer Stephanie’s experiences.  Do you think you could do it?  Please welcome Stephanie and share some feedback in the comments.

Guest post from Stephanie of Stephanie’s Projects.


Are you thinking of weaning yourself from using the microwave? Not really sure where to start? I have been there!
I am very excited about this post because of the many discussions about this subject in blogland. On a previous post on my own blog, I mentioned that my microwave died. When the machine busted, I took that as an omen and so recycled the old without replacing it… But I had already begun my journey to get along without a microwave, so the shock was minimal.

Here is how I did it… with some tips on how you can do it too!

I was a microwave-o-holic. I can freely admit that I had no clue how to cook an entire meal without a microwave. The convenience of precooked rice and reheating leftovers or making a cake in a matter of minutes (I do miss that recipe!) was a great pull. But I was also making an effort to eat real foods and toss out the chemicals in my home and food… I realized after researching online, that—just maybe—the microwave was inhibiting my efforts to have a healthy home.
I read posts from people who no longer used the microwave and why. Then I read research about health effects and the evolution… Did you know that microwaves were actually banned in Russia in 1976?! Very interesting.

The first Step: Plan meals ahead of time

It took me a little time to understand that this is the first step. But the truth is that cooking the conventional way takes a little more planning. That is why it’s the first step once you make the decision to use it less or completely cut it out of your cooking routine.
You need to find a planning method that works for you. I use a combination of a weekly meal plan, and a scan of the pantry to see what I have an excess of. It doesn’t always work out that I have a written meal plan, because some weeks are too uncertain and spontaneous (for those times, freezer meals are handy to stick in the oven). I do try to know for-sure what is for dinner the night before so I can search for recipes, thaw meat or prepare ingredients. I typically have 3 different meals in mind that can be prepared in no time (this is a handy trick to have up your sleeve in case you have unexpected guests to cook for).
It is helpful to look at your calendar when making a plan so you can gage the amount of time you will have to cook. If you don’t get home until at least 5:30 and you like to eat by 6, precooked meals from your freezer or slow cooker meals are the best! I have a relationship with my crock pot…

No more whole meals/entrees in the Microwave.

Mac and Cheese is just as easy in a pan. Hot dogs are great the old fashioned way. Rice is great cooked in boiling water, or better yet, chicken broth. Water boils just as well in a pot or kettle. Cakes should be cooked in the oven…
Now, you can jump head-on into this, or you can start by experimenting for a couple days a week. Then once you get comfortable with that add a couple more days to challenge yourself. Once you make the decision to cut the habit (so-to-speak) you can. Don’t beat yourself up if you slip a couple times with this… it happens to the best of us in a time crunch.
I imagined that initially cooking without a microwave would affect my kids in a more positive way than starting with reheating food. Again, this takes a bit of planning. No more taking items out of the freezer 10 minutes before you want to cook it – because if it needs to be thawed you would need to use the microwave and the goal is to ignore it.
When I began to make a conscious effort to make foods from scratch without using the handy microwave, I was a bit shocked at the pile of dishes. (Unfortunately microwave bowls don’t go in the oven) I really don’t like dishes… once I accepted the unavoidable; I began to change my dishwashing methods. For example, instead of piling the dishes in the sink until dinner was over, I found less stress in multitasking; cleaning in shifts while cooking made for fewer dishes on a full stomach (and a cleaner kitchen). I also found it advantageous to cook in shifts. If you have a vegtable dish and a main dish you can prepair the ingredients earlier in the day or the night before to save time when you get around to cooking dinner.

Reheating Foods

This can seem tricky if you have a love for left overs. It also may take a little time to get accustomed to heating up food. I do this one of 3 ways, depending on the food and quantity.

  1. Add it to a pan. I have gotten in the habit of leaving a sauté pan on the stove to drop left overs in to heat. It takes about 5 minutes to reheat and the food tastes just as good as the first time around! You can reheat anything this way; I particularly use this method for pasta and rice meals, cut up food as well as breakfast foods (leftover eggs or pancakes).
  2. My toaster oven is great for heating leftover or frozen burritos, pizza, or french fries on a piece of foil. A pie tin fits great in my little toaster, so I purchased a ceramic pie dish for this purpose. My favorite thing about putting leftovers in the oven is that you no longer have to settle for soggy food! Breaded chicken is crunchy. Pizza is crisp. Writing this is making me hungry.
    But only so much fits into the toaster oven, which brings me to …
  3. You can use your large oven for the same purpose if you have a large quantity of food to heat up. I have some stoneware pieces that I keep in my oven (because I use them almost daily!) like a pizza stone that you just need to place food on and let it heat up. I really like stoneware because I don’t have to scrub them with soap—I did mention that I dislike dishes.
    You can save time (and dishes) by storing leftover casseroles in glass or ceramic that can be put directly into the oven—rather than plastic containers or ziplock bags.

Heating to Cook

Think butter or hot fudge. I found the loss of my microwave very sad when it came to heating butter for recipes or fudge for my ice cream. But in the end, I don’t even miss it! You can heat little things up in a glass jar in a toaster oven or in a small pan on your stove. If you need a container to heat it up in the microwave anyway, you are not even creating more dishes to clean!

Another use for your Microwave…

Can you think of what to do with your microwave? You can donate it, give it away or recycle a busted one. But if you have a built-in unit, you might want to use it to store mason jars or keep bread. Come up with another way to use it!

Stephanie loves being a busy mom to two amazing little kids; ages 4 and 2. She is an over-educated freelance writer, blogger, dance instructor and stay-at-home momma. She loves to share what she has learned on Stephanie’s Projects and through simple ideas, encourages others who want to live full, healthful lives. She and her husband enjoy working for each other on their own financial business in California.

What do you think? Can you live without your microwave?


I’m sharing this post with Frugally Sustainable.

Could the weather be any better?! I love walking around the neighborhood and seeing how far along everyone is with their spring yard work and gardening plans.  The crazy warm weather makes me think I should be putting seedlings in the ground, but this is New England so patience is key.

My budding gardener got a new set of toolsfrom her Grammy for Easter. She was so excited to put them to good use and get planting. Get your kids excited about growing things and watch their eyes grow wide.

We set up a variety of containers to plant seeds, which is always a cheaper option than buying a flat of seedlings.  The herbs went in first, Basil, Dill and Oregano.  The little gardener planted her own pickling cucumbers that she picked out at the garden store.

Source: Design Sponge

When it comes to containers for seedlings, there are lots of eco friendly options.  I use leftover ones from past seasons and this year I’m trying the egg carton which can go right into the ground.  The newspaper cup above is from an old post at Design Sponge but I love how simple it is.  Plus it can go right into the ground too.  If you have yogurt containers, those will be a perfect size for seedlings but take the plastic off before putting them in the ground.

My husband had fun with the circular saw and whipped together some raised beds.  Plus we are getting one big one made from red cedar installed by Soil and Seed. When you choose wood for raised beds, skip the pressure treated ones and opt for red cedar or old wood that is still in good shape.  Avoid chemicals in the wood that will eventually seep into your soil and your food.

One of the reasons we choose to get the raised bed installed is that it will also be filled with organic soil.  Despite having our own compost, it won’t be enough to fill a 4×8′ bed.  I also had a hard time finding organic soil at the big box stores last year.  Doable, but we realize that totting little toddlers around to pick up lumber, soil and build the whole thing just doesn’t make sense.  We would rather spend the time doing the plantings.

I love the new plant-a-grams from Williams-Sonoma.  I’ll be bringing these to the local farm stand to pick out the balance of seedlings to get our garden growing. They also have one for a vegetable garden and a salad garden, yum!

Next step will be getting the raised bed installed and making a plan.  Look for that post mid-May!  In the meantime, check out Part 1: Getting Organized, and Part 2: What to Plant and When.

What are you looking forward to growing this year? Anything new?

Image and video hosting by TinyPic
I love to hear your feedback and comments. Stop by and visit FacebookPinterest or Twitter for more conversation!  Or get posts delivered via Email or RSS Feed. Thanks! I’m sharing this with Simple Lives Thursday   


Visit the Amazon Earth Day Store

Post is shared with Sustainable Ways, Your Green Resource, The Homesteader Blog Carnival

Good news when you want to organize your freezer.  You have to finish this project, and finish fast.  When I started menu planning last week I realized my freezer had gotten a little out of control.  Usually I keep a running of list of what’s inside clipped to the side of the fridge.  I realized that the freezer was full, but not with anything useful to make dinner.  Time to clear it all out and start over. (And why exactly do I have THREE ice creams in there??)

I choose clear Fridge Binz from Bed Bath and Beyond for this project.  You can get them on Amazon for a lot less than I paid…lesson learned. Check online first! I liked the clear option and the durability of the material.  I don’t mind spending a little more money on an organization system if I think I can use it for the next 10 years.

The door now has some workable space.  So excited for the warm weather to break out our Zoku Popsicle maker and use up some of the frozen fruit I found.

The labels were made by the Chalkboard Contact PaperI have used in my other organizing projects last month.  I like the simplicity of the black and white labels so I just keep going with it for now.  I even like how the scallop punch label for the apple sauce came out.  I can reuse the jar, wipe off the label and then fill it with something else.

Anyone else have an organizing project ahead for the weekend? I love to hear what everyone else is working on and get inspired to tackle something else!

-Amazon links are all affiliate links. I you purchase through them, it will usually save you money and also kick back a little to support this site. Thanks for your support!

This is the final week of Project Simplify.  It’s been so much fun tackling a specific area each week.  My husband likes it so much he has picked out our “mail table” for next week to continue our challenge.

Everyone gets to pick their own hot spot this week.  For me it’s the home office.  It has been a bit of a dumping ground since the holidays and it needs some TLC.  I have a variety of projects I work on, including the blog, social media marketing for volunteer organizations and helping to launch a farmers market in town.  There are too many piles of stuff so I will also be sharing some new organization systems for managing different projects.

Plus there will be a giveaway to celebrate the end of Project Simplify!  One winner will receive products from both Naked Binder and invite.L.

Here is the starting point for the home office…I’m already looking forward to cleaning this up!


What’s your hot spot for the week?

Image and video hosting by TinyPic

Week 1: Kids’ Storage with Paint Buckets
Week 2: Creating a Pantry
Week 3: Laundry Closet

I love to hear your feedback and comments. Stop by and visit FacebookPinterest or Twitter for more conversation!  Or get posts delivered via Email or RSS Feed. Thanks!