Need a healthy trail mix for all your on-the-go adventures this summer? I’ve got you covered with my favorite picks to make your own trail mix.

Need a healthy trail mix for all your on-the-go adventures this summer? I’ve got you covered with my favorite picks to make your own trail mix.
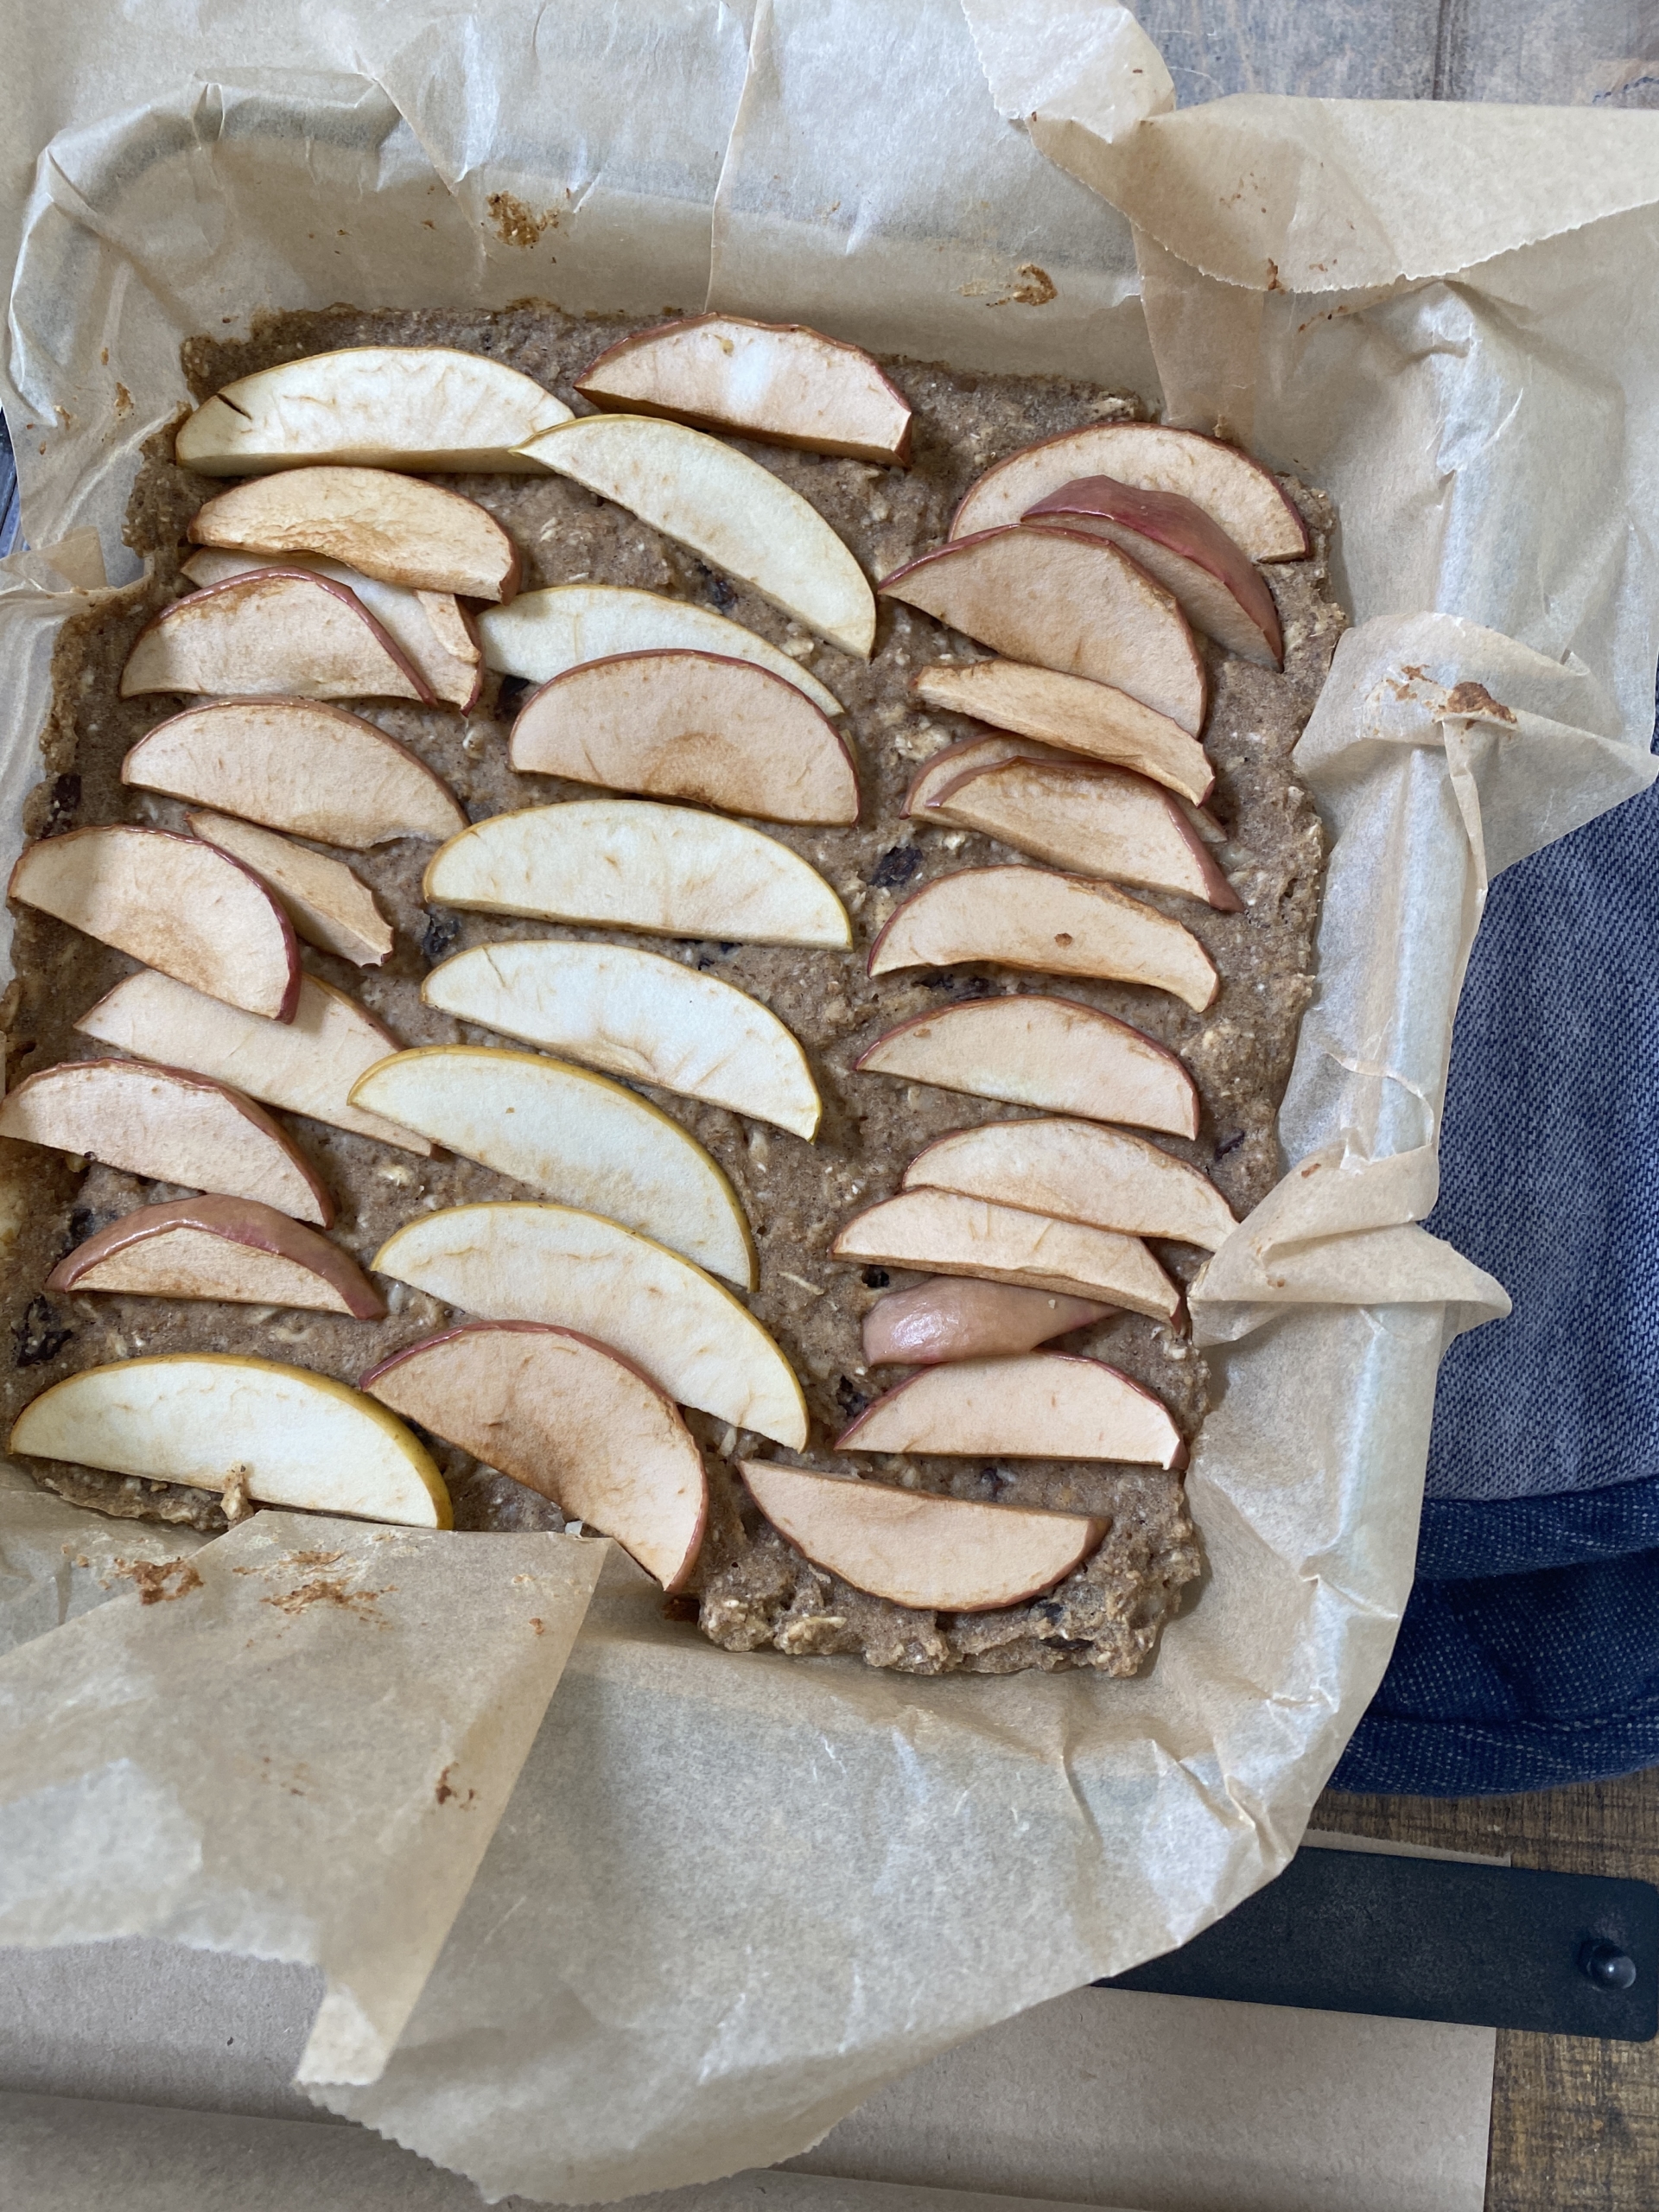
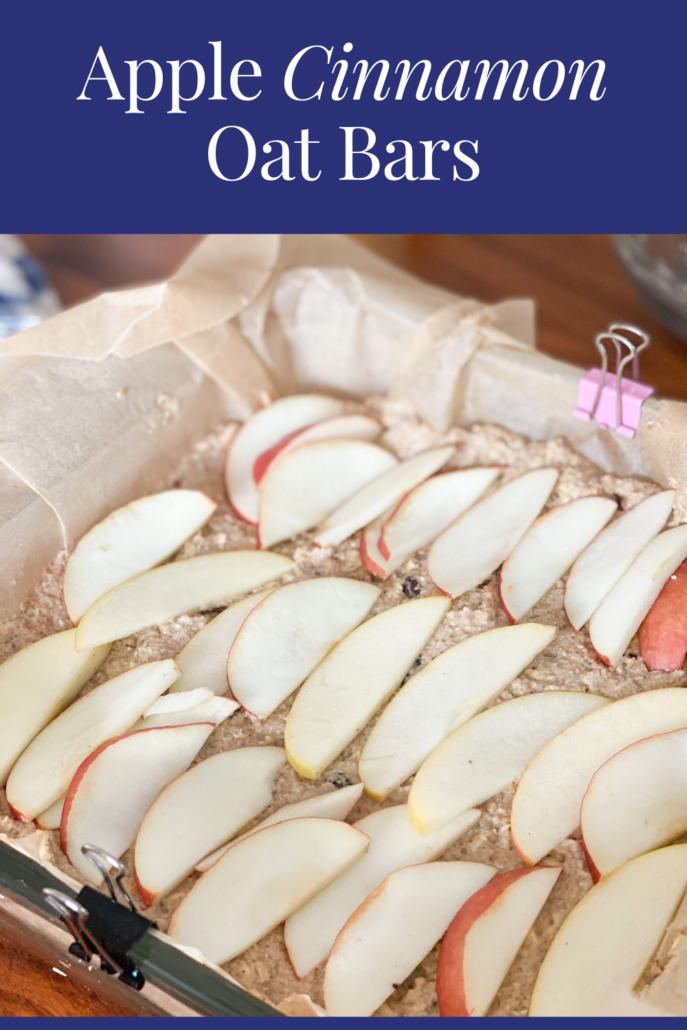
Try these Apple Cinnamon Oat Bars next time you find yourself with some extra apples at home.
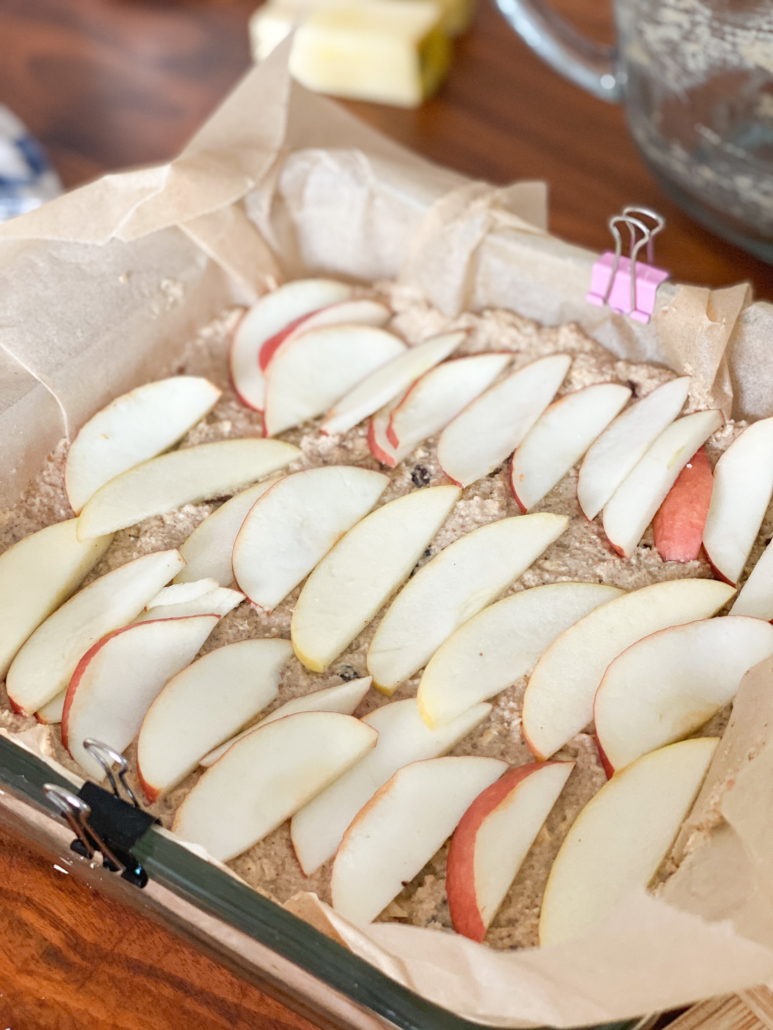
This recipe uses basic ingredients, but there’s a twist. Instead of using store-bought applesauce, we are making our own in the blender!
When I bake these, the house smells like apple pie! The whole family enjoys them and they tend to disappear within 24 hours so I’ll call that a winning recipe.
I tried this recipe a couple of different ways. With applesauce, and without. With egg, and without. This version offers the best balance of flavor, fiber, and texture. A filling treat with layers of apples, nuts, and a healthy dose of protein.
My version is a riff off of Laura Lea’s version. I’ve simplified it as I try to eliminate all excess steps.
You will be making your own oat flour in a high-speed blender. (I have the Blendtec one.) If you don’t have that or a Vitamix, then buy oat flour ahead of time. (saves you another step!)
RELATED: How to Make Sheet Pan Pancakes

I always use binder clips to keep the parchment paper on my baking pans. Whether it’s a loaf pan or a square baking dish, these clips are like an extra set of hands.
If you have metal clips, they can go right into the oven!
Parchment sheets are also something I always keep stocked in my pantry. No more fighting with a hard-to-tear piece of paper. These are the unbleached parchment paper sheets I buy.
I have some new online cooking classes in the works. To help me get ready I’m doing a few extra cooking demos on Instagram. Here’s the demo on YouTube, or you can find it on my IGTV channel. (the layout is perfect for IG, not so much on YouTube…if only tech was easier, right?)
Pin this for later and sharing is caring. Thanks for trying out these Apple Cinnamon Oat Bars! Let me know how they come out over in our Facebook group Eat Well, Live Well.
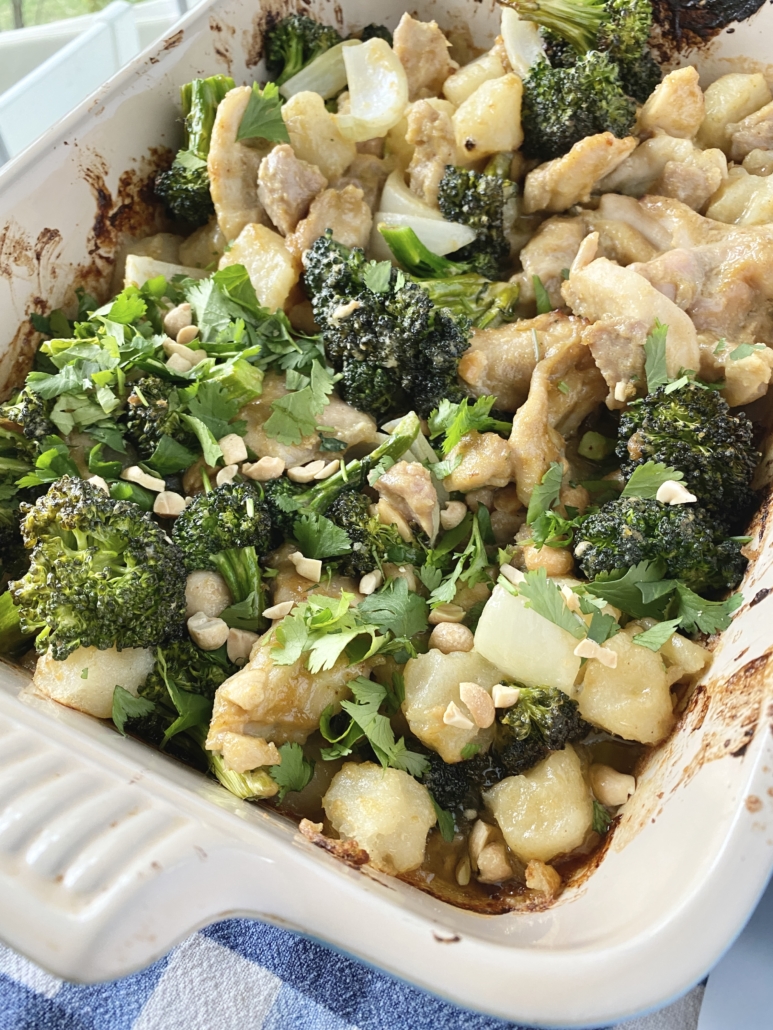
Who likes the simplicity of a one-pan meal? I certainly do on a busy weeknight. Fewer dishes and more time to relax before gathering around the table. This new recipe for our Sheet Pan Peanut Chicken and Broccoli could not be easier, or delicious.
There’s a couple of helpful tips for gathering your ingredients for this recipe.
First, the chicken. I find chicken thighs retain the most moisture and are my first choice. I opt for organic if I can’t find any local, pasture-raised poultry. However, if you want to save time, you can purchase cutlets to reduce your prepping time. (You can toss them in without slicing them into smaller pieces.)
Second, we use the cauliflower gnocchi from Trader Joe’s that’s Gluten-Free. This version is made with about 75% cauliflower, as well as cassava flour, potato starch, extra virgin olive oil, and sea salt. No wheat, sugar, dairy, or eggs are included here, and that translates to fewer carbs, with significantly less fat & calories than potato-based varieties. (Whole Foods has a good option too, but more expensive and tastes the same.)
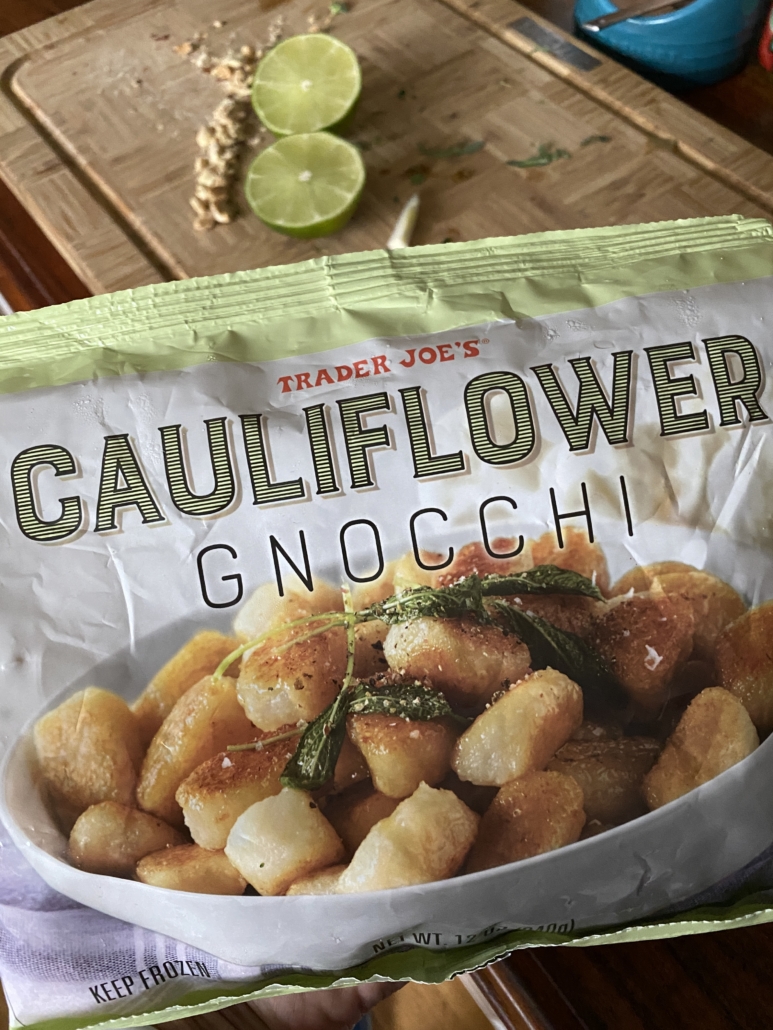
Trader Joe’s also has sweet potato gnocchi, but it’s NOT gluten-free. They also have Kale Gnocchi, which is gluten-free, but I didn’t want too much green in this recipe in case it turned off the kids from trying something new.
If you want to make this vegetarian, I would suggest trying this with tempeh. Cut in half lengthwise, then short wise into rectangles.
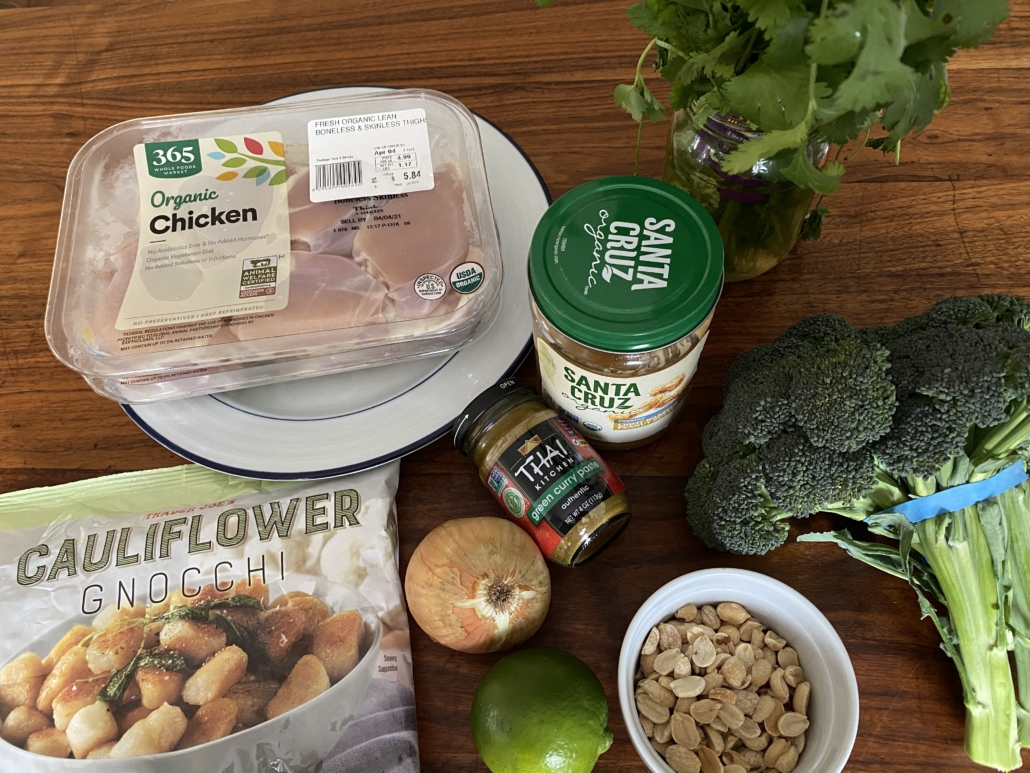
The one unique ingredient I purchased for this recipe is a Thai Green Curry paste from Thai Kitchen. You can use red curry paste, though it will have a bit more of a kick. Most grocery stores will have these in the Asian food section.
Don’t let these awesome flavor pastes go to waste. Use a little bit to jazz up some storebought hummus. Thin it out with a little olive oil and use it as a salad dressing. I’m a huge fan of making rice bowls for lunch. I’ll sauté leftover chicken, rice, and roasted veggies on the stove and toss in a teaspoon or so of the curry paste to bump up the flavor.
Both of these curry pastes make an awesome marinade for chicken, fish, or pork. Even better, toss some chicken with the curry paste and olive oil and toss in the freezer for a simple freezer meal down the road.
My version of this recipe came about after I read Nadia Hussain’s Time to Eat: Delicious Meals for Busy Lives. There are loads of time-saving tips in her cookbook. Freezer meal ideas, simple sheet pan suppers, and lots and lots of ideas of how to repurpose leftovers.
Nadia’s version includes making peanut butter from scratch. While that sounds lovely, I’m taking a shortcut and buying the peanut butter.
I’m also using frozen gnocchi and skip the step of boiling them separately. I find roasting them is one of my favorite ways to cook gluten-free gnocchi.

I love that I can pop this in the oven and then sit and read for 30 minutes, or get a head start on the dishes.
Sheet pan suppers are such a great way to serve a family. If your kids don’t “like things touching,” I found this recipe still worked well to separate the ingredients at the end. One child had this on a plate with the chicken and broccoli separated out, with a couple of gnocchi to try (again.) After a few comments, he dug in and enjoyed this recipe.
Pin this below to save for your next meal plan.
Thanks in advance for sharing my Sheet Pan Peanut Chicken and Broccoli Recipe.

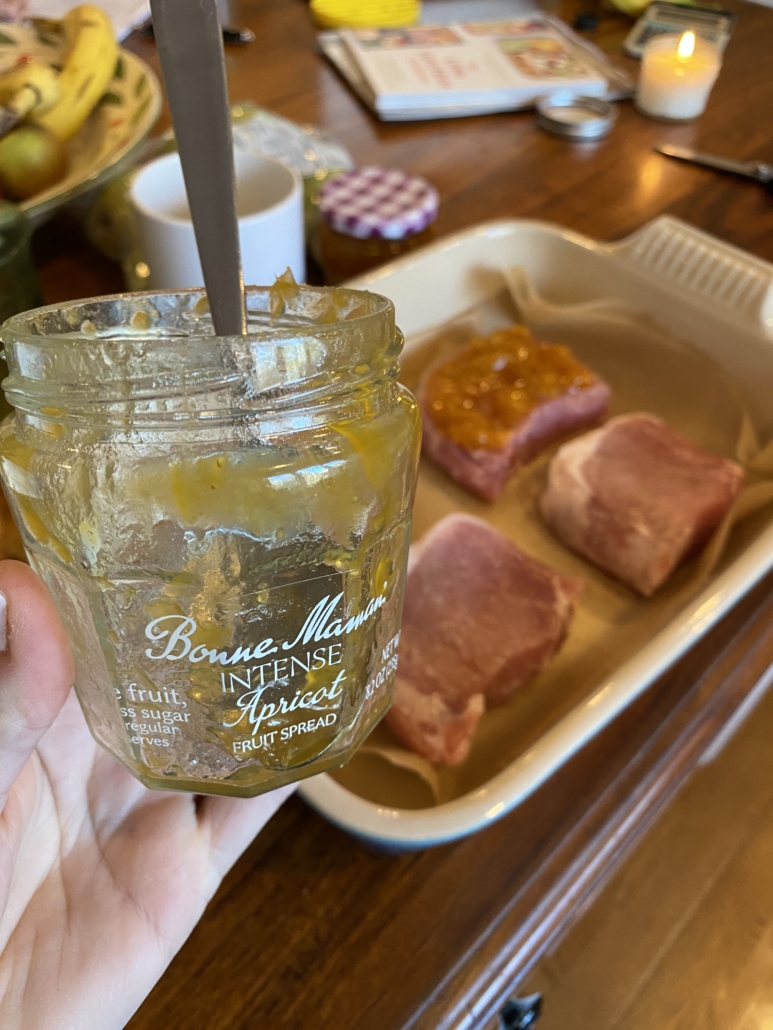
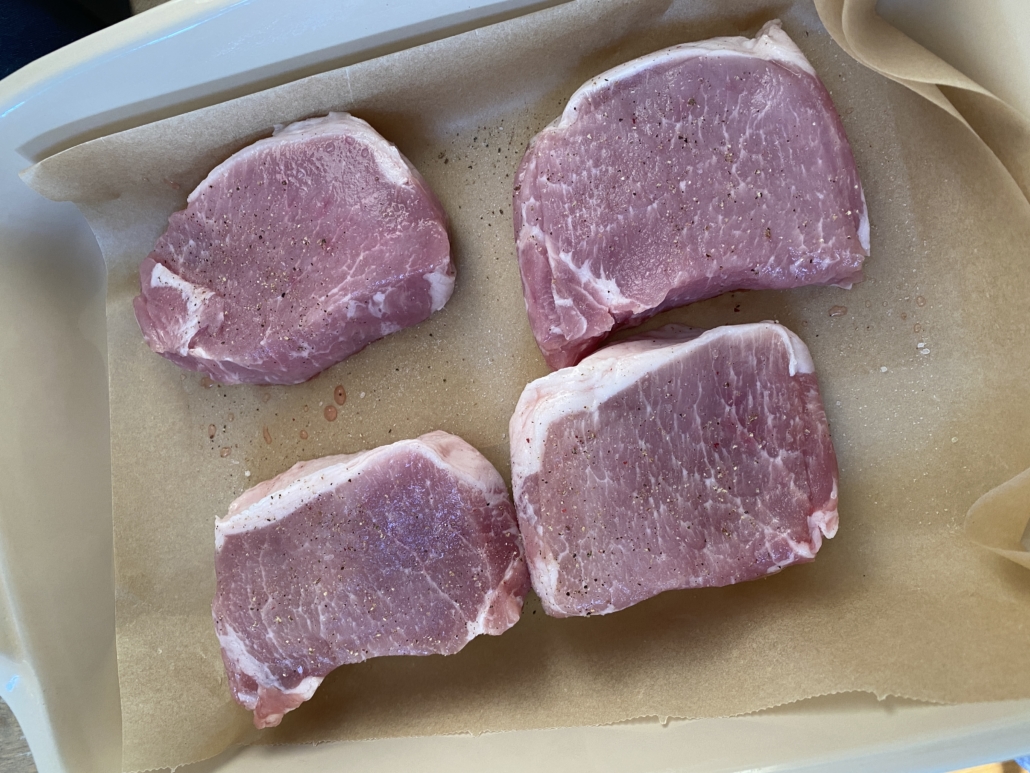
This Apricot Pork Chops recipe has been in our family rotation of meals for nearly 15 years. It’s so easy, and I can’t believe I’ve forgotten to share it here. It’s so simple!
It’s time you add it to your next meal plan. This recipe is versatile, and I share all the swaps below to make it gluten-free, pork-free, and paleo-friendly.
This is a term I learned from Jenny Rosenstrach, author of Dinner, A Love Story. The idea of this concept is meals that you can make without a recipe. My apricot pork chops recipe has become one of my “back pocket” dinners. With just a couple of ingredients, it’s easy to remember once you make it twice.
My granola and almond milk are both recipes I’ve learned after making them multiple times for meal prep. You probably have a few back-pocket dinners that are staples in your house. Maybe this recipe will become one of them.
Sourcing local, high-quality meat is worth the effort. You’ve heard the saying; you are what you eat. But, it can also be said, you are what your food eats. Look for a local meat farmer who takes care of their animals and the land if you can. One meat farmer I’ve met said he is really a “grass farmer” since he needs to give his cattle a variety of grasses. Make sure those grasses they eat are not sprayed with pesticides, and in the cold winter months, the animals are eating organic feed. (In my opinion, the organic certification for meat is not as important as knowing the farmer and their practices.)
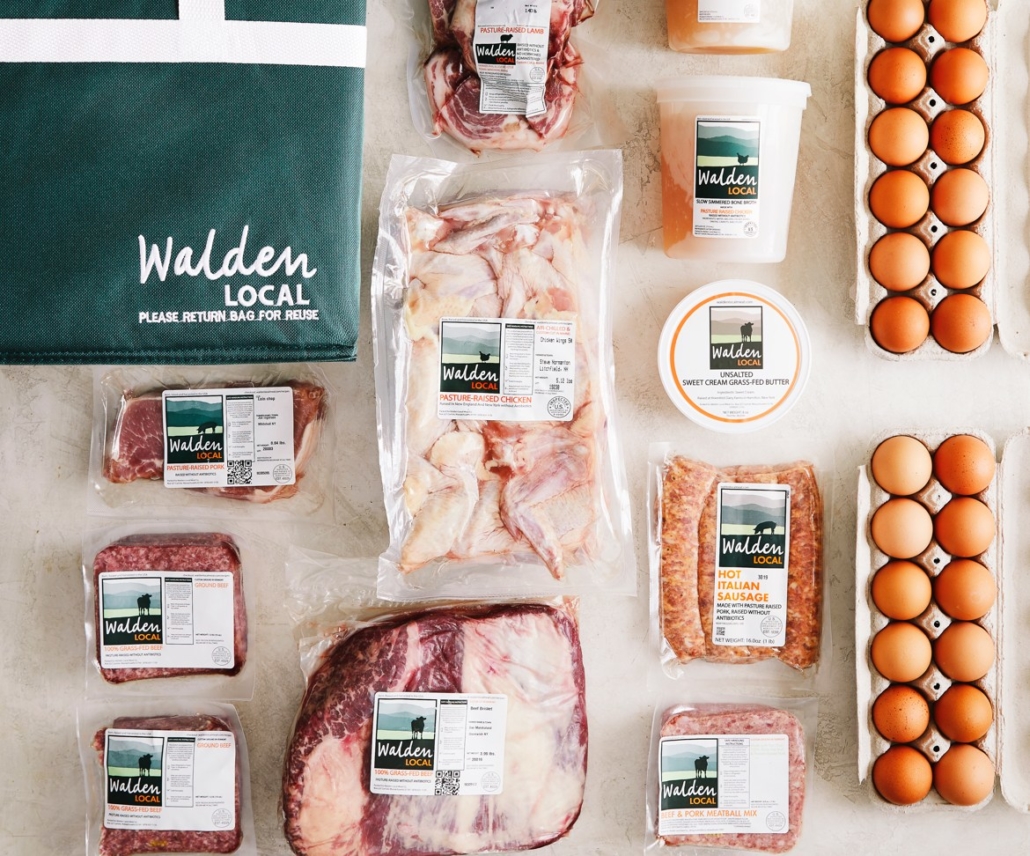
In today’s recipe, I’m using pork from Walden Local Meat. I was on the waitlist for about two months and just got our first delivery. I was very impressed, and the kids were all happy with the recipes I made with the meat. (trust me, that doesn’t always happen, especially with new recipes!)
Walden promises their beef is 100% grass-fed and finished – the animals receive no grain, no soy, no corn, and no wheat ever. For anyone with food allergies, switching to a grass-fed meat option can make a difference in your symptoms.
Check Walden Local Meats out here, and you can get free bacon and eggs in your first delivery. The eggs are AMAZING!
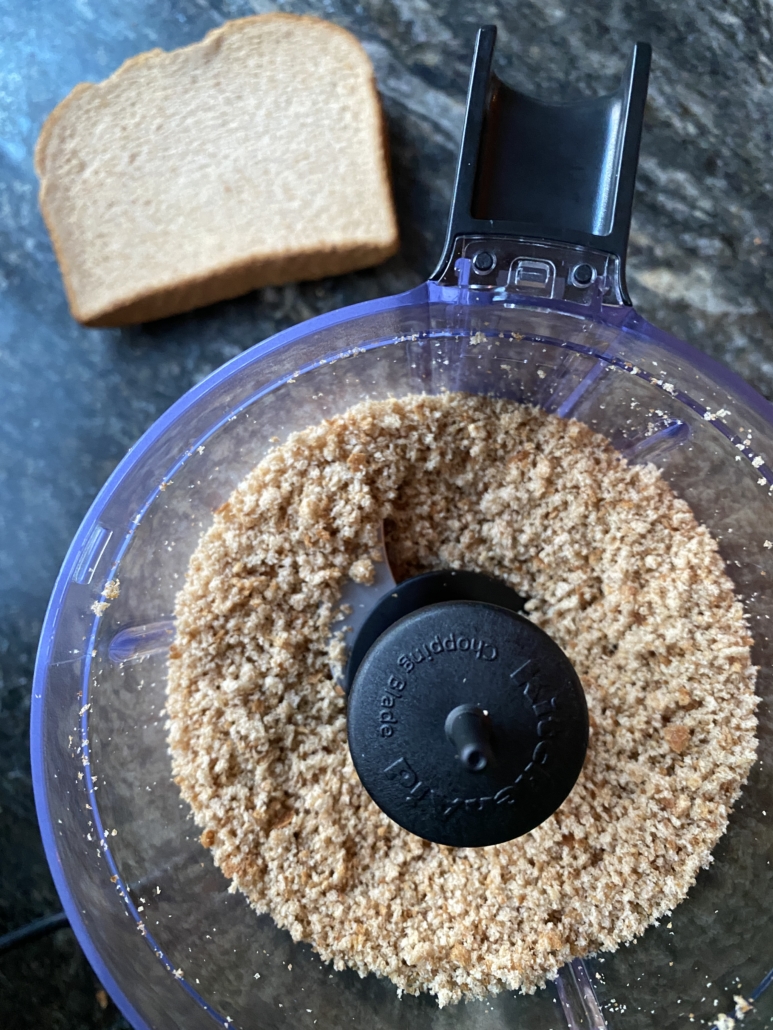
You can buy your breadcrumbs, but it’s even easier to make them yourself. If you have a food processor, this will take no time at all. I store all the heels of a loaf of bread in our freezer. You know all the end pieces of the bread that the kids won’t eat? I store them up and then make a big batch of breadcrumbs. I’ll store them in the freezer, too, so I can make this recipe, or my homemade chicken nuggets, super fast.
For this recipe, though, you’ll just need one slice of bread. It can be an end piece or a regular slice of bread. It works either way. Below is my mini food processor, which is great for quick jobs like this one. And everything can go into the dishwasher to be cleaned.
This is such a simple dinner idea, and there are lots of variations you can do to make it work for your family. I’ll detail them below the recipe. The recipe was originally published in the everyday Food cookbook, and I’ve made some tweaks over the years. Fifteen years of making this, and it’s still a delight.

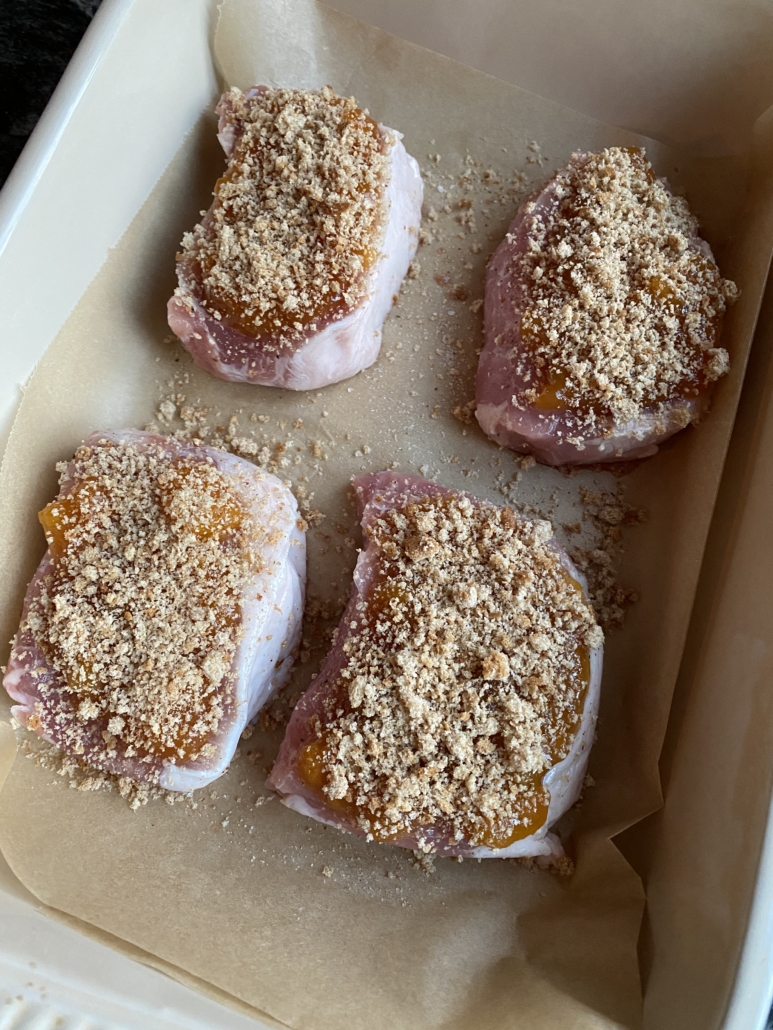
Gluten-Free: use gluten-free panko or gluten-free bread crumbs.
Paleo-friendly: top with crushed pecans or walnuts
Pork-Free: we’ve also made this recipe using chicken. I find chicken thighs cook up better than chicken breasts, which tend to be too dry.

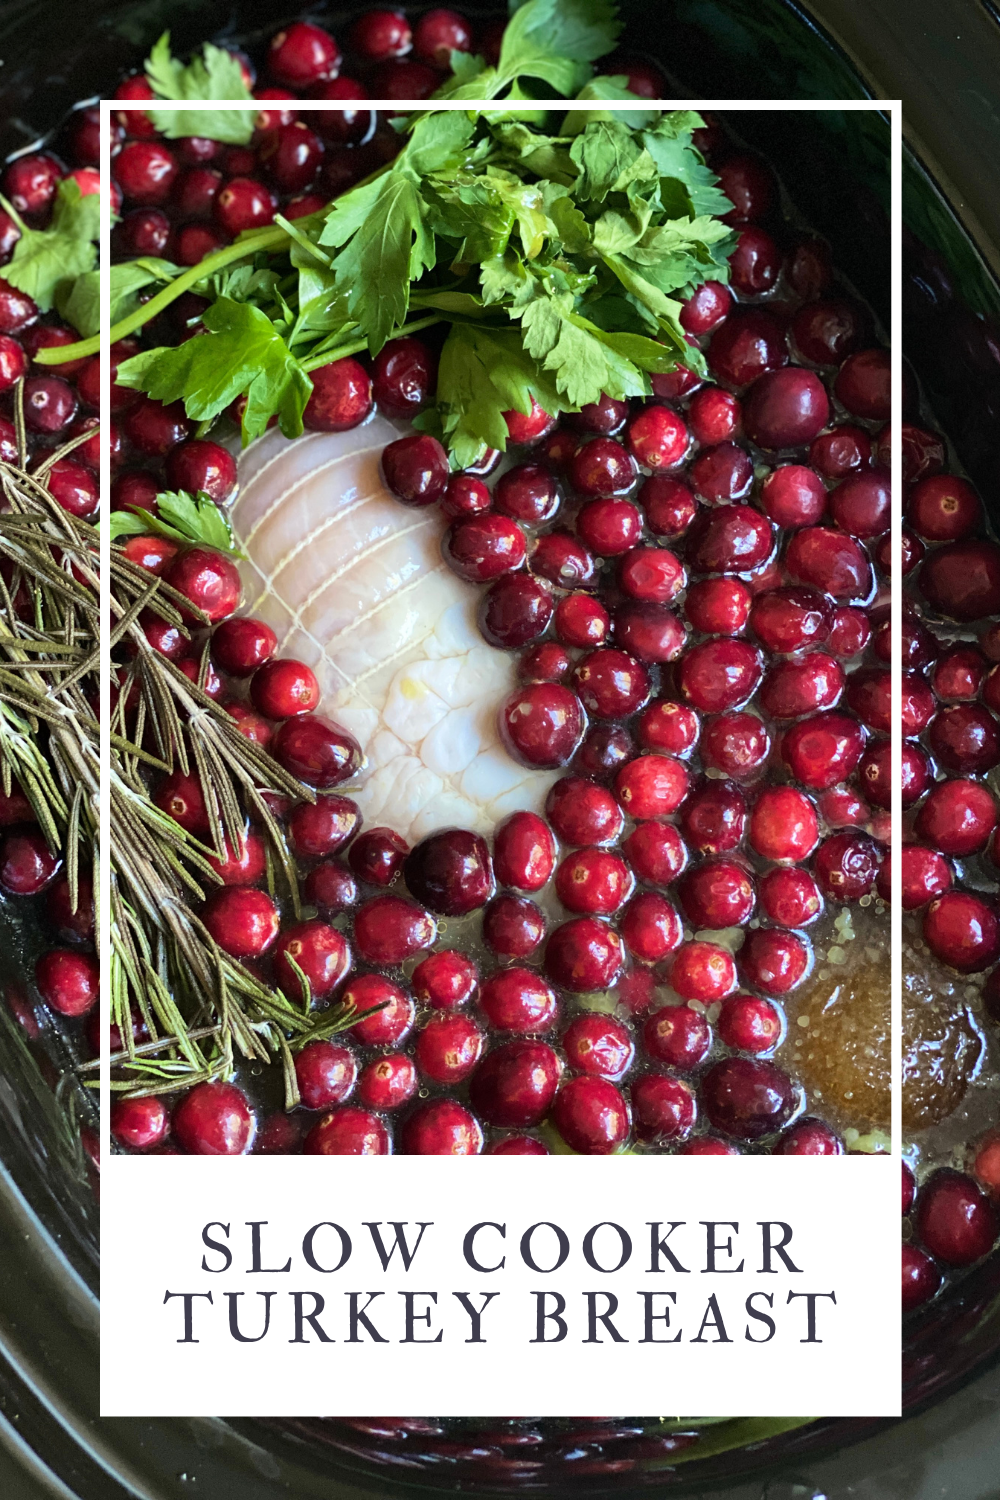
My slow cooker turkey breast recipe is the perfect recipe for a small, family Thanksgiving. No fuss, hands-off, and delicious every time.
I hear there is a run on small turkeys, so this is a great back-up option. A turkey breast is an economical way to enjoy turkey for Thanksgiving, but not fuss with a big bird. Pop it into your slow cooker and you have even more time for the Macy’s Day Parade and football games. (And more room in your oven for all the best side dishes.)
This is my step-by-step tutorial of how to cook a turkey breast in a slow cooker. You can play with the recipe and adjust to your taste preferences. Another bonus, you can also pop in some red potatoes and have those ready to go as an easy side dish. You can make this long after the Thanksgiving holiday is over as it’s a perfect Sunday dinner meal.
First, make sure your turkey breast is defrosted. Take it out at least one day ahead of time if it’s frozen. This lets the meat cook evenly and avoid getting dried out.
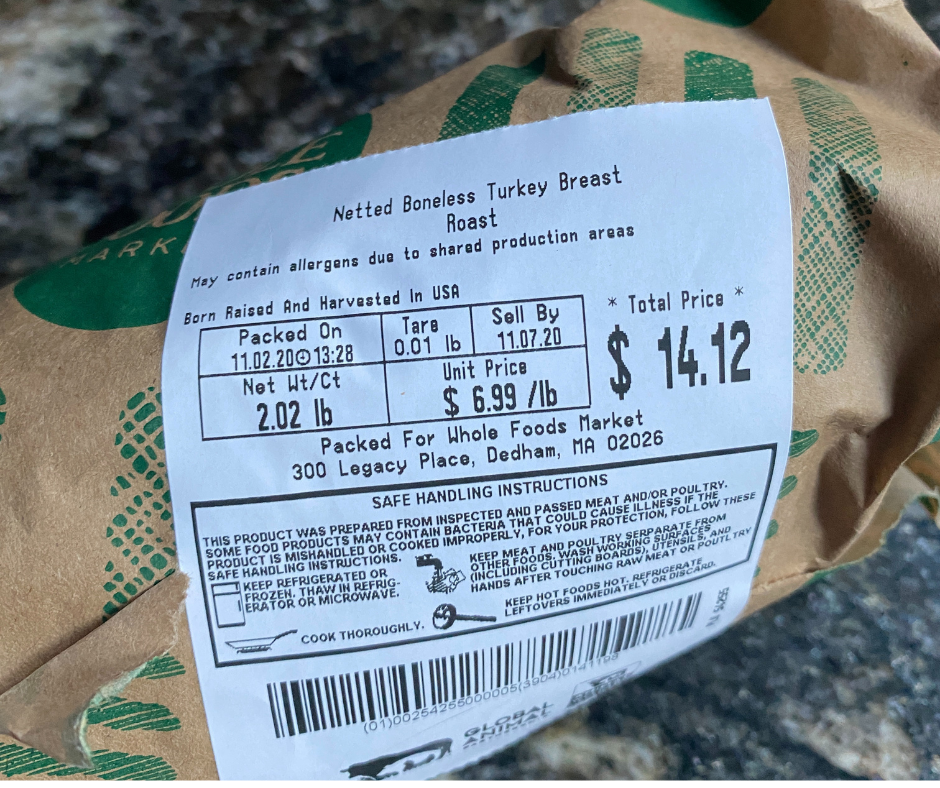
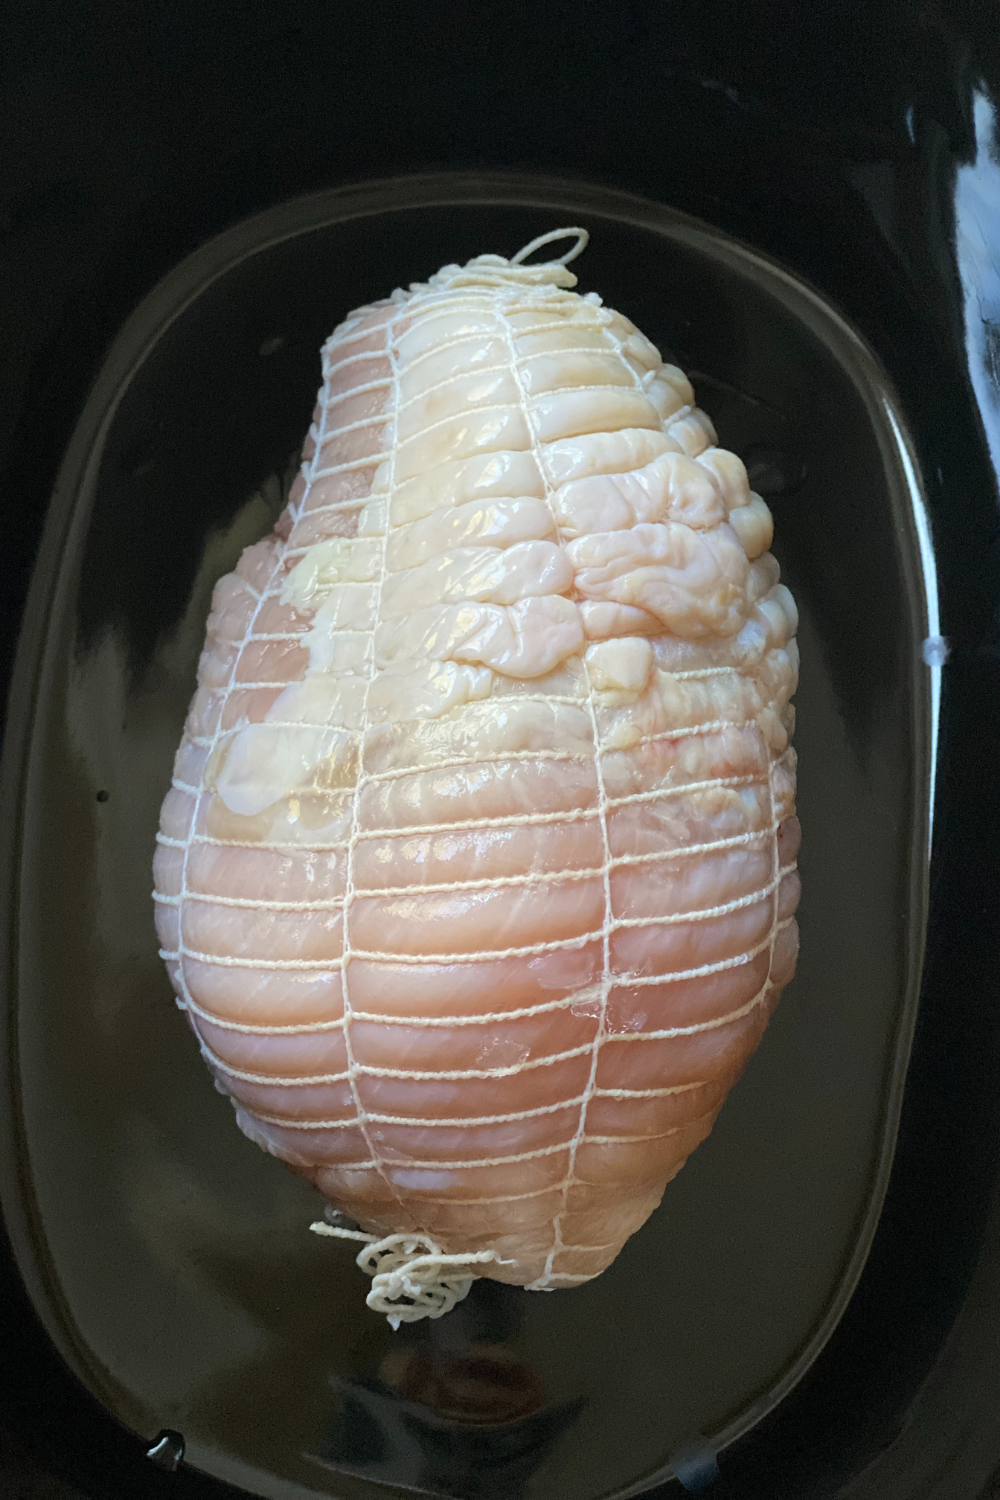
You can find a turkey breast netted or not, and it really won’t impact cooking this recipe. I grabbed mine at Whole Foods and they carry a netted option. (Amazon Prime brought me “turkey cutlets” the first time instead of my turkey breast which is why this recipe post is just a bit later than I had planned.)
There’s no need to brine this turkey. See, already easier than cooking a full-size turkey.
Slow cooker temperature ranges vary quite a bit. The good news is this recipe accounts for those nuances. This is my favorite slow cooker from All-Clad that is 6.5 quarts.
Unwrap your turkey breast from the package or paper. Place it at the bottom of your slow cooker lengthwise.
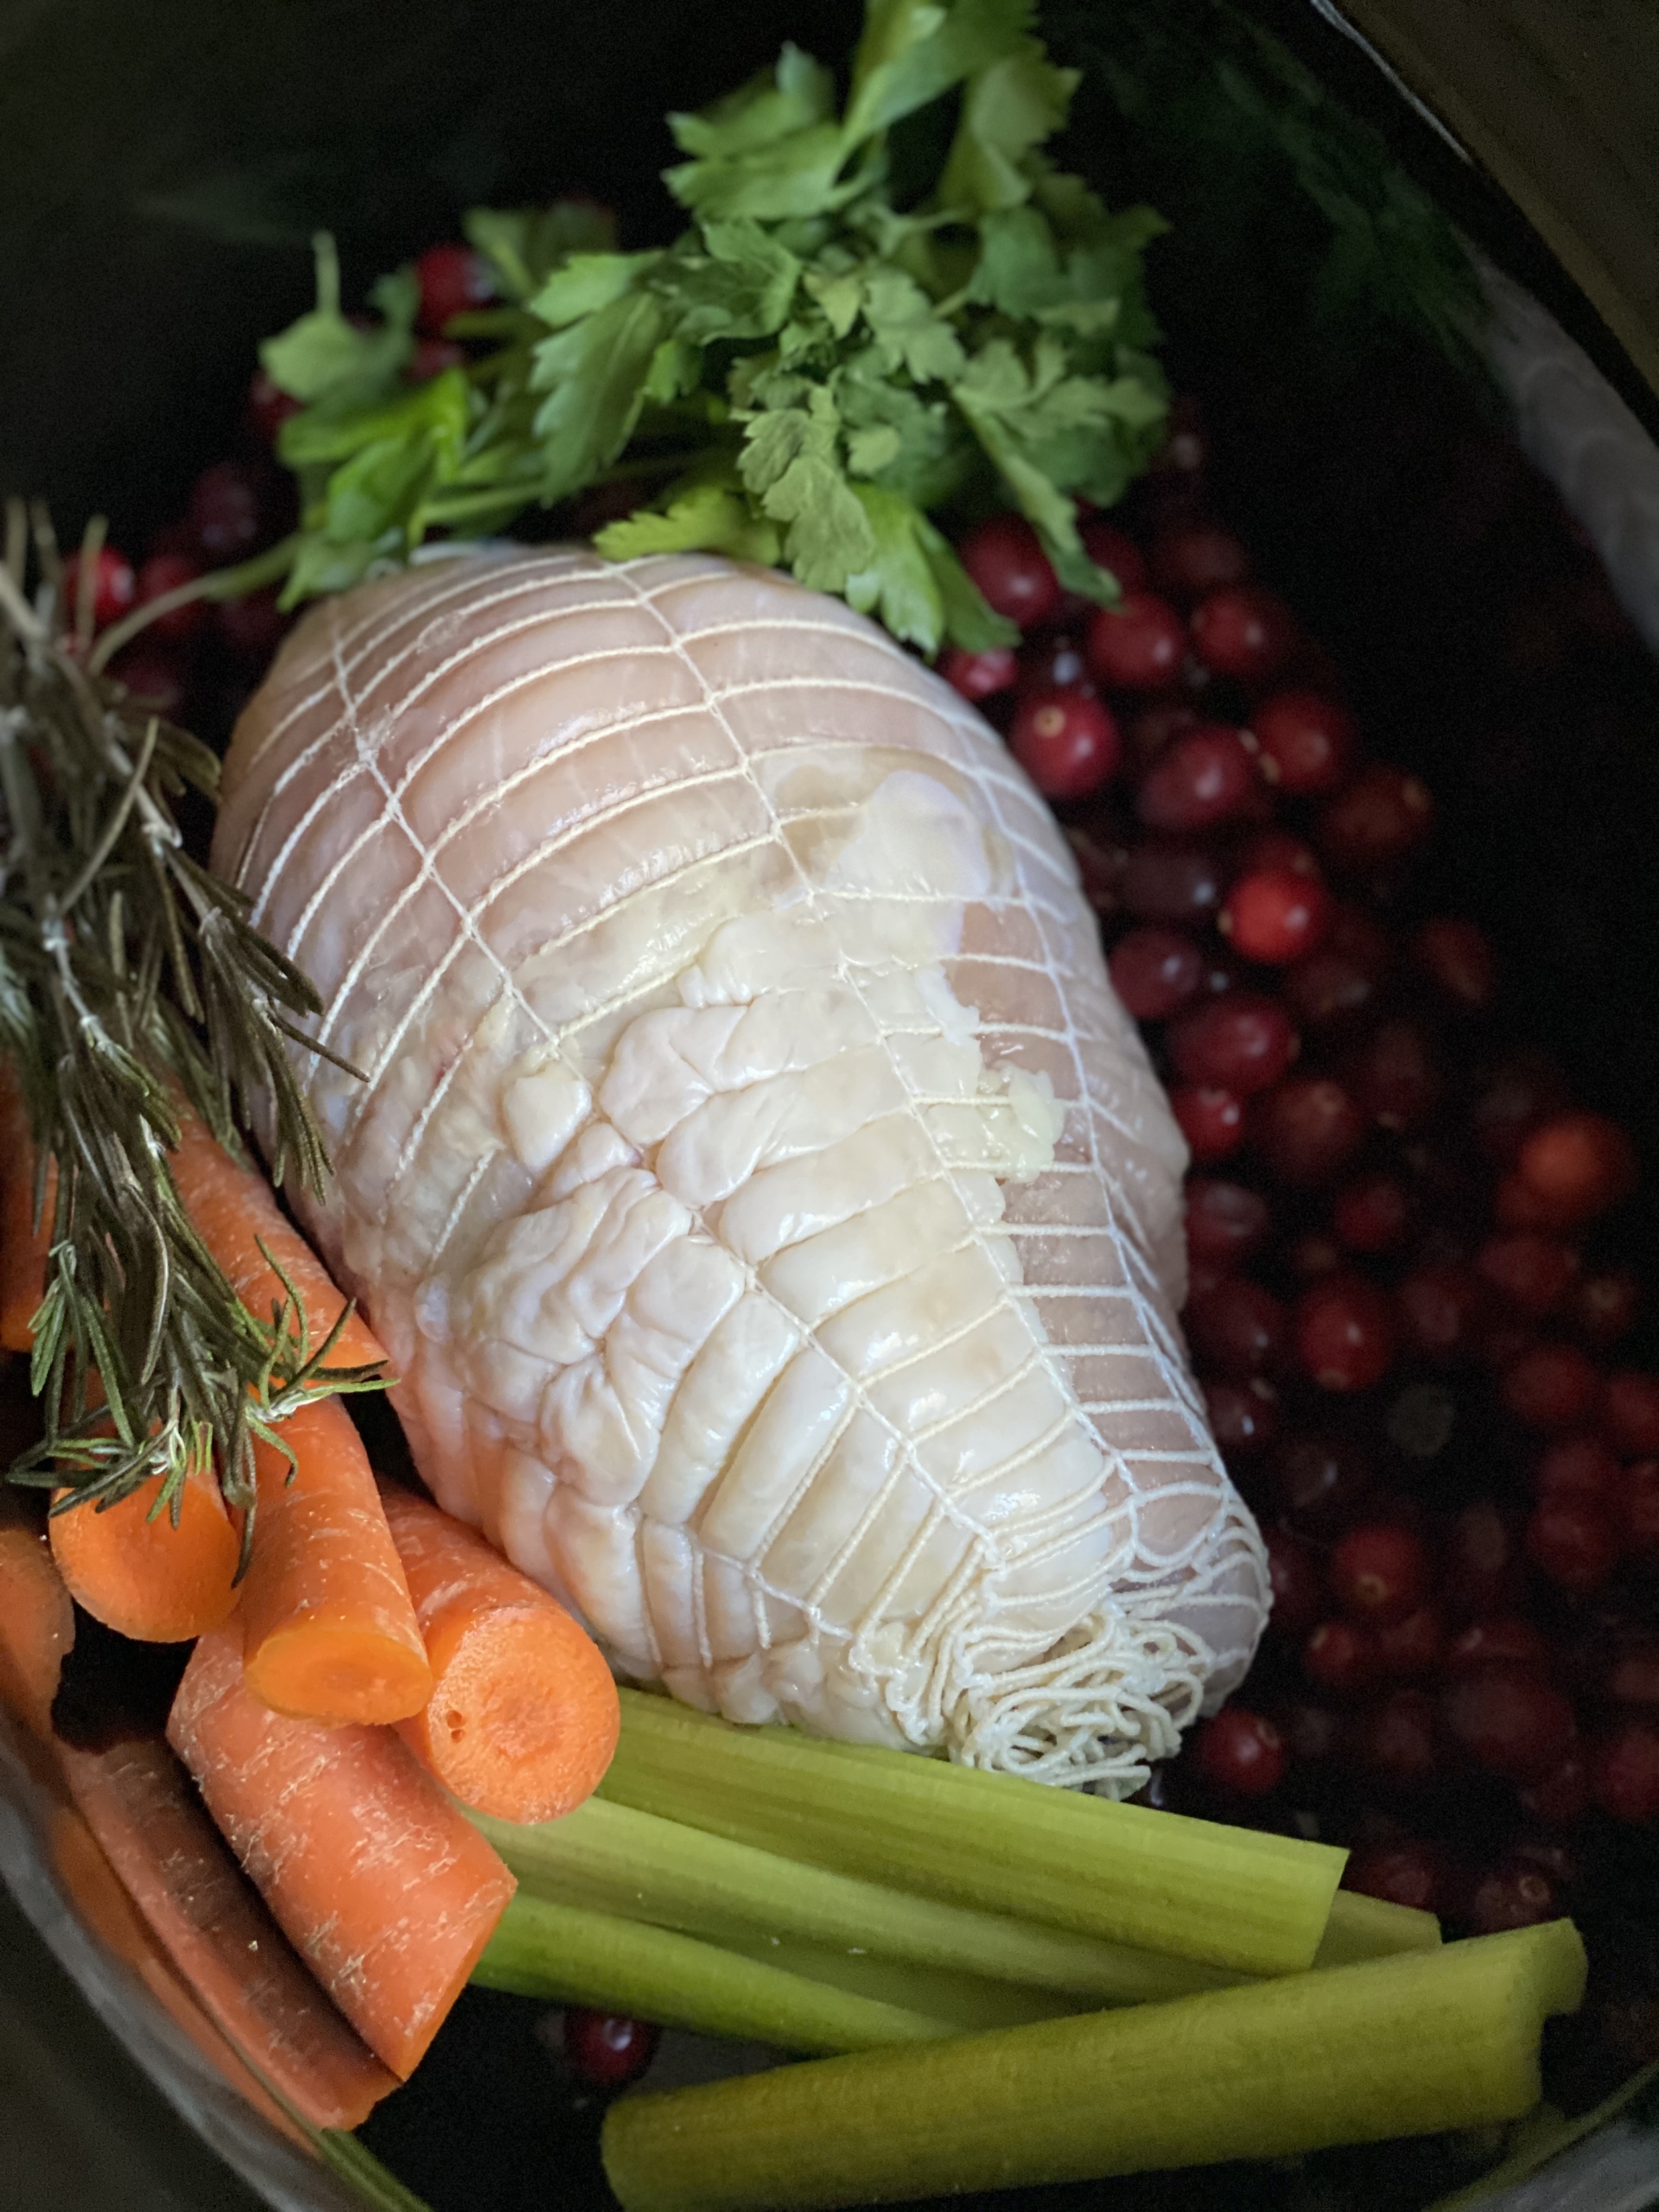
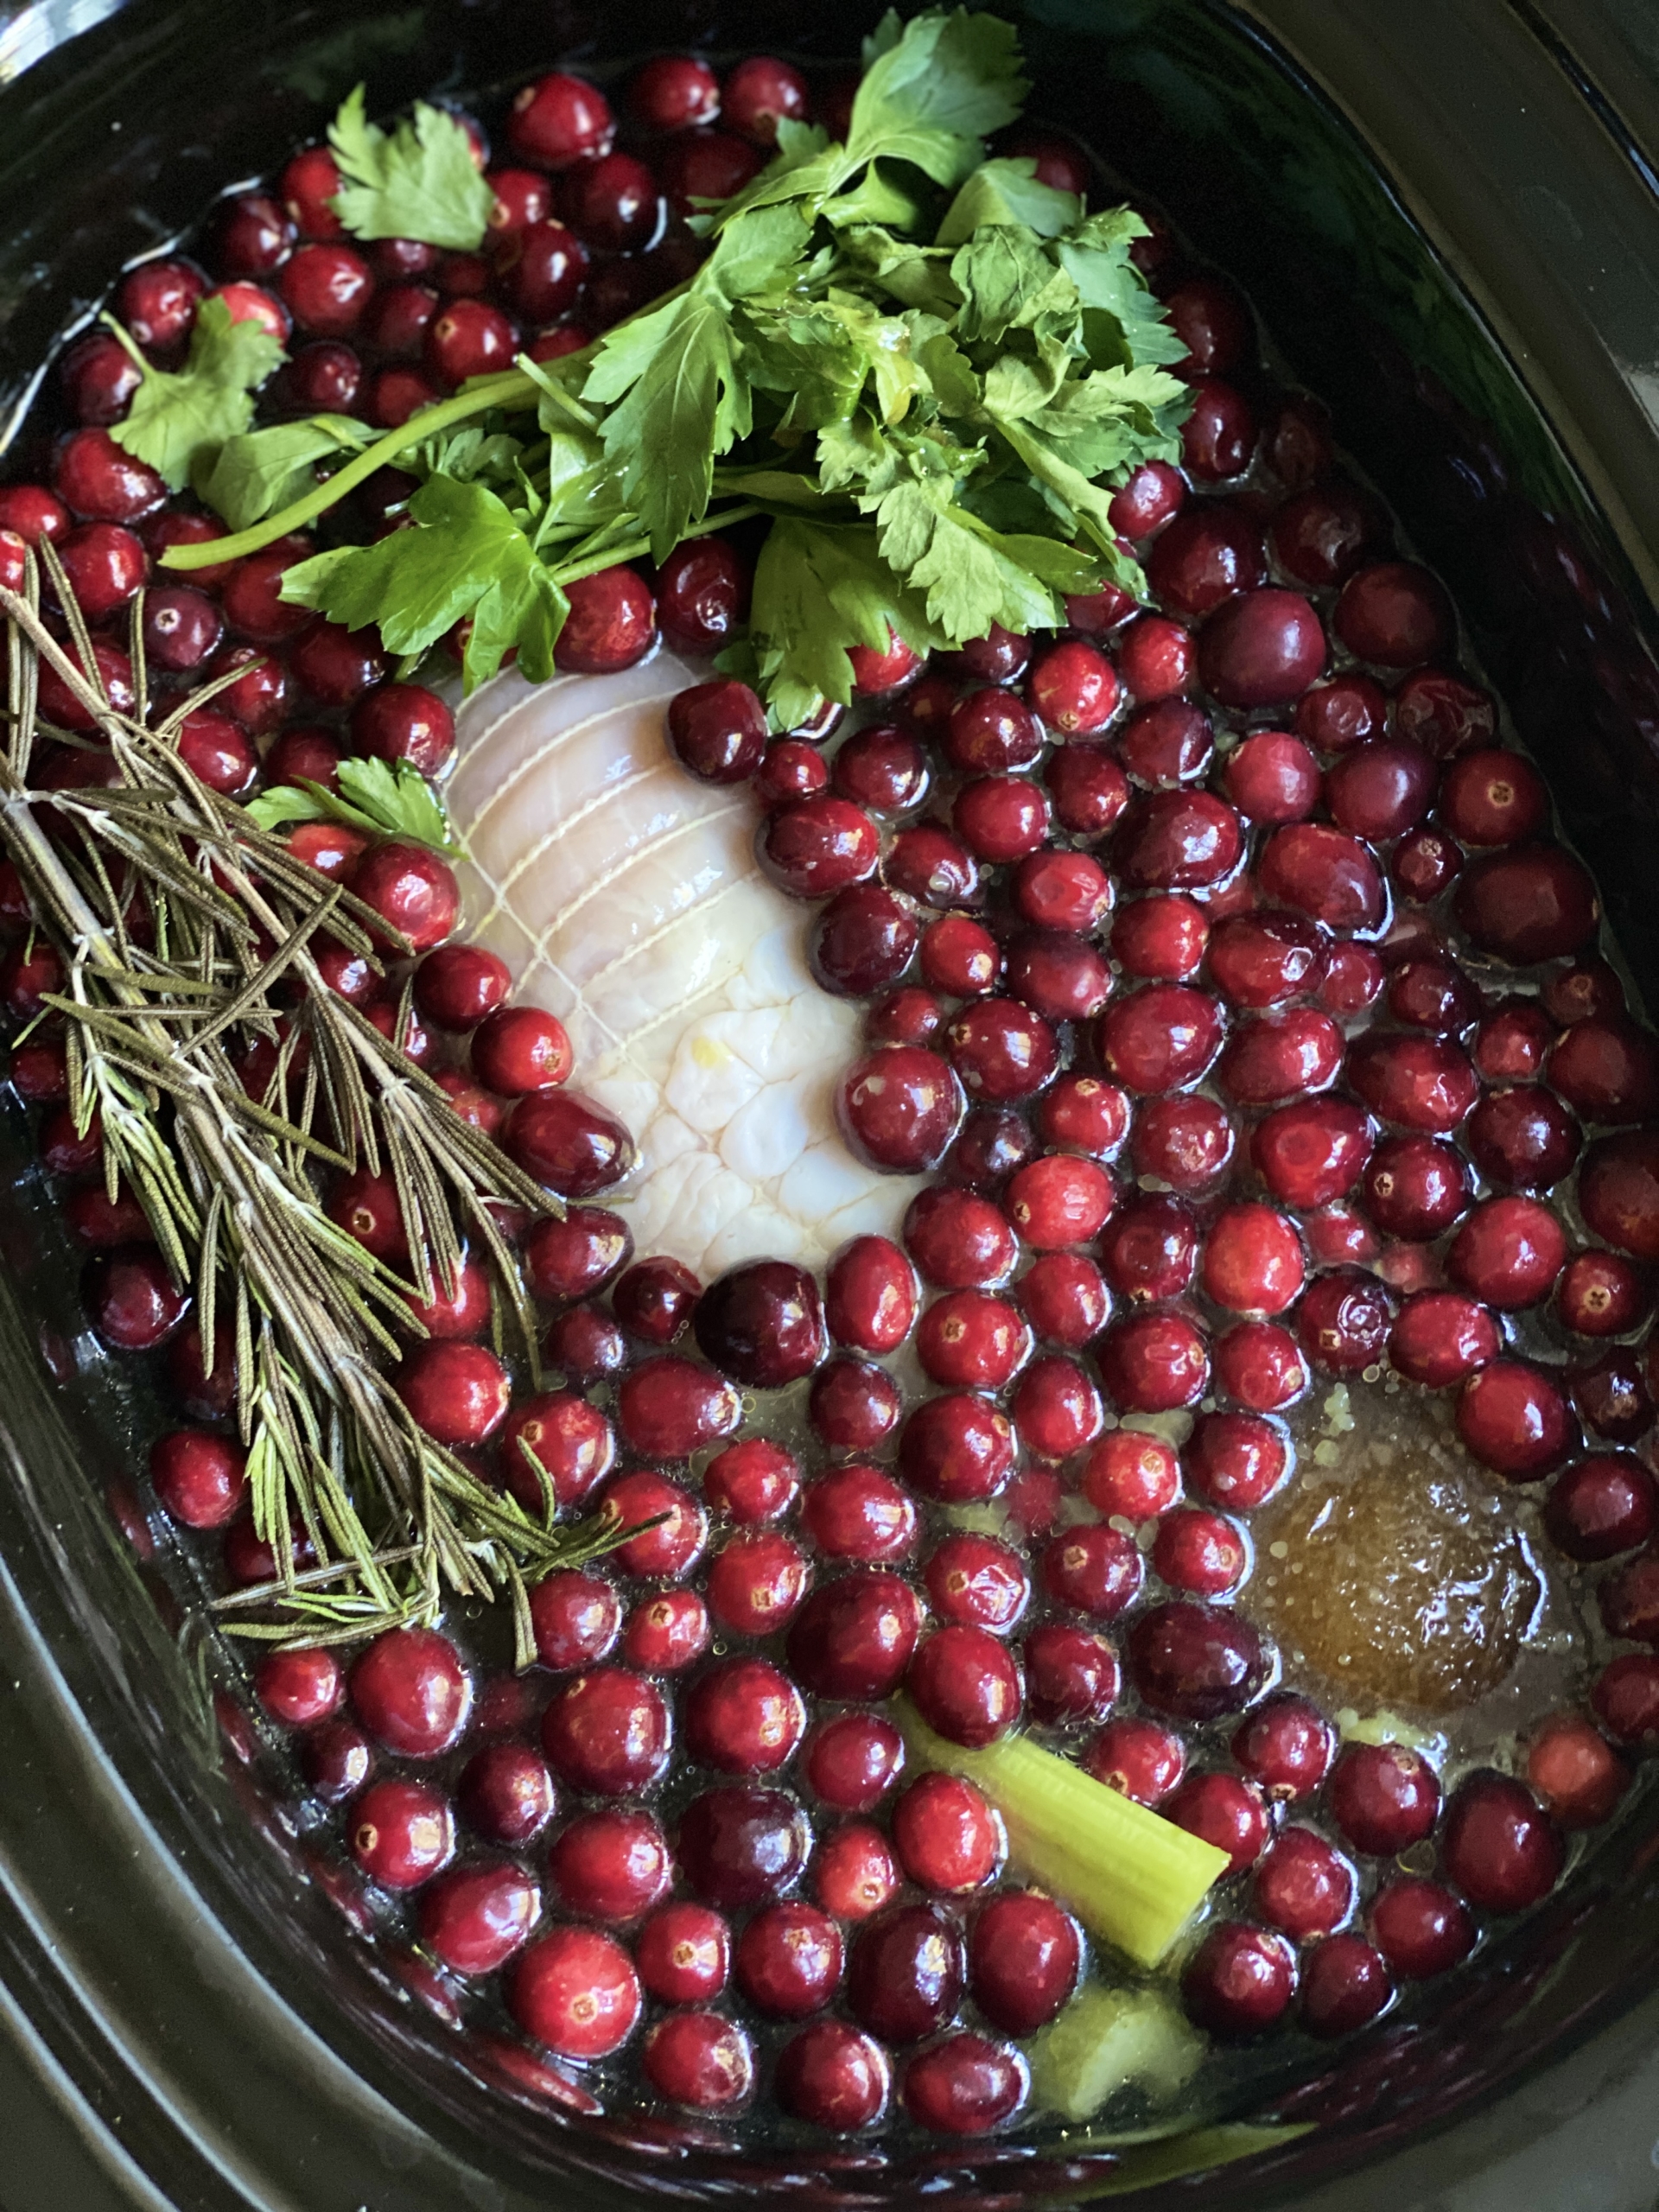
In my recipe, I love to add a bag of fresh cranberries, celery, onion, carrots, and some fresh parsley and rosemary. The reason we add the aromatics is two-fold.
This is where there is not quite a precise measurement, it will depend on the size of your slow cooker. The key is to COVER your turkey with broth or water. You can use filtered water, vegetable broth, or in my case I opted for my homemade chicken bone broth for even more flavor.
Do you know what will happen when you’ve added enough water? Your cranberries will float! It’s a good way to know you are headed in the right direction.
The last step is to add sea salt and freshly ground pepper, because everything really tastes better with a quick hit of both.
I find the best cook time for the crock pot turkey breast is for 3-4 hours on high, or 5-7 on low. Now, smaller slow cookers cook faster as there is less water or broth to heat up. So adjust accordingly.
Also, make a meat thermometer your friend. I opt for 160°F when cooking poultry, then I take it out and let it rest for at least 5 minutes to help distribute the juices, and it will keep cooking to the magical number of 165°F.
You can use the broth for gravy as I mentioned, or save for a turkey soup if you have any meat leftover. With a small, 2 pound turkey breast, you may not have a ton of leftovers, so plan accordingly.
I hope this helps you celebrate a small Thanksgiving, either in person or virtually. If you have any questions about cooking Thanksgiving dinner, head over to Instagram where I can answer your questions.
If you have skin on your turkey breast, you can pop it under the broiler to crisp up the skin if it’s one of your favorite part’s of a big turkey dinner. (yes, it’s mine. My sister and I would always hover to grab some once it was being carved)
Also, feel free to a some white wine to your slow cooker. Always use good quality wine that you would drink in a glass. If you wouldn’t drink the grocery store white wine, don’t cook with it.
My favorite wines to pair with a Thanksgiving Turkey are as follows:
Happy Thanksgiving to you! Please pin the Slow Cooker Turkey Breast recipe below to save for seasons to come.
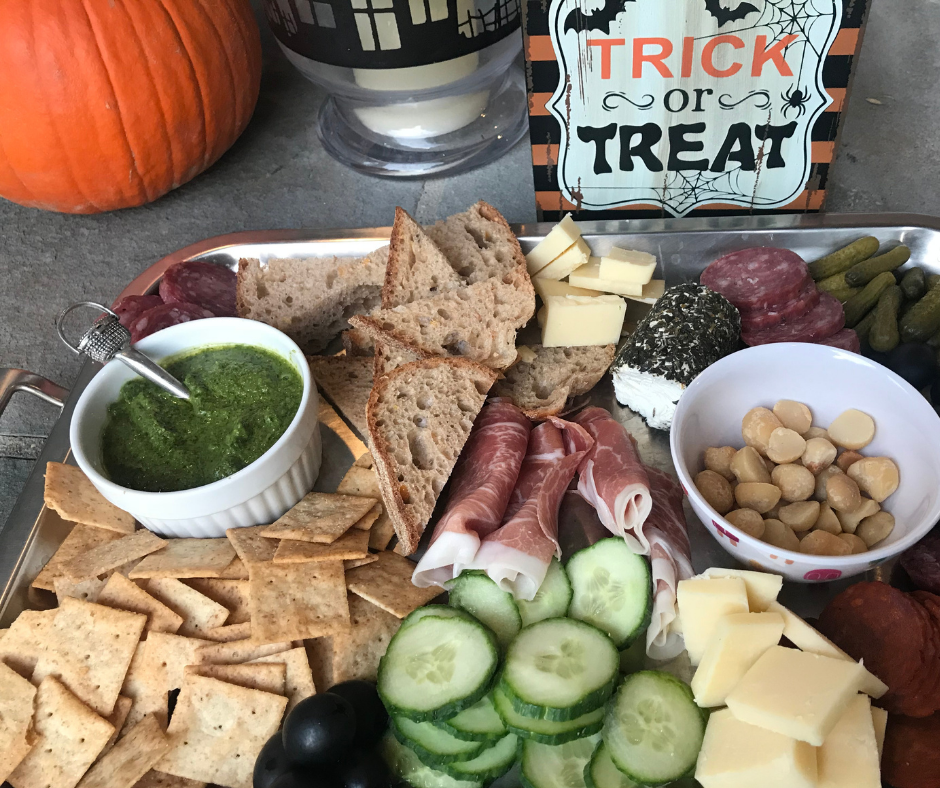
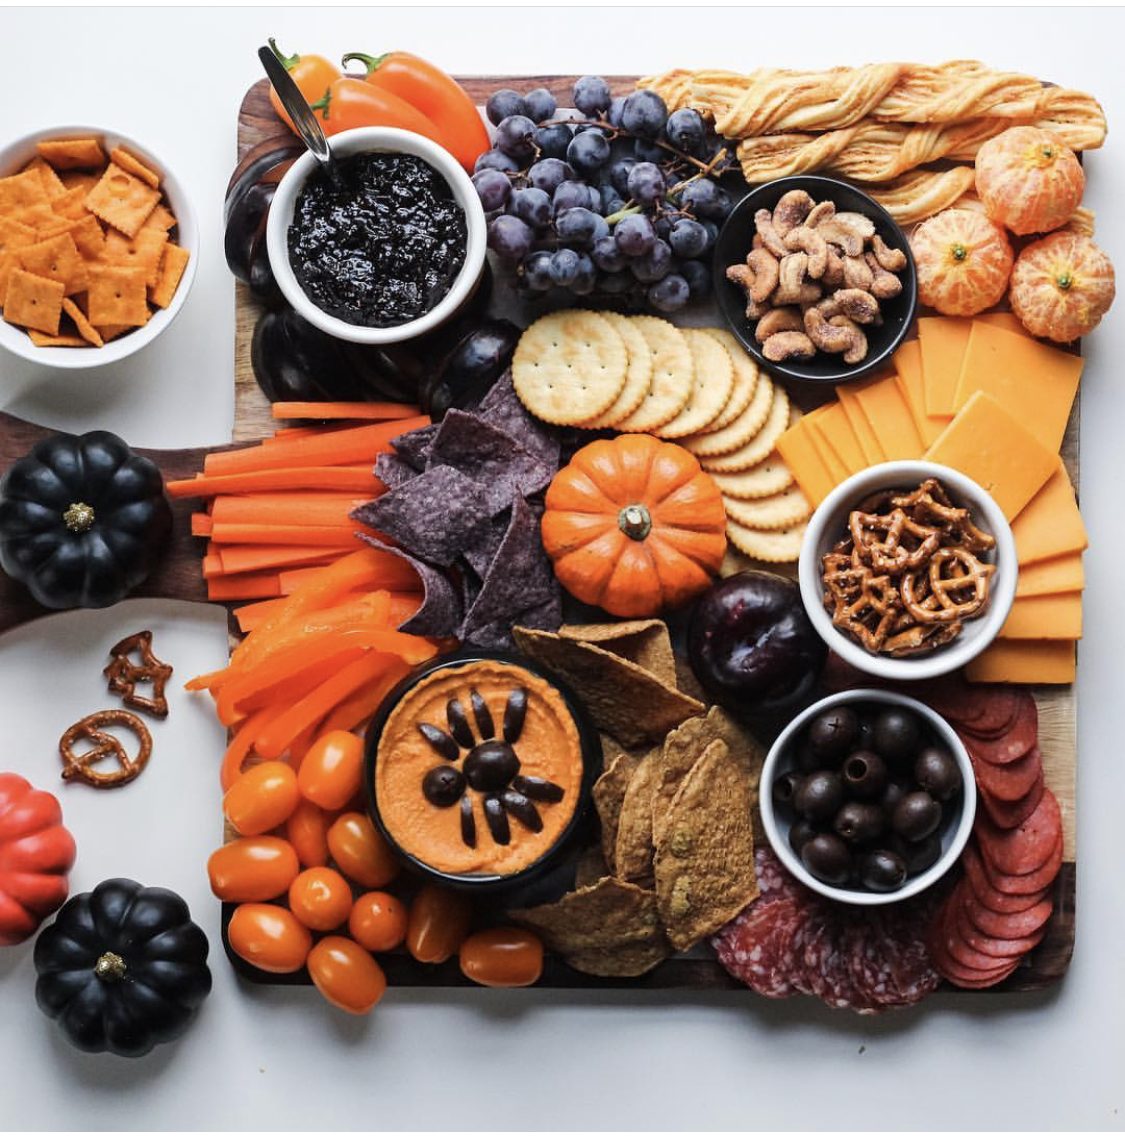
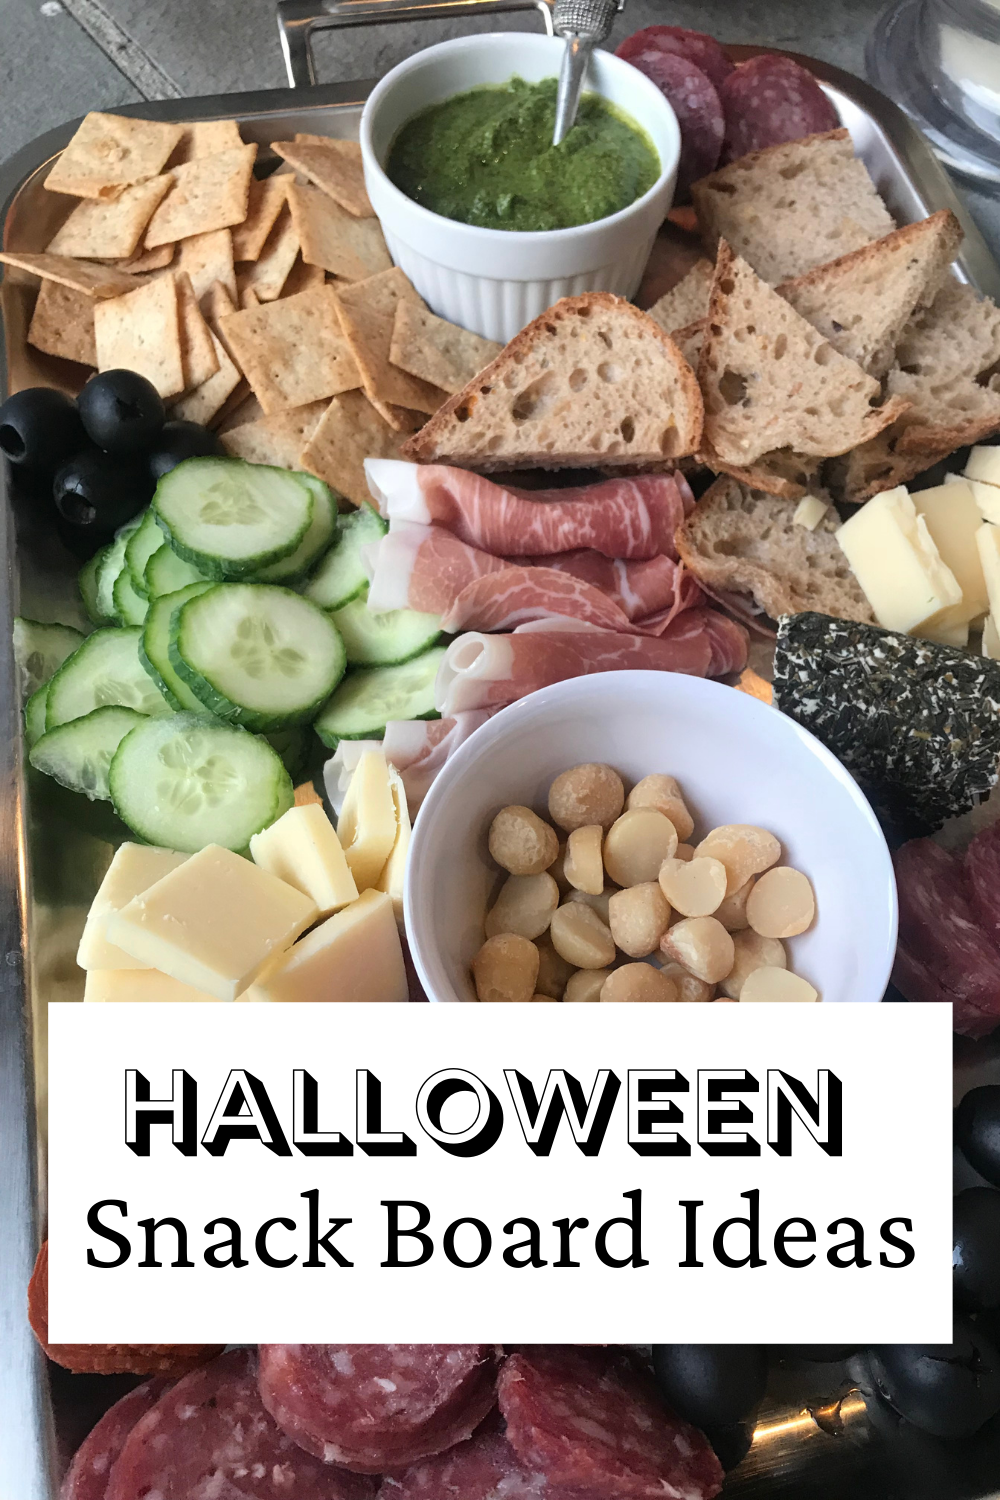
How to create a Halloween Snack Board for the spooky holiday ahead.
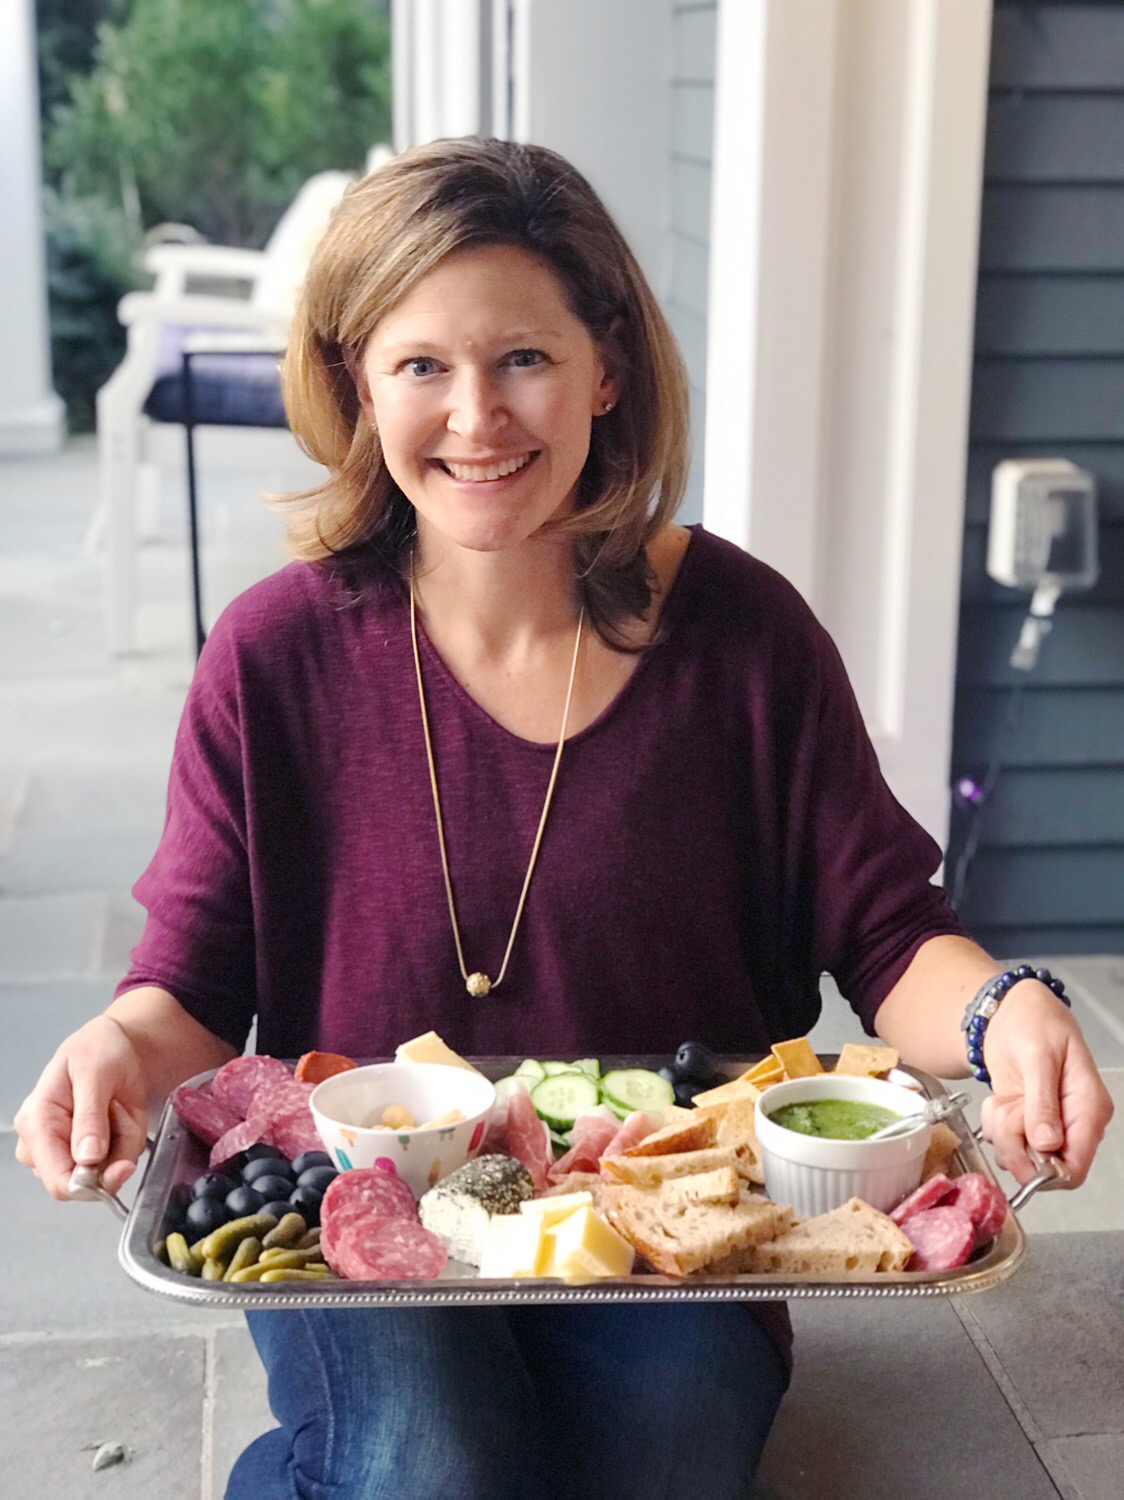
A few years ago, we started planning a Halloween Dinner Board before Trick or Treating. It’s now a tradition in our house. It’s such a simple way to get some food into the kids before heading out the door.
They are always way too excited to sit still for dinner, so this snack board really makes life easier. They can grab and go as they get into their costumes. It’s also easy to entertain and feed grandparents who stop by to take costume pictures too.
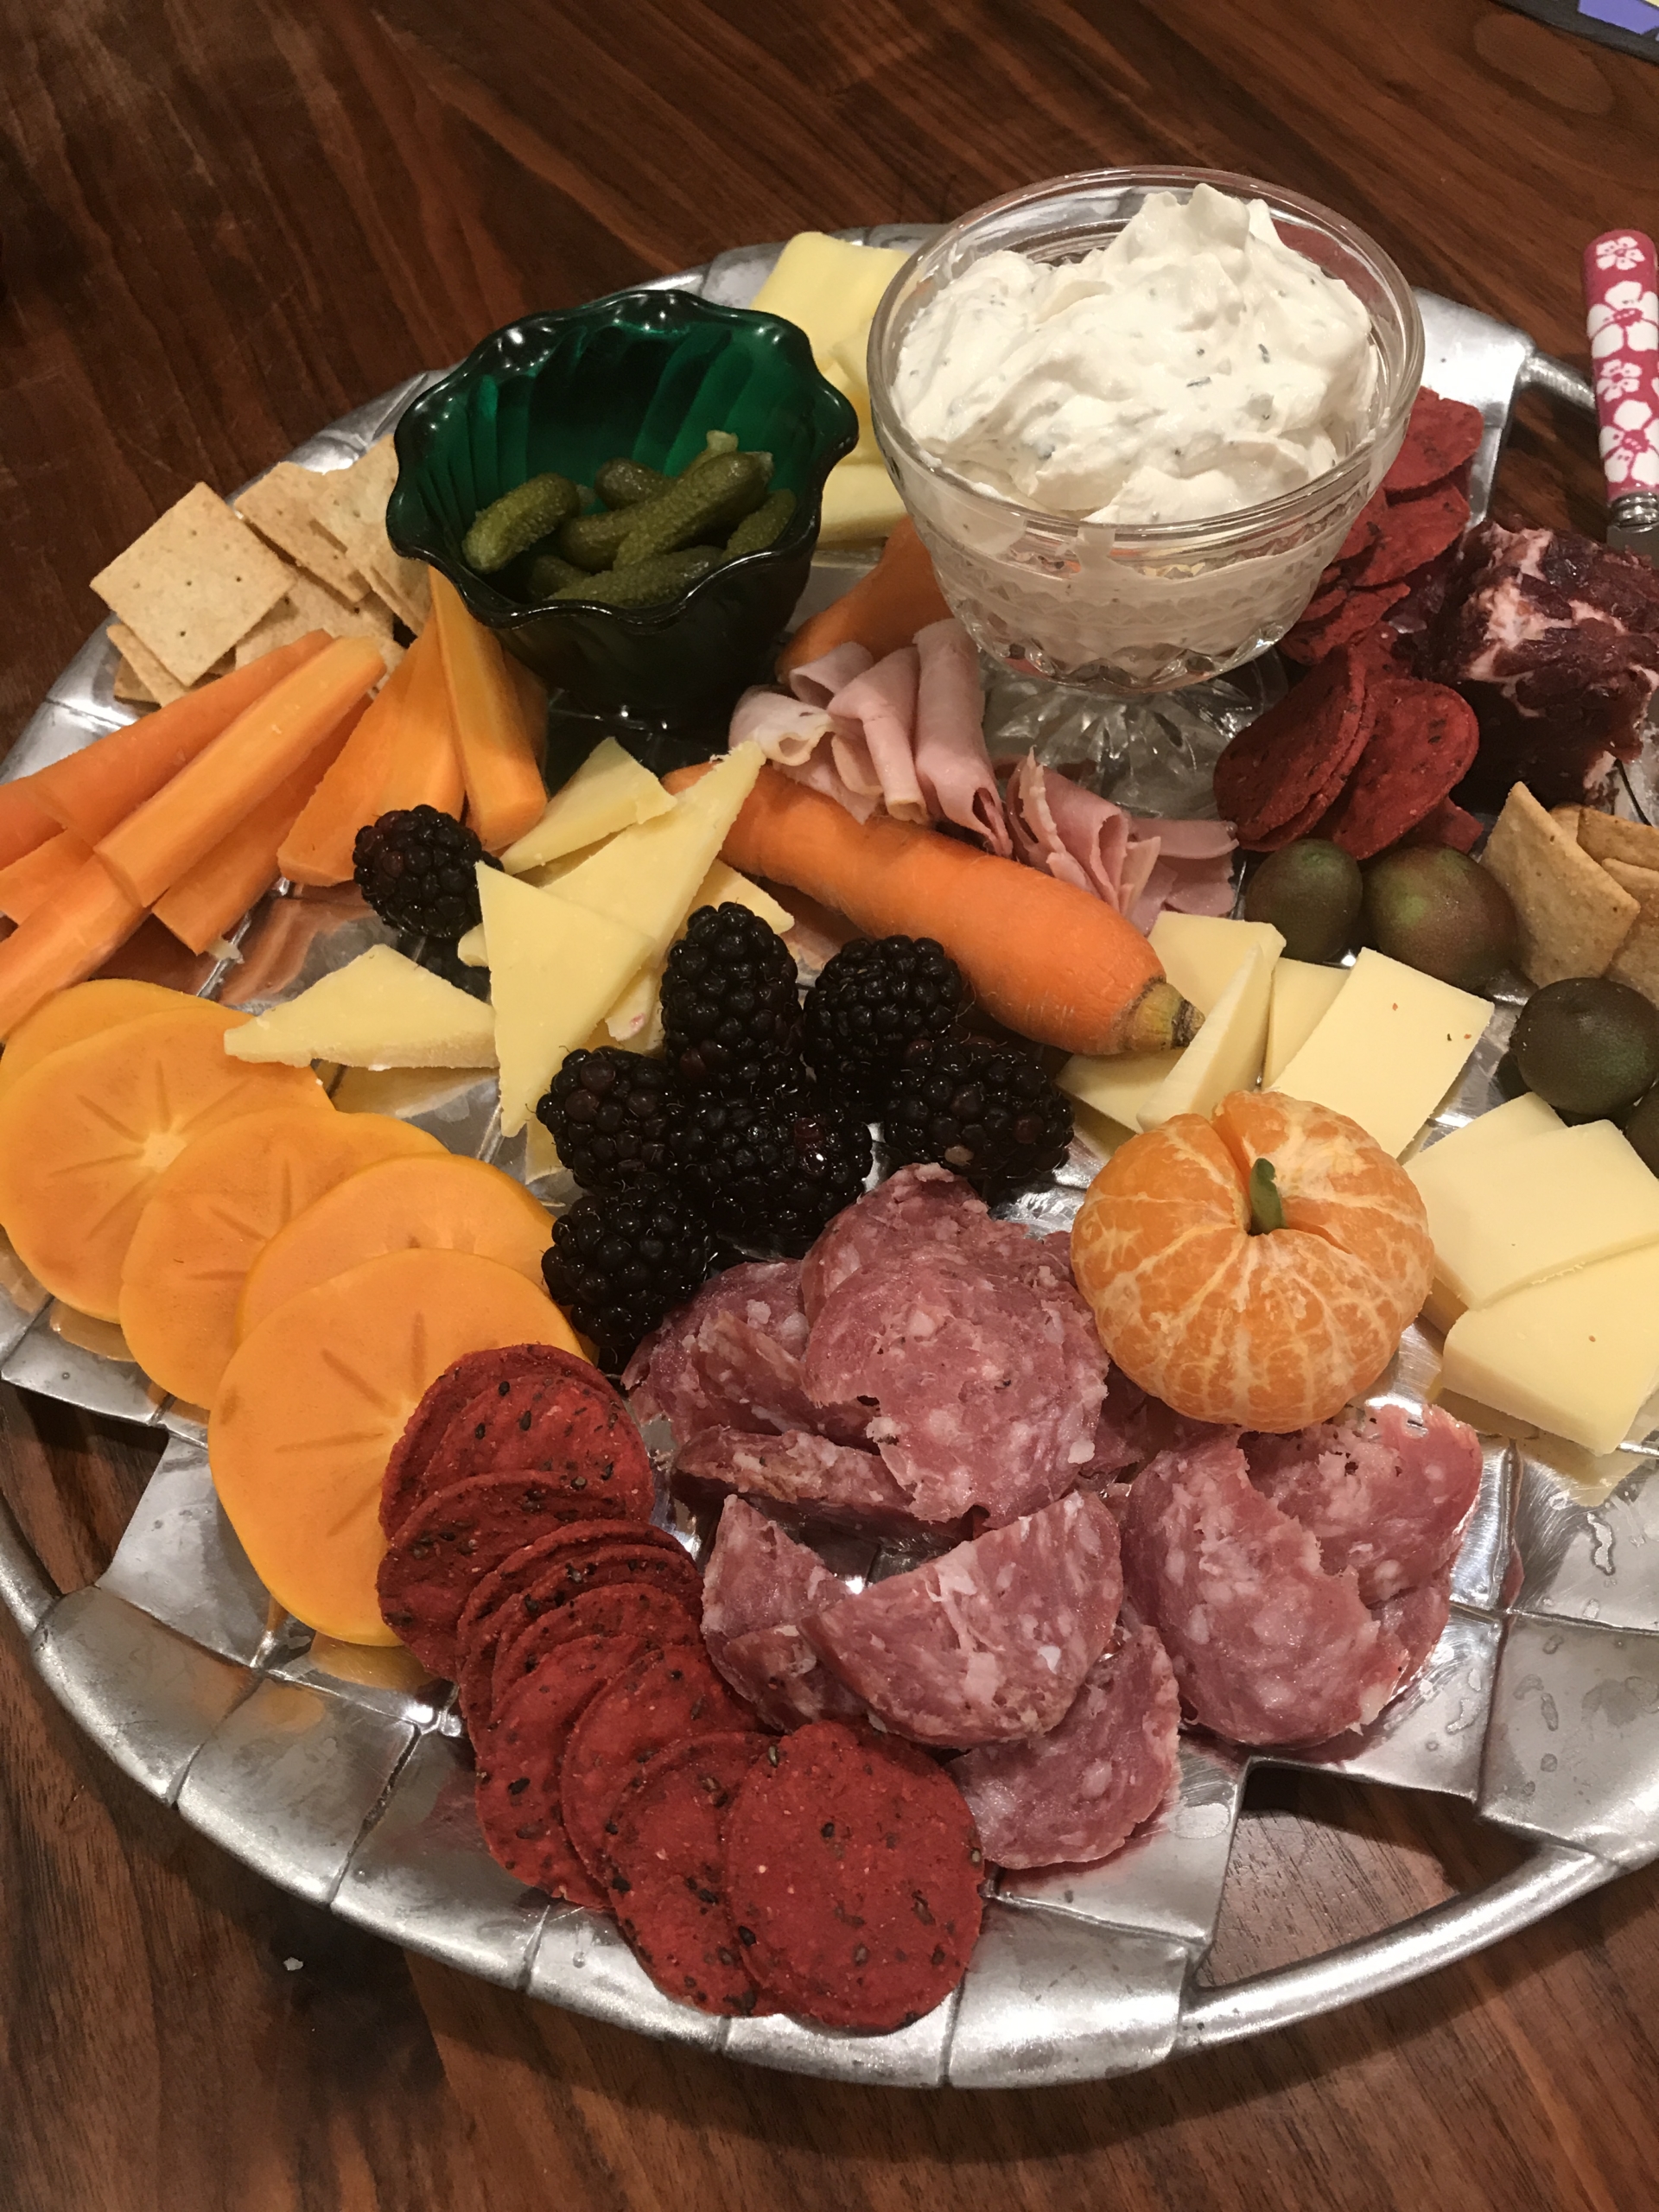
Dinner snack boards or you may call them “grazing boards,” are a holiday tradition that you can mix and match with the colors of the event. For our Halloween snack board, we go with a white, black, green, and a little red mixed in.
The easiest place to grab all your snack platter ingredients is Trader Joe’s. They truly have such a great selection, and I love getting in and out of their store quickly.
Here’s a shopping list of the items I usually grab for my snack boards.
Forgive the lighting on the picture above, but that’s real life when you are busy getting the kids ready in their costumes and trying to snap a picture.
Here are some other great ideas to add to your snack boards. (and if someone has the source for these, let me know. I had them saved from ages ago)
In my Halloween charcuterie board, I choose not to add in any Halloween candy. My goal is to fill the kids up with some real food before they dive into the sugar. This year, if your kids can’t go trick-or-treating, you may want to create an epic Halloween snack board and include some candy before you settle into a Halloween movie night.

We also put these cute clementines in the kid’s lunch boxes during the week of Halloween. Here’s a food-safe pen you can use. to decorate oranges or bananas.
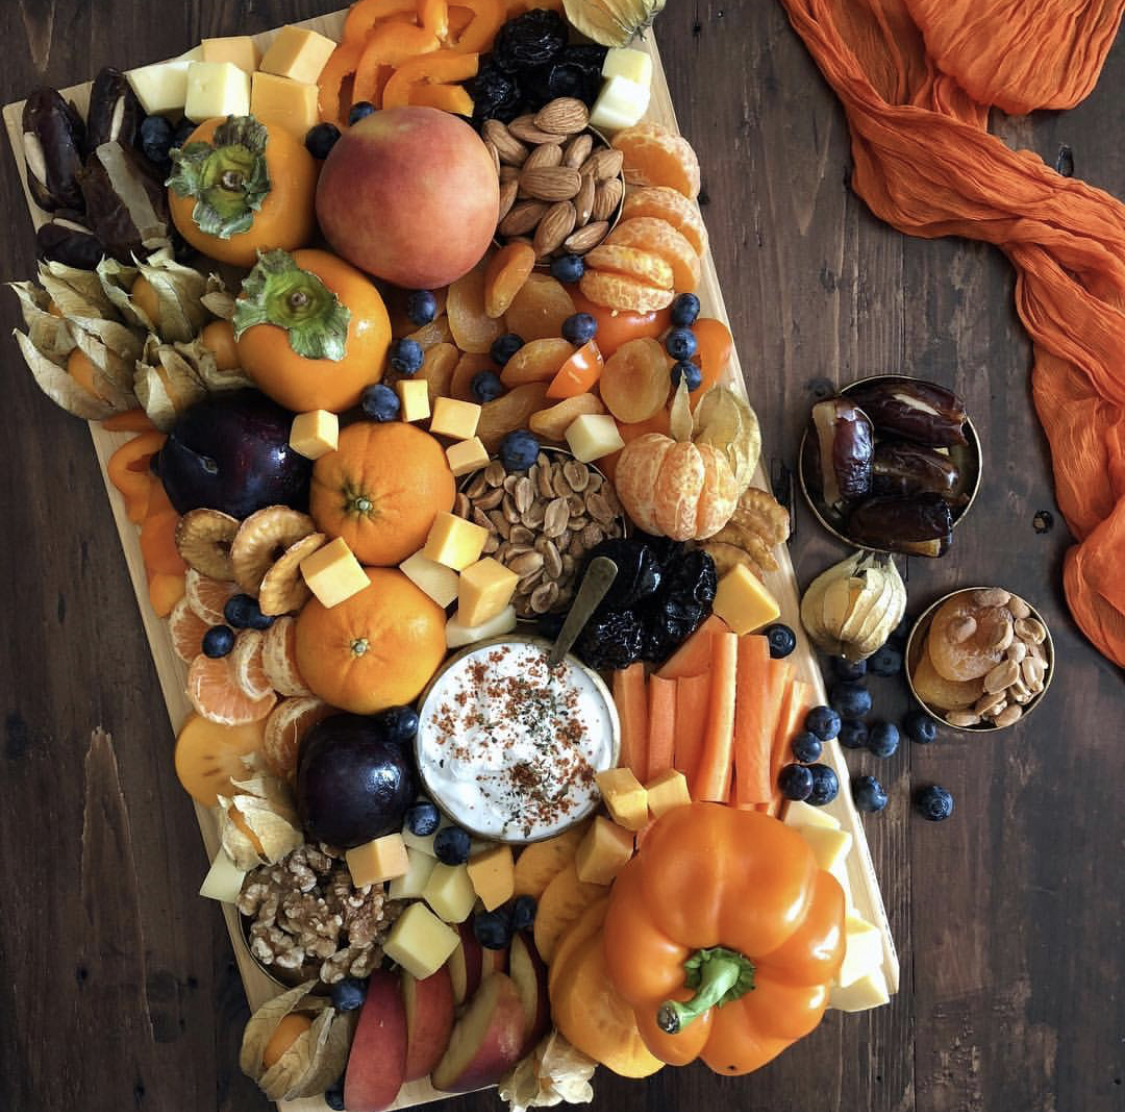
Halloween snack board can be transitioned for fall entertaining too. No need for all things spooky! If you want to create mini charcuterie boards, I really love the ones we got from Etu Home.
You can also whip up a batch of my Green Smoothie Muffins too! Such a great addition to the snack board or for snack time.
Have fun this Halloween. Be safe, and tag me if you make a Halloween Snack Board with @EmilyRoachWellness on IG.

Need some help planning your 4th of July meal plan? I know it doesn’t quite feel like business as usual when it comes to our summer plans, but the Fourth of July is my favorite holiday of the year. Even if it’s just you celebrating, here are some fun ideas for the kitchen. We will celebrate at the beach this year with some family outside. Here’s hoping the mosquitoes are not too bad this year!
Pamela Salzman’s American Flag Pie recipe. You can check out her Instagram IGTV and watch the tutorial. Make the dough today and break up the steps to make it easier.
A Couple Cooks’ updated broccoli salad looks like a great option to use some of our garden fresh broccoli.
Potato salads are my favorite, especially when it’s a French Potato Salad. I’m totally hooked on adding capers to my potato salad, and so are my kids!
I like grilling chicken and being able to have some “plain” and others with a kick. I’ve found using a hoisin glaze at the end is perfect. Here’s an easy tutorial for a grilled hoisin chicken, but please don’t use canola oil. Sub avocado oil on the grill due to the high heat.
Zucchini hummus is a perfect pair to all the snappy veggies from our garden, plus a few more from local farms.
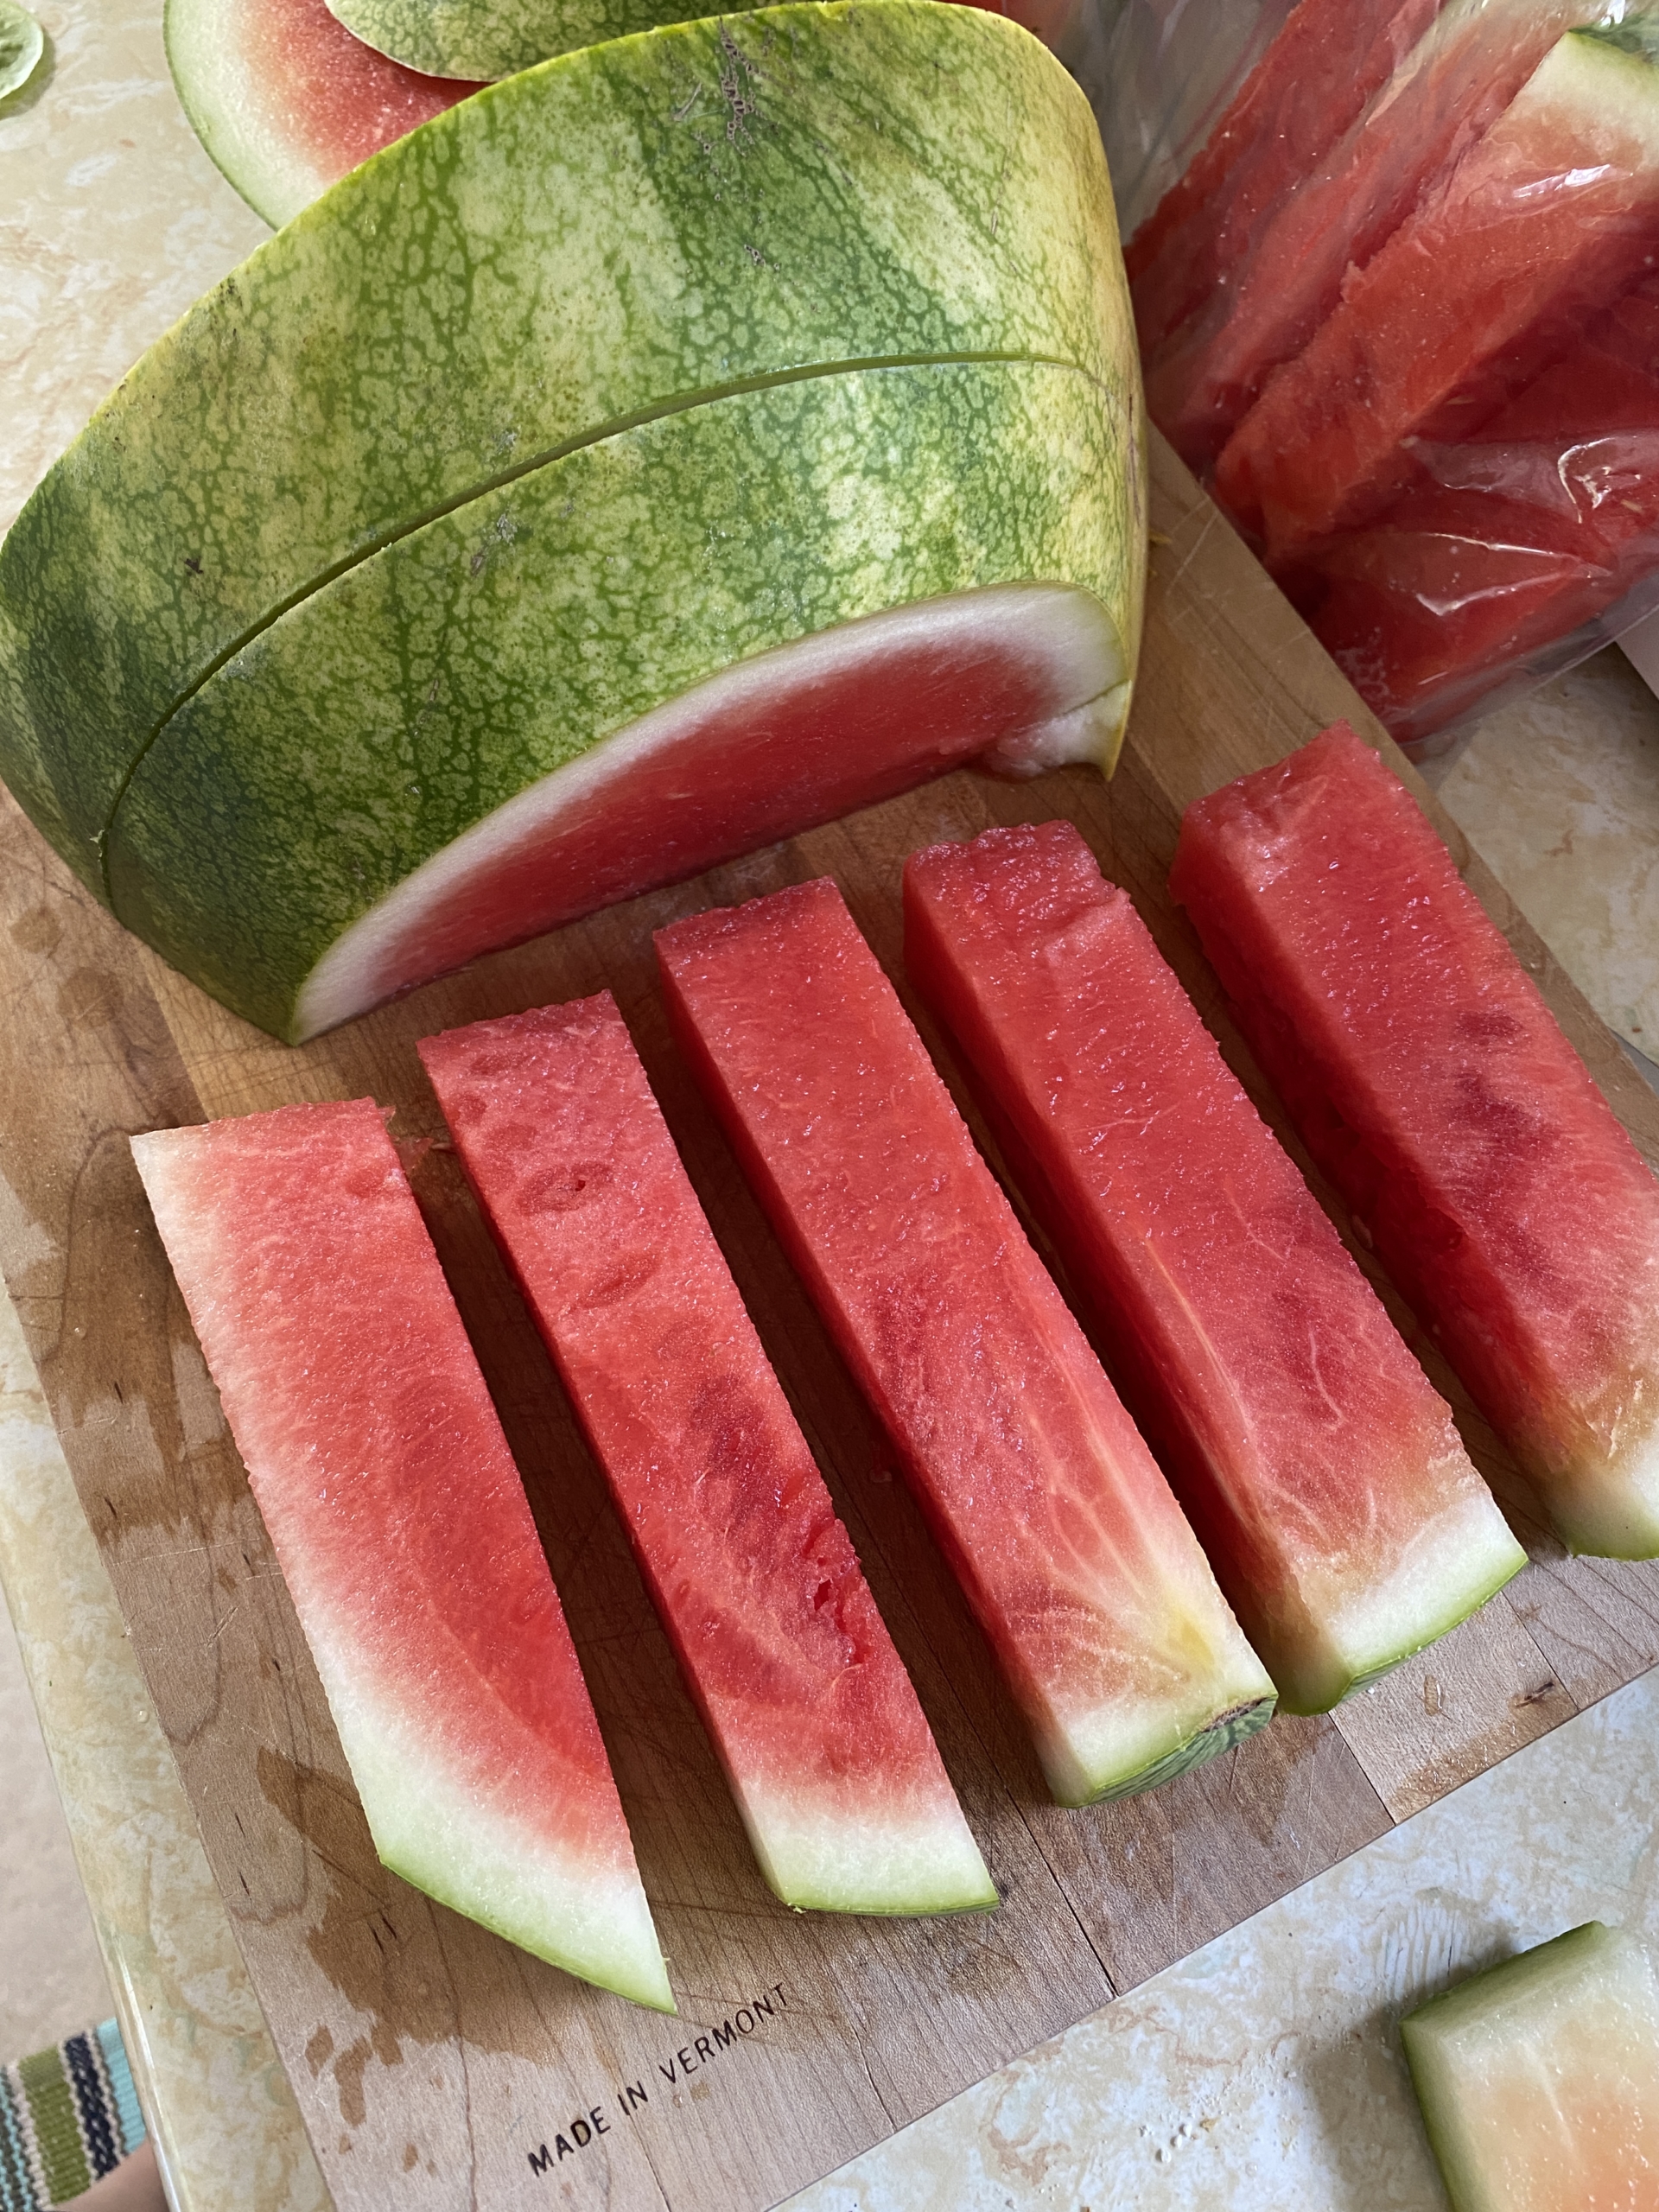
Round out the menu with watermelon sticks and you’ll be good to go. Sticks are the way to go for less mess and they also taste delicious frozen.
Scale-up as needed for your guest count.
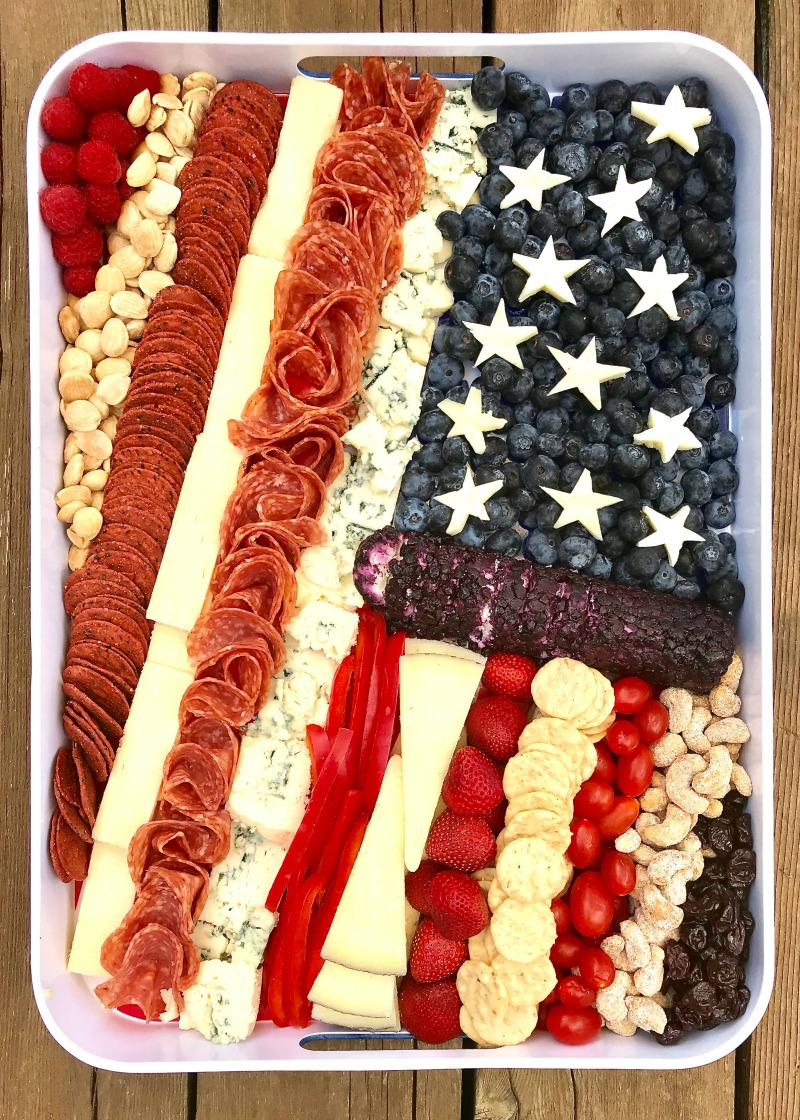
American Flag Cheese Board from The Baker Mama
And a cute red, white, and blue cheese and fruit board is always a win for your 4th of July meal plan. This one from The Baker Mama is gorgeous and full of gluten-free crackers from Trader Joe’s.(She has a full shopping list on this post here.)
🇺🇸🍓🌟🍷☀️🏖
I hope you enjoy the long weekend. Raise a glass of clean-crafted wine to toast the holiday! I’ll be enjoying a glass of Adelante Sauvignon Blanc because my mom and sister are in town and it’s their favorite. You can grab it too for 20% off till Friday.
Cheers and happy 4th of July!
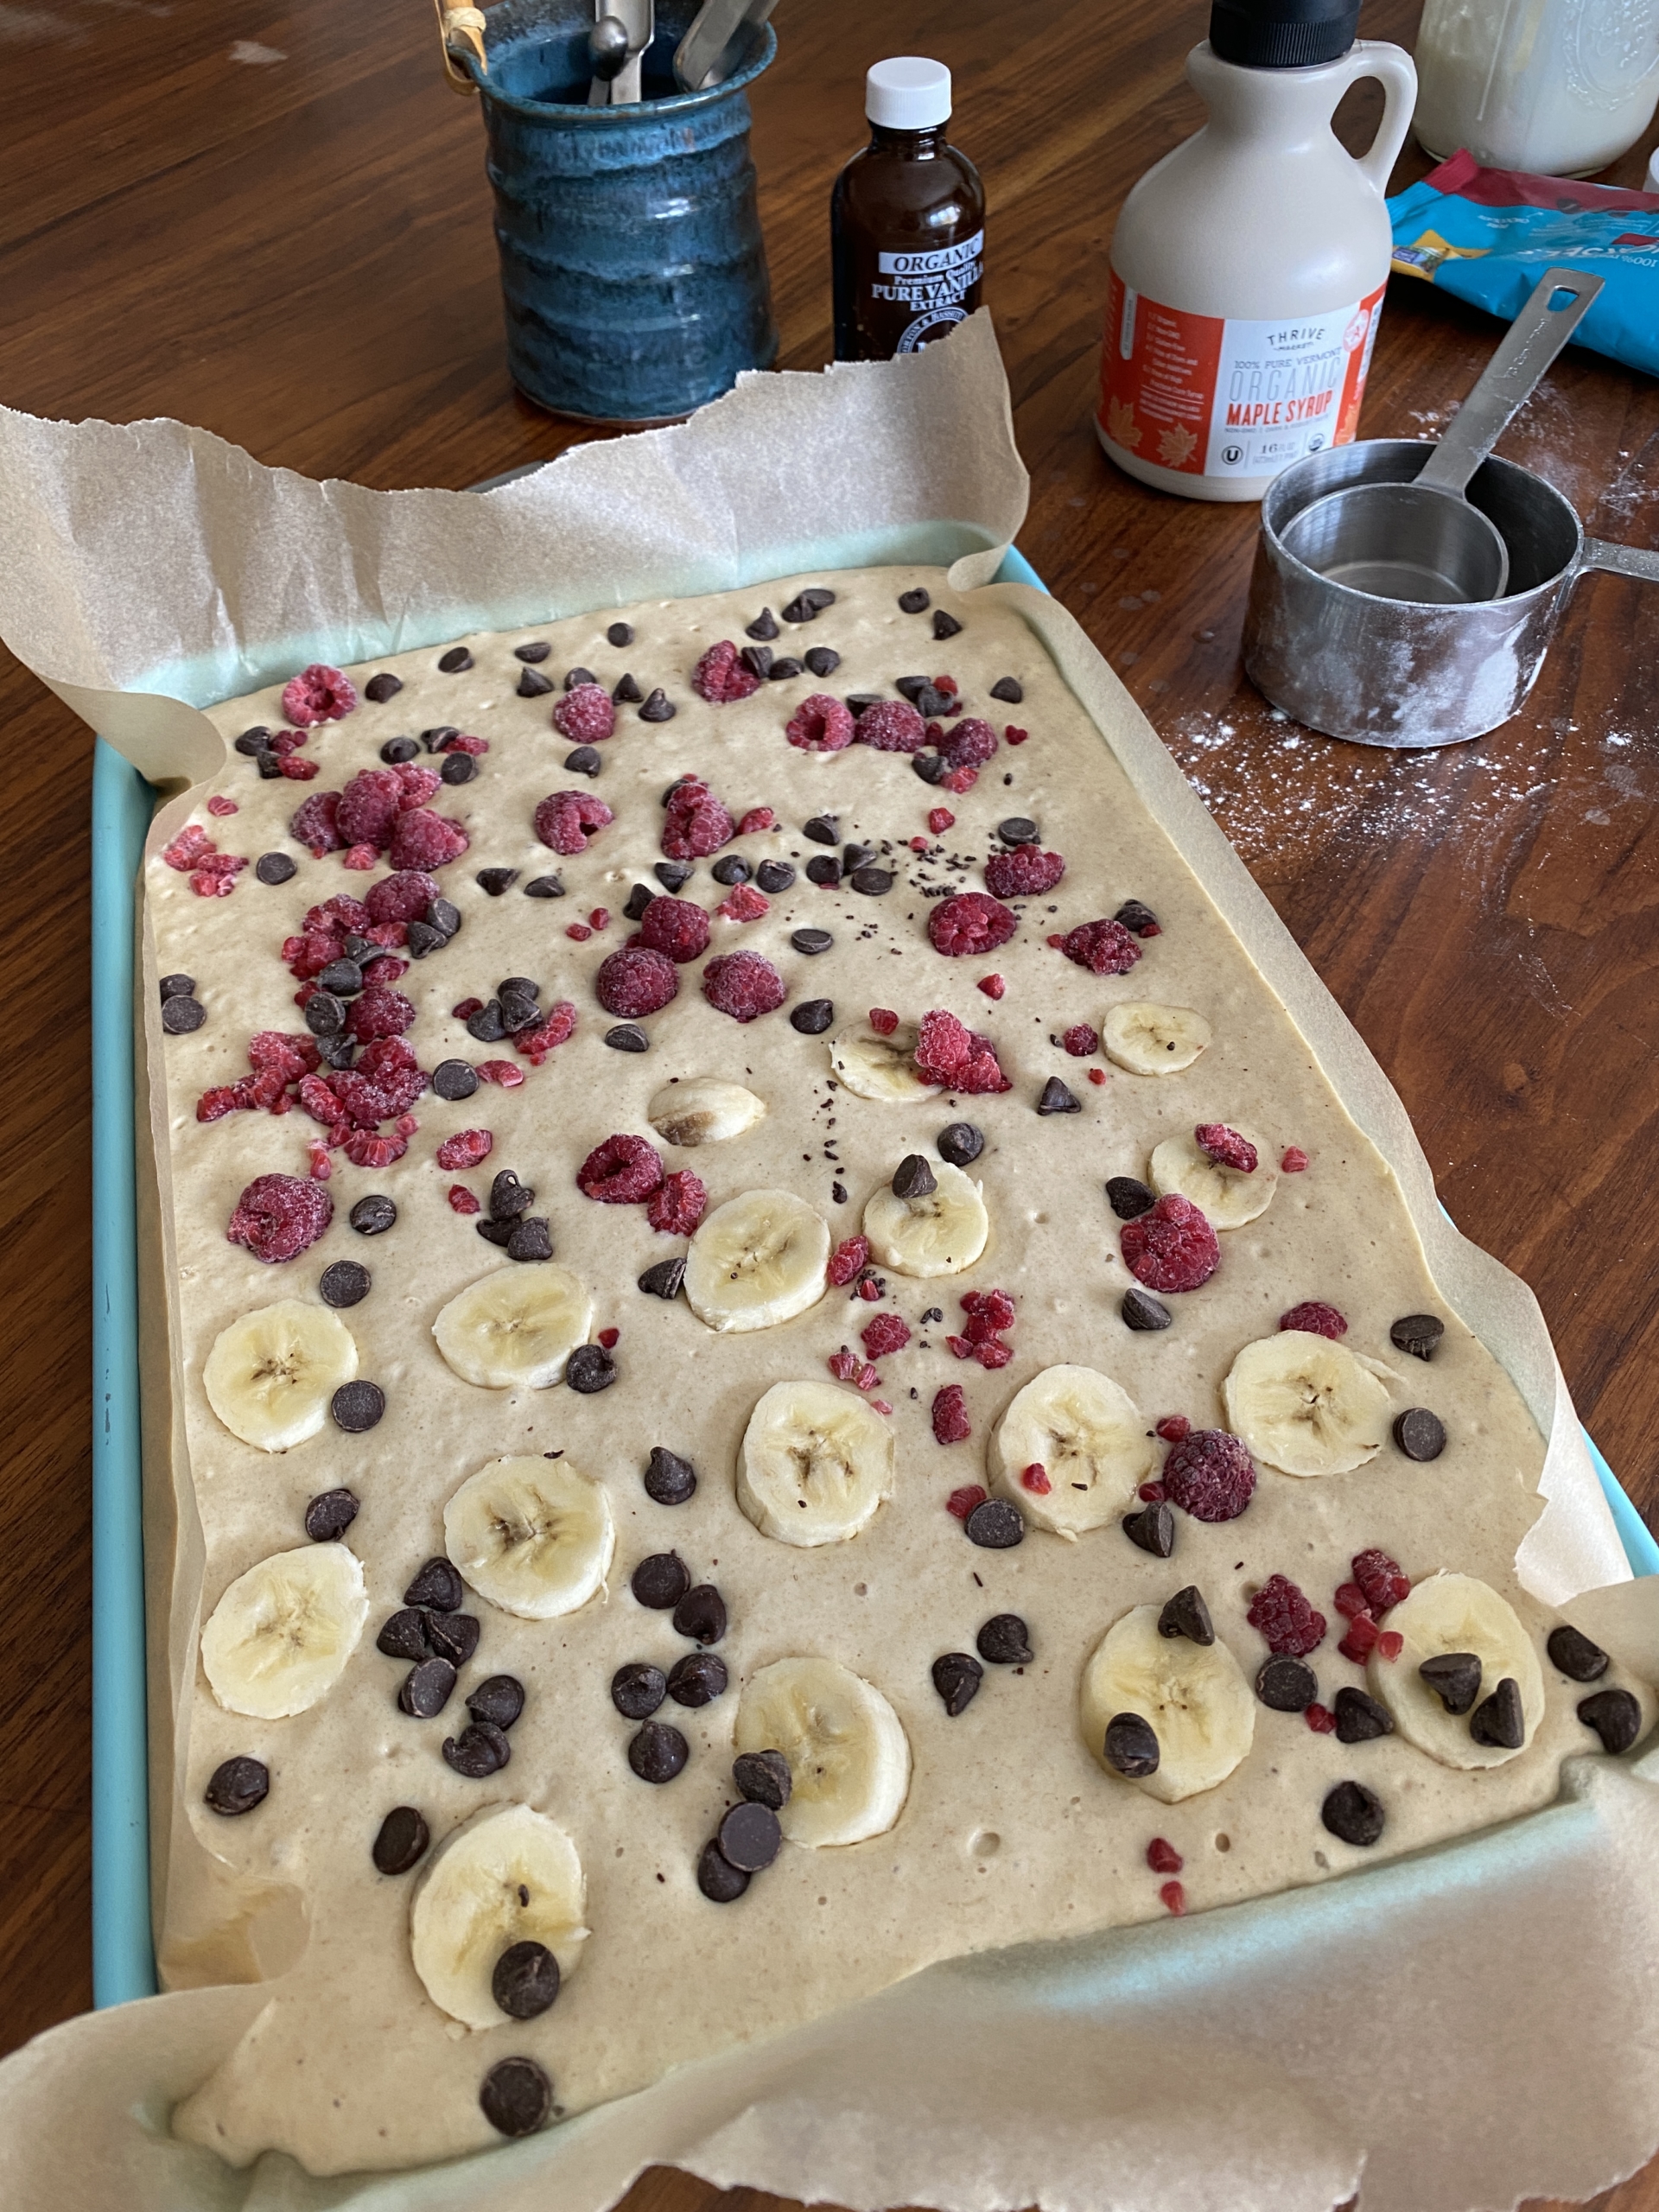
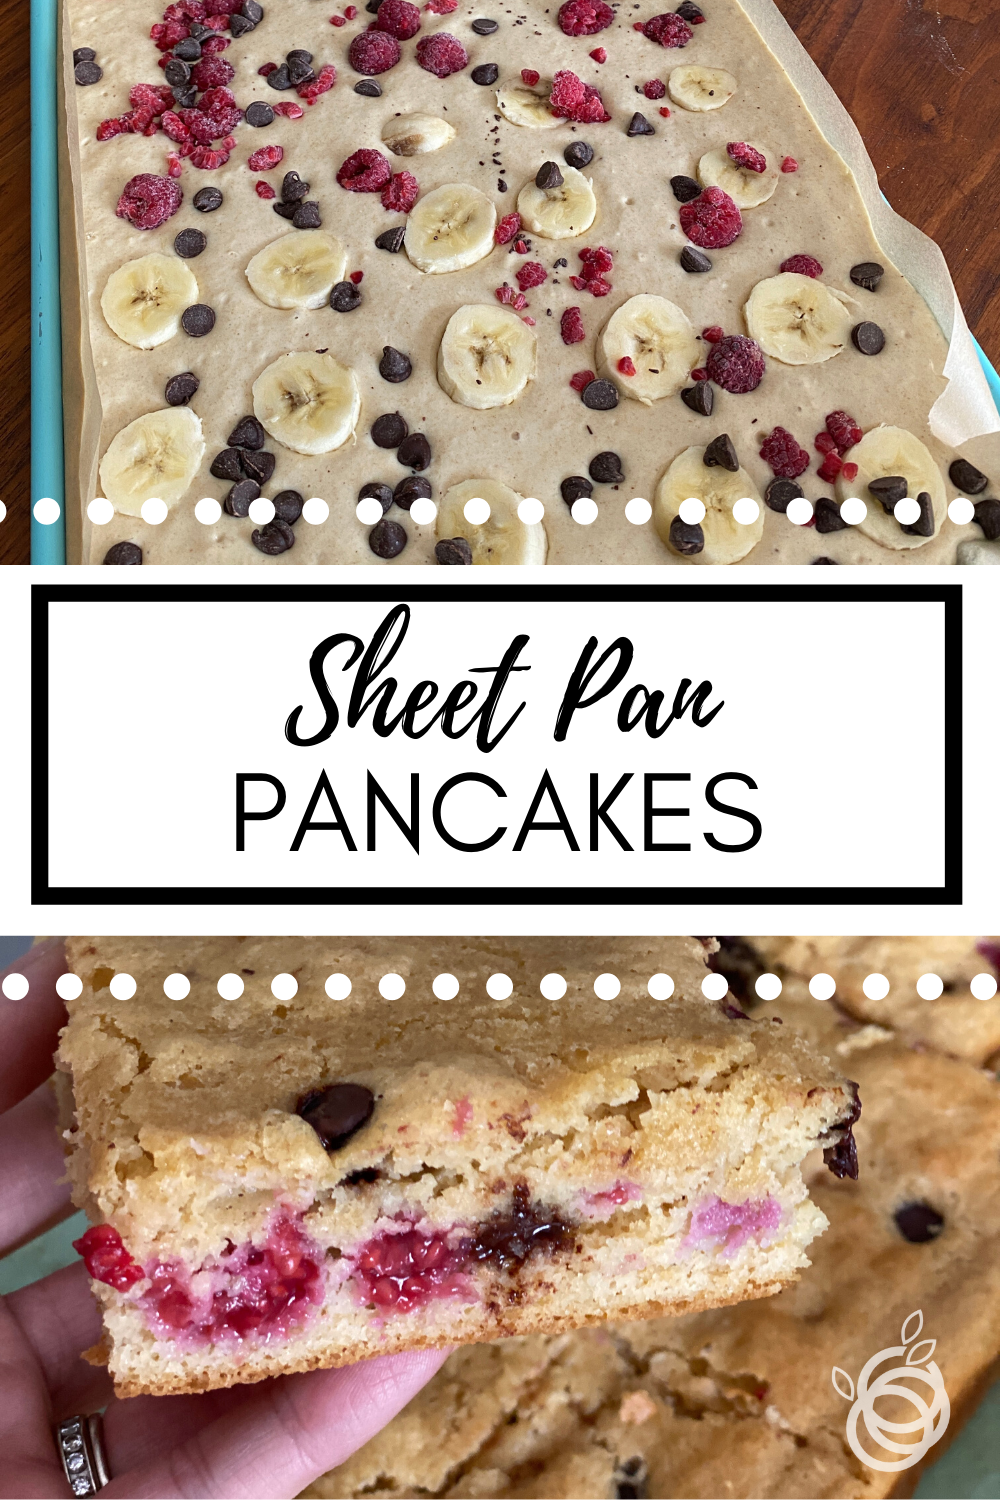
When I shared these sheet pan pancakes on Instagram you were just as excited as me. Where have these been all my life?! When I recently learned this trick and tested it out, we were all delighted with how fast breakfast came together. No flipping, no mess, and so much fun adding in our toppings. Clean up was a breeze.
We tend to make pancakes from scratch at least once over the weekend. (Sometimes twice a week with our new homeschool schedule.) A sheet pan pancake is definitely possible for a weekday even when school is back in session. (This is my usual oat flour gluten-free pancake recipe.)
I’ll walk you through this cooking method, along with a recipe sample. You can actually use your own favorite pancake mix, and I’ll explain how.
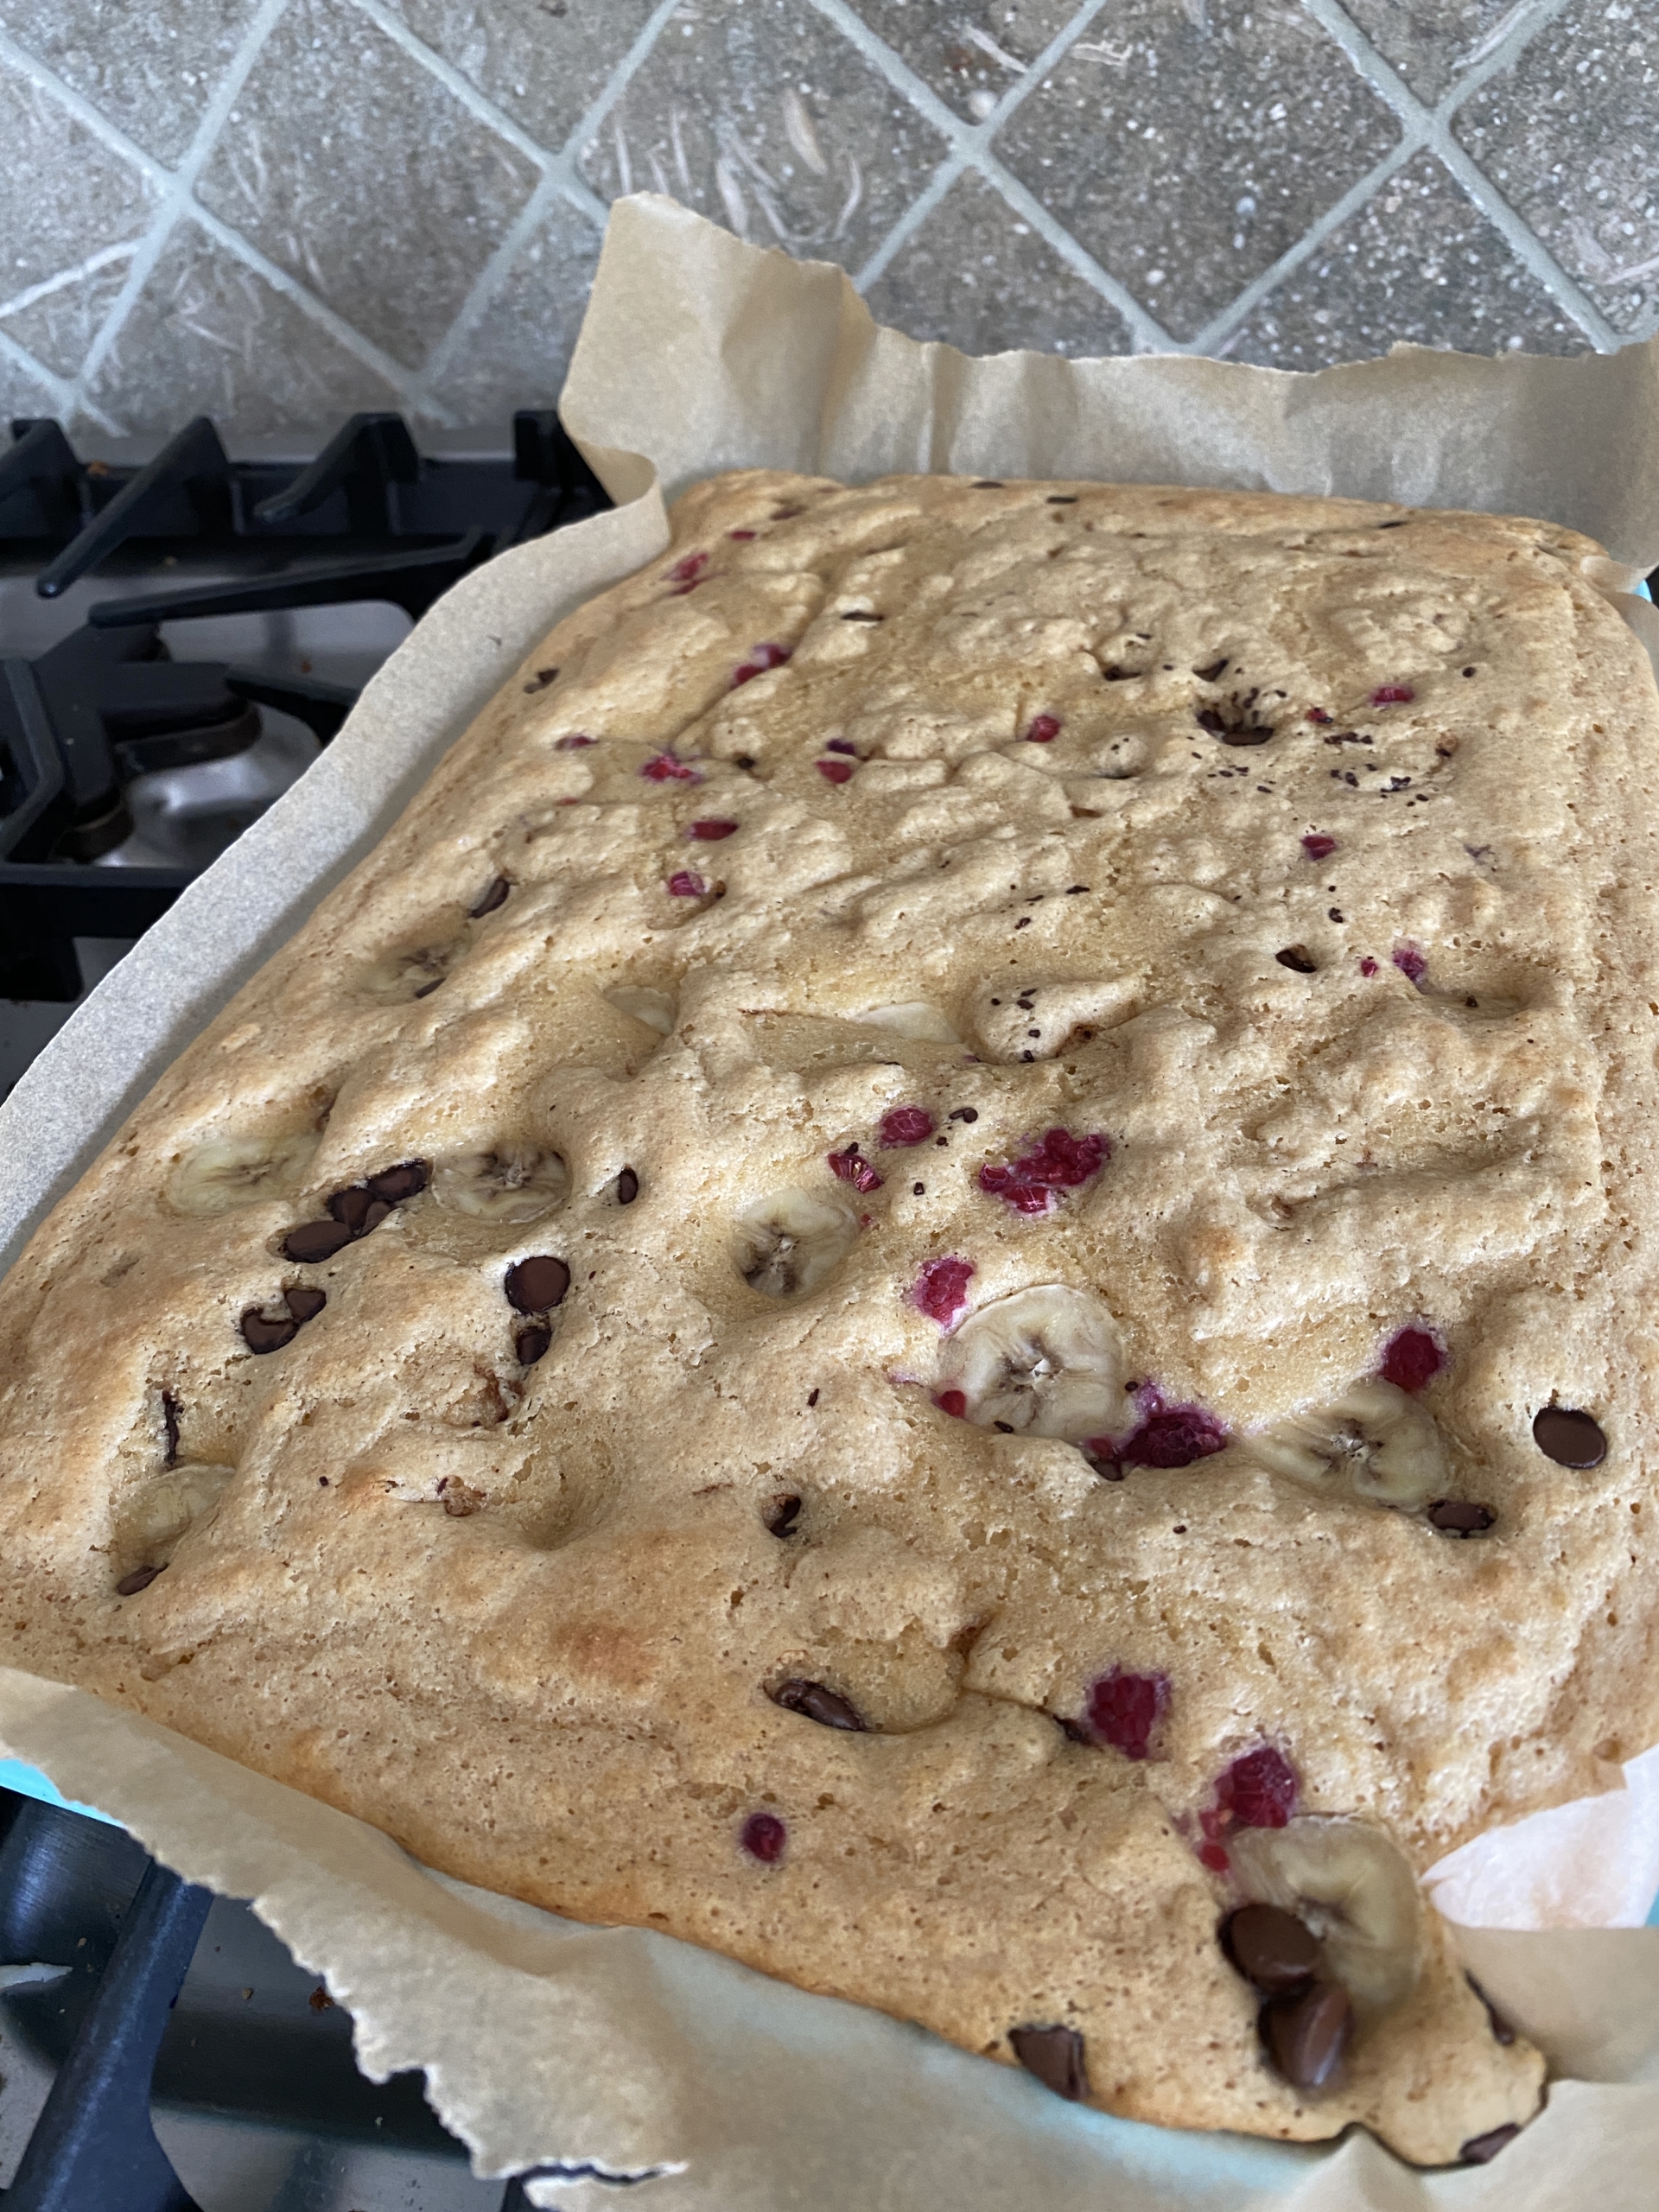
The kids called it “breakfast cake” once they saw it at the table. They were quite right, as the pancake takes on a cake-like texture. Though still perfect with some syrup and yogurt (or whip cream!) on top.
There is little sugar in the cake, so it’s perfect for breakfast, and even better paired with your favorite yogurt. (Here’s my slow cooker yogurt recipe.)
Sheet pan pancakes will be perfect for sleepovers, once we can host them again. (Never thought I would miss those!) Make it for brunch, or serve it as dessert and no one will be the wiser. I promise I won’t tell.
Here’s the short version. You will need 3 cups of pancake batter to fill an 18×13” rimmed baking sheet properly. Use your favorite pancake mix, or make it from scratch. Your choice. And did you know you can use your pancake mix for something other than pancakes?
The pancake toppings are what make it all so much fun. Here’s my list of fun ideas you can mix and match
Sweet potato brownies were not something I expected my kids to love. But they surprised me! Or maybe, the recipe surprised us all. This simple, healthy brownie recipe was easy to make, and a fun way to enjoy a chocolate treat.
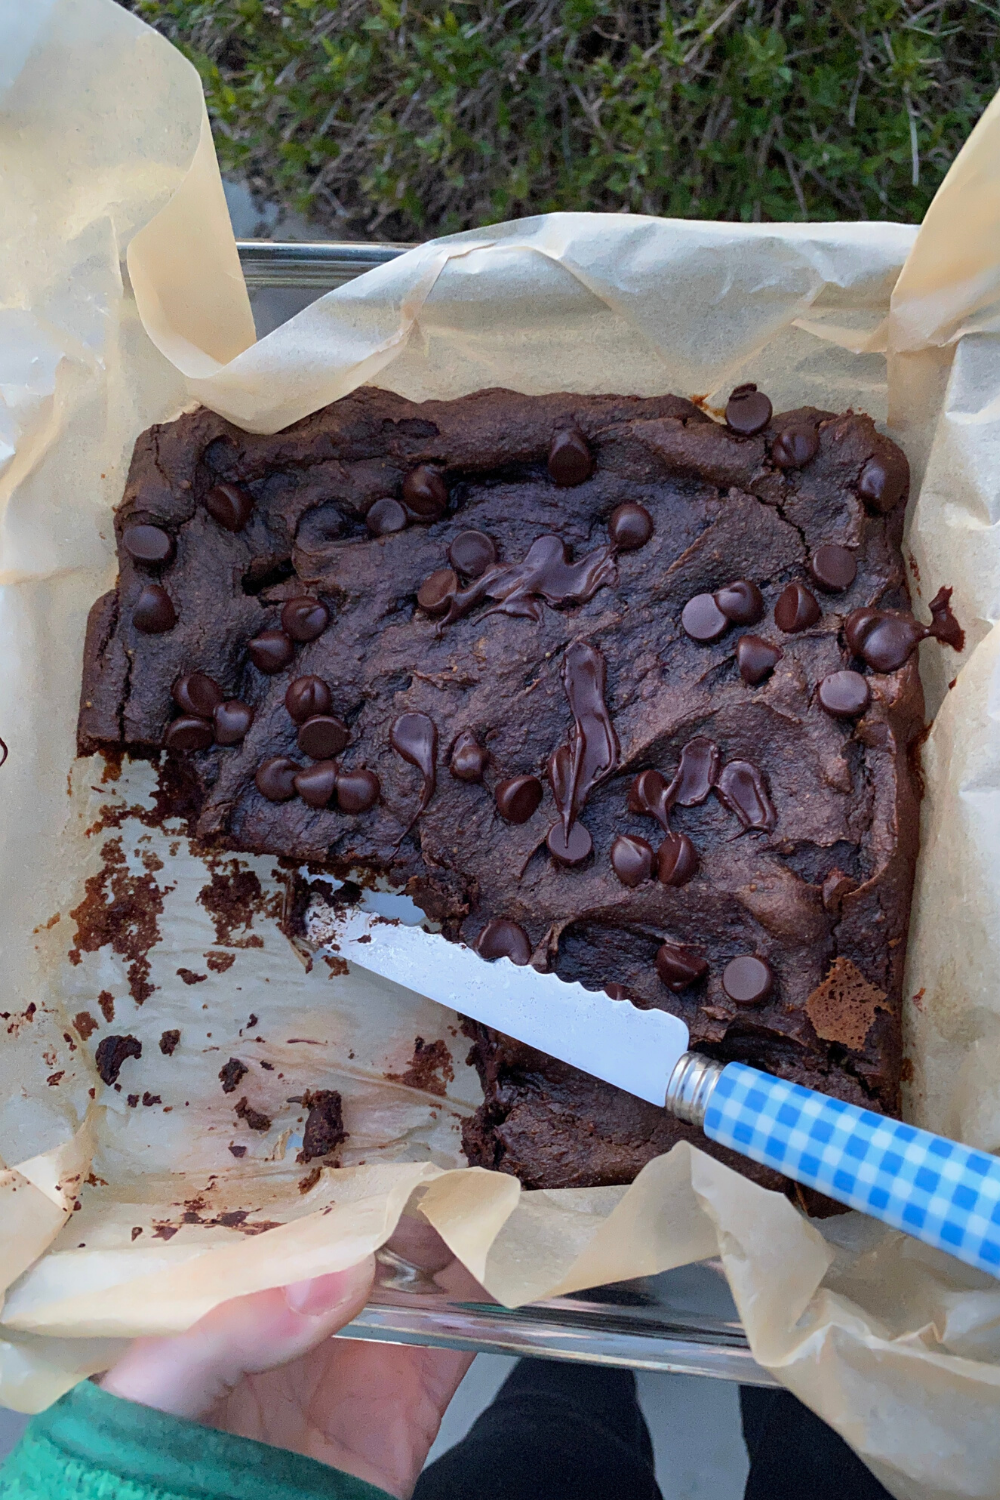
When we bake sweet potatoes for dinner, we often make extra for leftovers. Instead of having another stuffed sweet potato, I decided to test out a sweet potato brownie recipe. I often read a recipe and start making edits in my head. Today’s recipe is my tested version.
One of the easiest things I’ve learned over the past few years of baking is how much easier it is to use a blender for baking projects. For muffins, brownies, or quick breads, you’ll often find me tossing all the ingredients into the blender to create a batter. These sweet potato brownies were no exception.
The reason why is not because it makes everything taste that much better.
No.
A much more important reason.
LESS DISHES!
I think most people dislike baking because of all the clean-up involved. The end results are always worth it, but the clean-up is for the birds.
Use your blender my friend. Easiest clean up ever. Add hot water and a squirt of dish soap to the blender and blend on high till it’s sparkling clean. Thank me later!
I am creating this recipe with the assumption that you already have cooked sweet potatoes on hand. If you don’t, cook 1-2 sweet potatoes at 400º for about 35-40 minutes, or until you can pierce it with a fork easily. Let cool to make it easier to handle. You will need 1 cup of sweet potato for the brownie recipe, and remove the skins.
You could probably also sub in canned sweet potato or pumpkin and it will all still work. The chocolate flavor is clearly the star of the show. The vegetable’s responsibility is to keep the brownie rich and gooey.
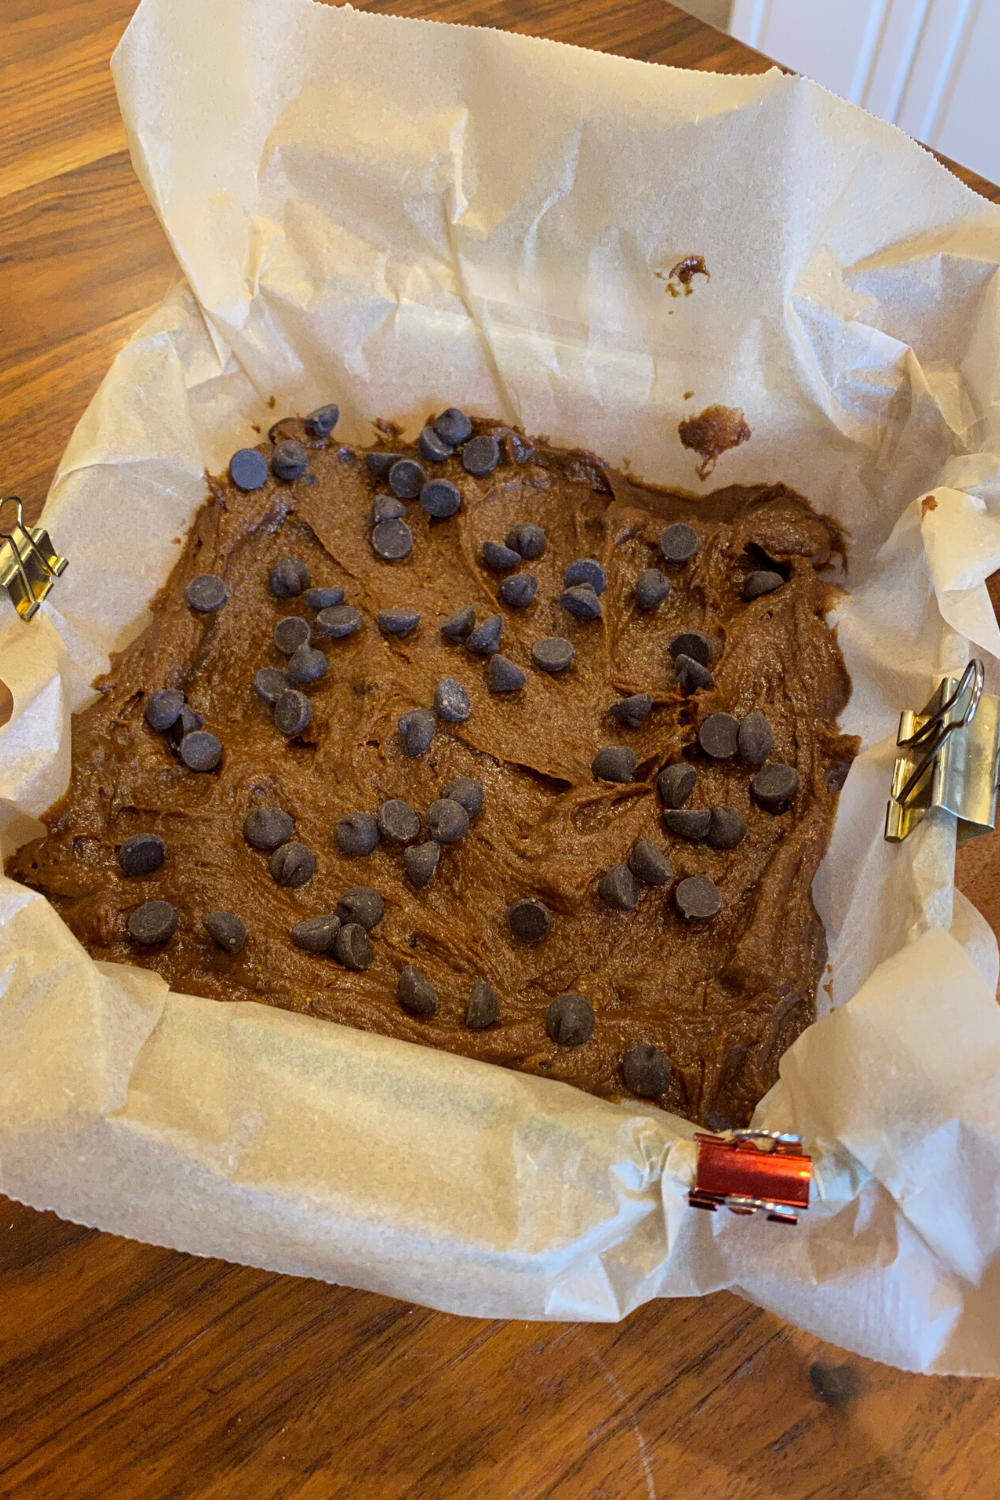
Another cooking hack you need to notice. Keep a bunch of binder clips in your kitchen. I use them to secure the parchment paper to pans when I’m working with them. It’s like having an extra set of hands. (way better than kids who are really just there to lick the bowl when we are done.)
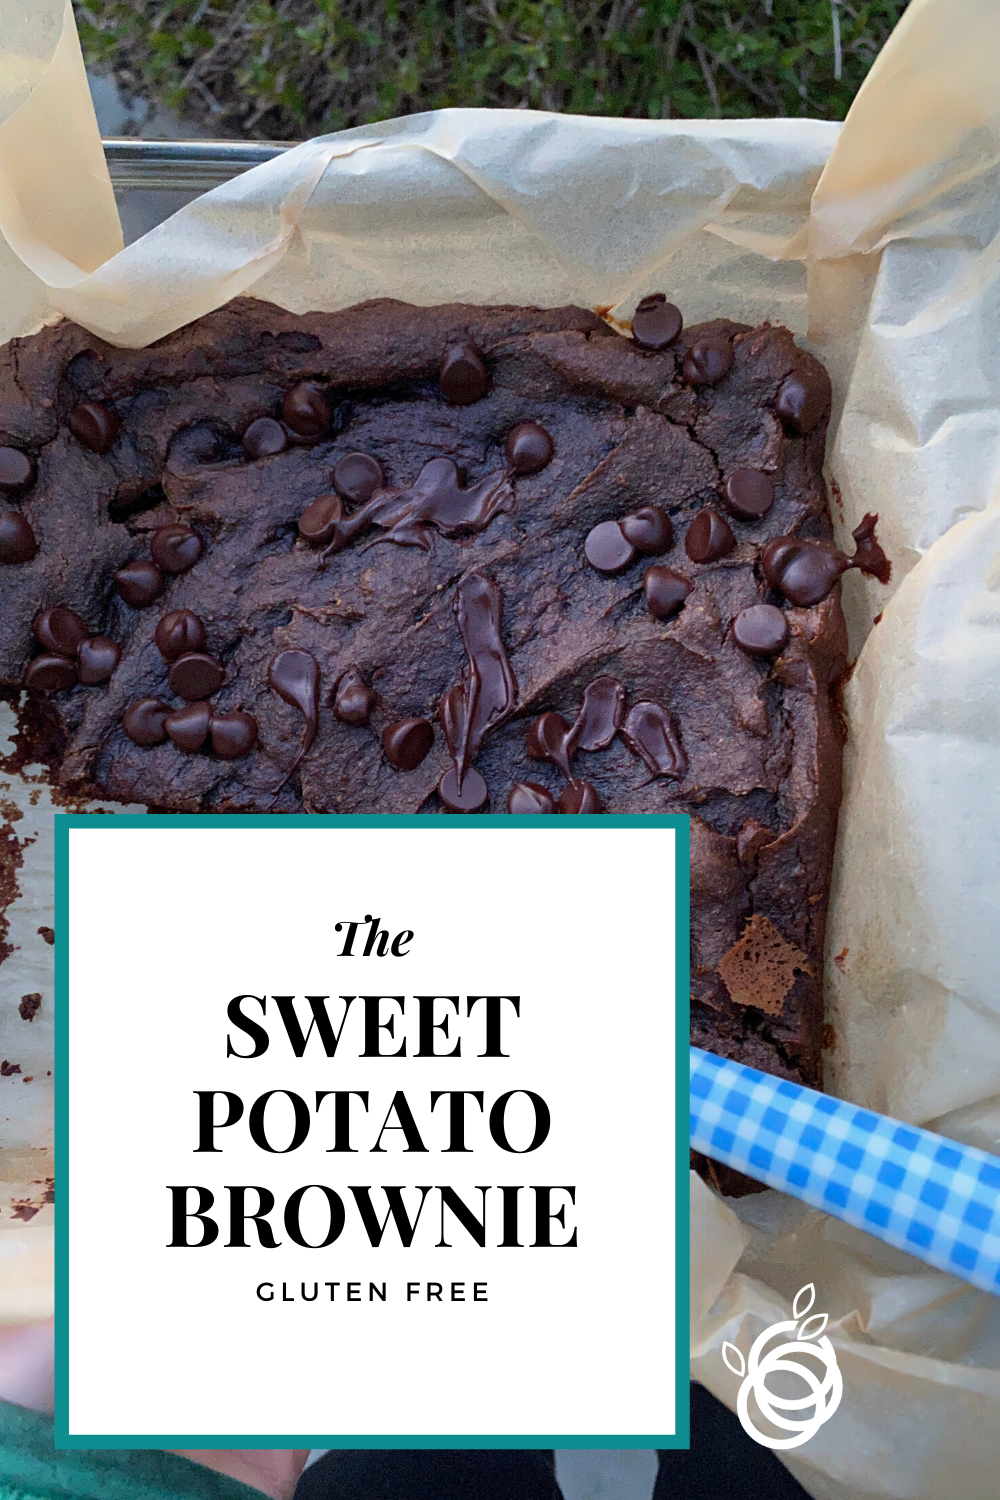
Thanks for reading friend. Please share this post or pin the image below. Thank you and enjoy!

Now more than ever, it’s important to learn these natural cold and flu-fighting foods to help support your health. While I take care of my immune system year-round through diet and lifestyle, when my kids get sick or I feel a tickle in my throat I often turn to a few key foods for extra support.
Isn’t it wonderful that we can eat our way into better health? We can even strengthen our immune system while enjoying delicious plant-based foods and beverages. I love that!
Do you know why a particular food supports the immune system? The simplified version is that foods high in antioxidants, like vitamin C, E, and A help because they reduce free radical damage which can damage all cells in the body, including all of the cells used by the immune system. So, the key is to reduce the damage so the immune system can work at full capacity.
Since there are a lot of natural cold and flu-fighting foods that support the immune system, I find it is best to pick the foods that have antioxidant power AND that I like the taste of. That way I am excited to take my “medicine”. If you missed the first post in this series about boosting your immune health, make sure you read 5 Ways to Boost Your Immune System.
Now for the fun part, I am going to share with you my absolute favorite antioxidant foods because they taste amazing to me, they are cost-effective and they are SIMPLE. I hope you find one that gets you into the kitchen to discover the healing benefits of plants.
Here are the antioxidant superstars that I prefer!
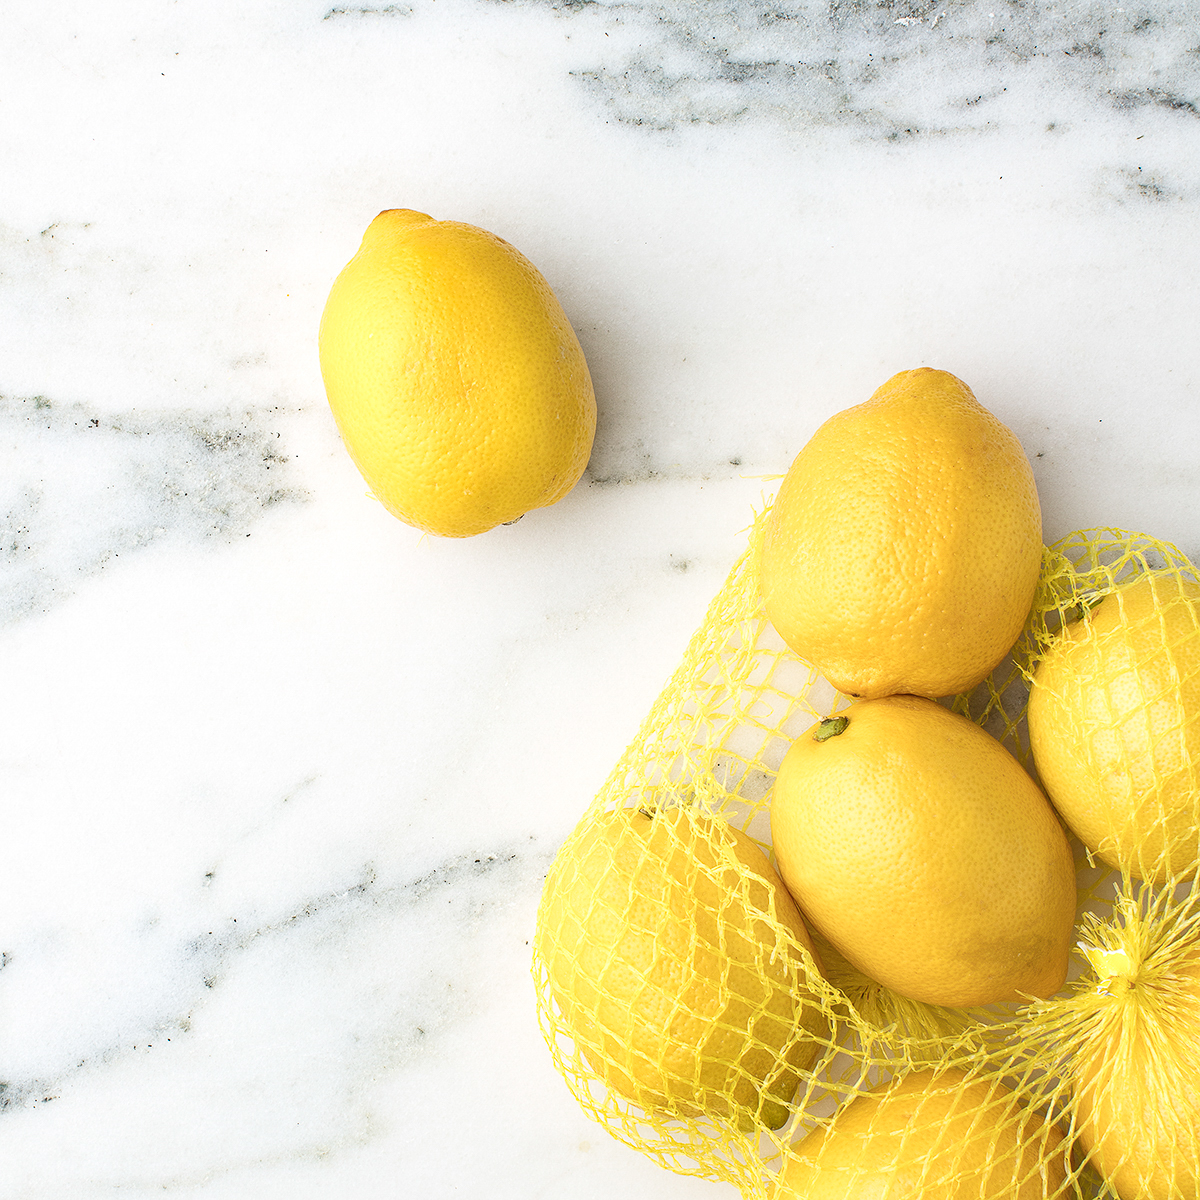
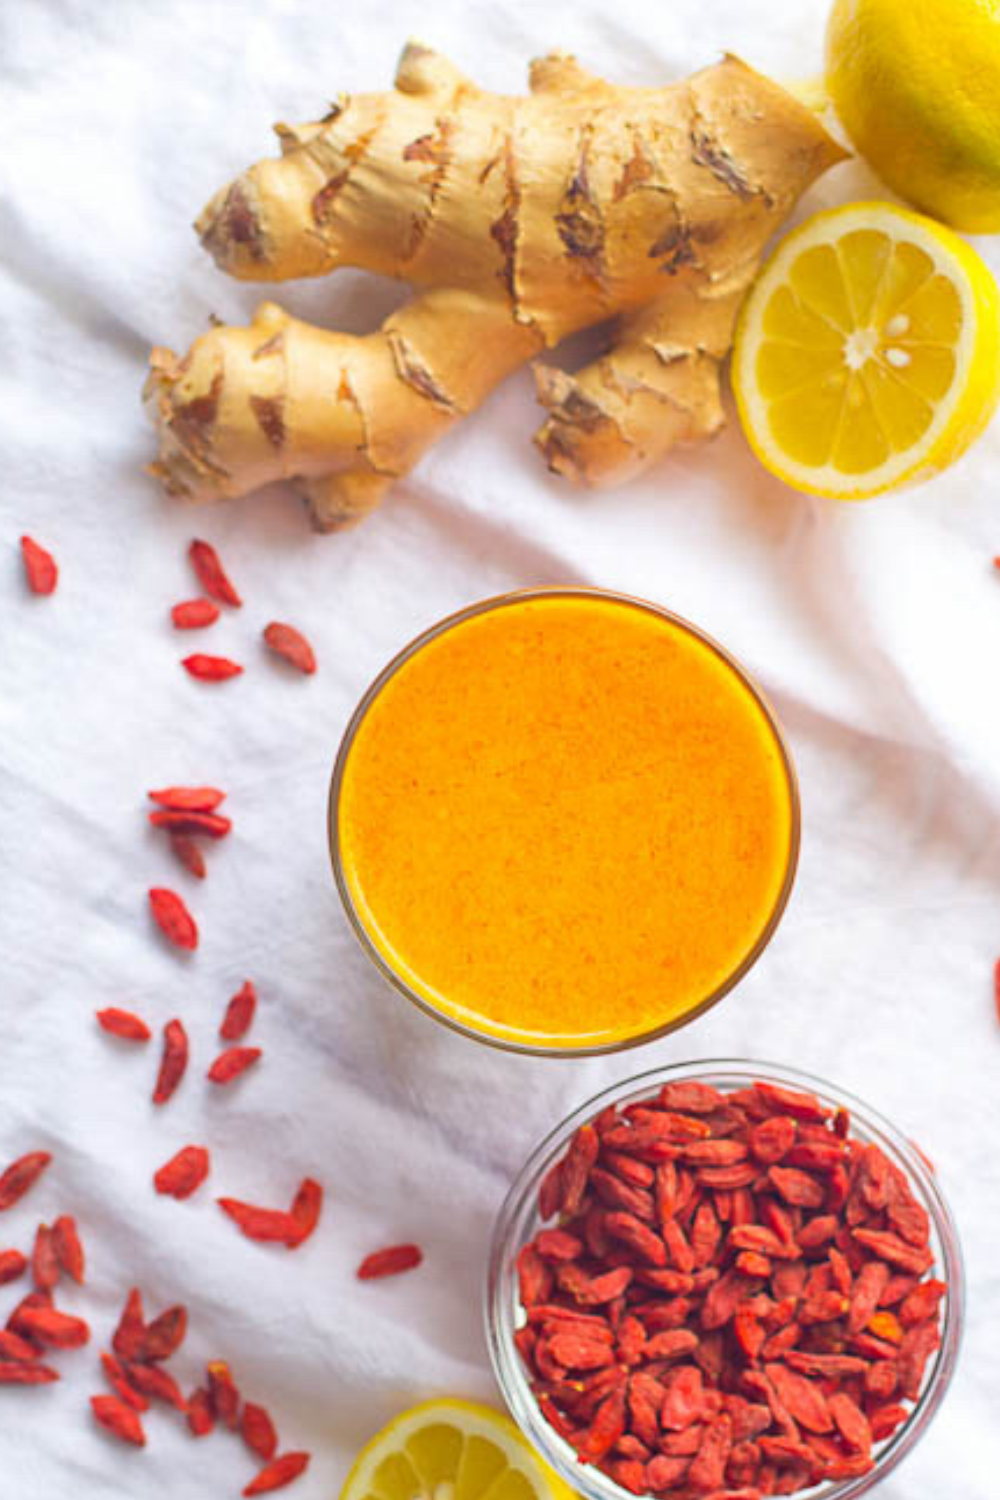
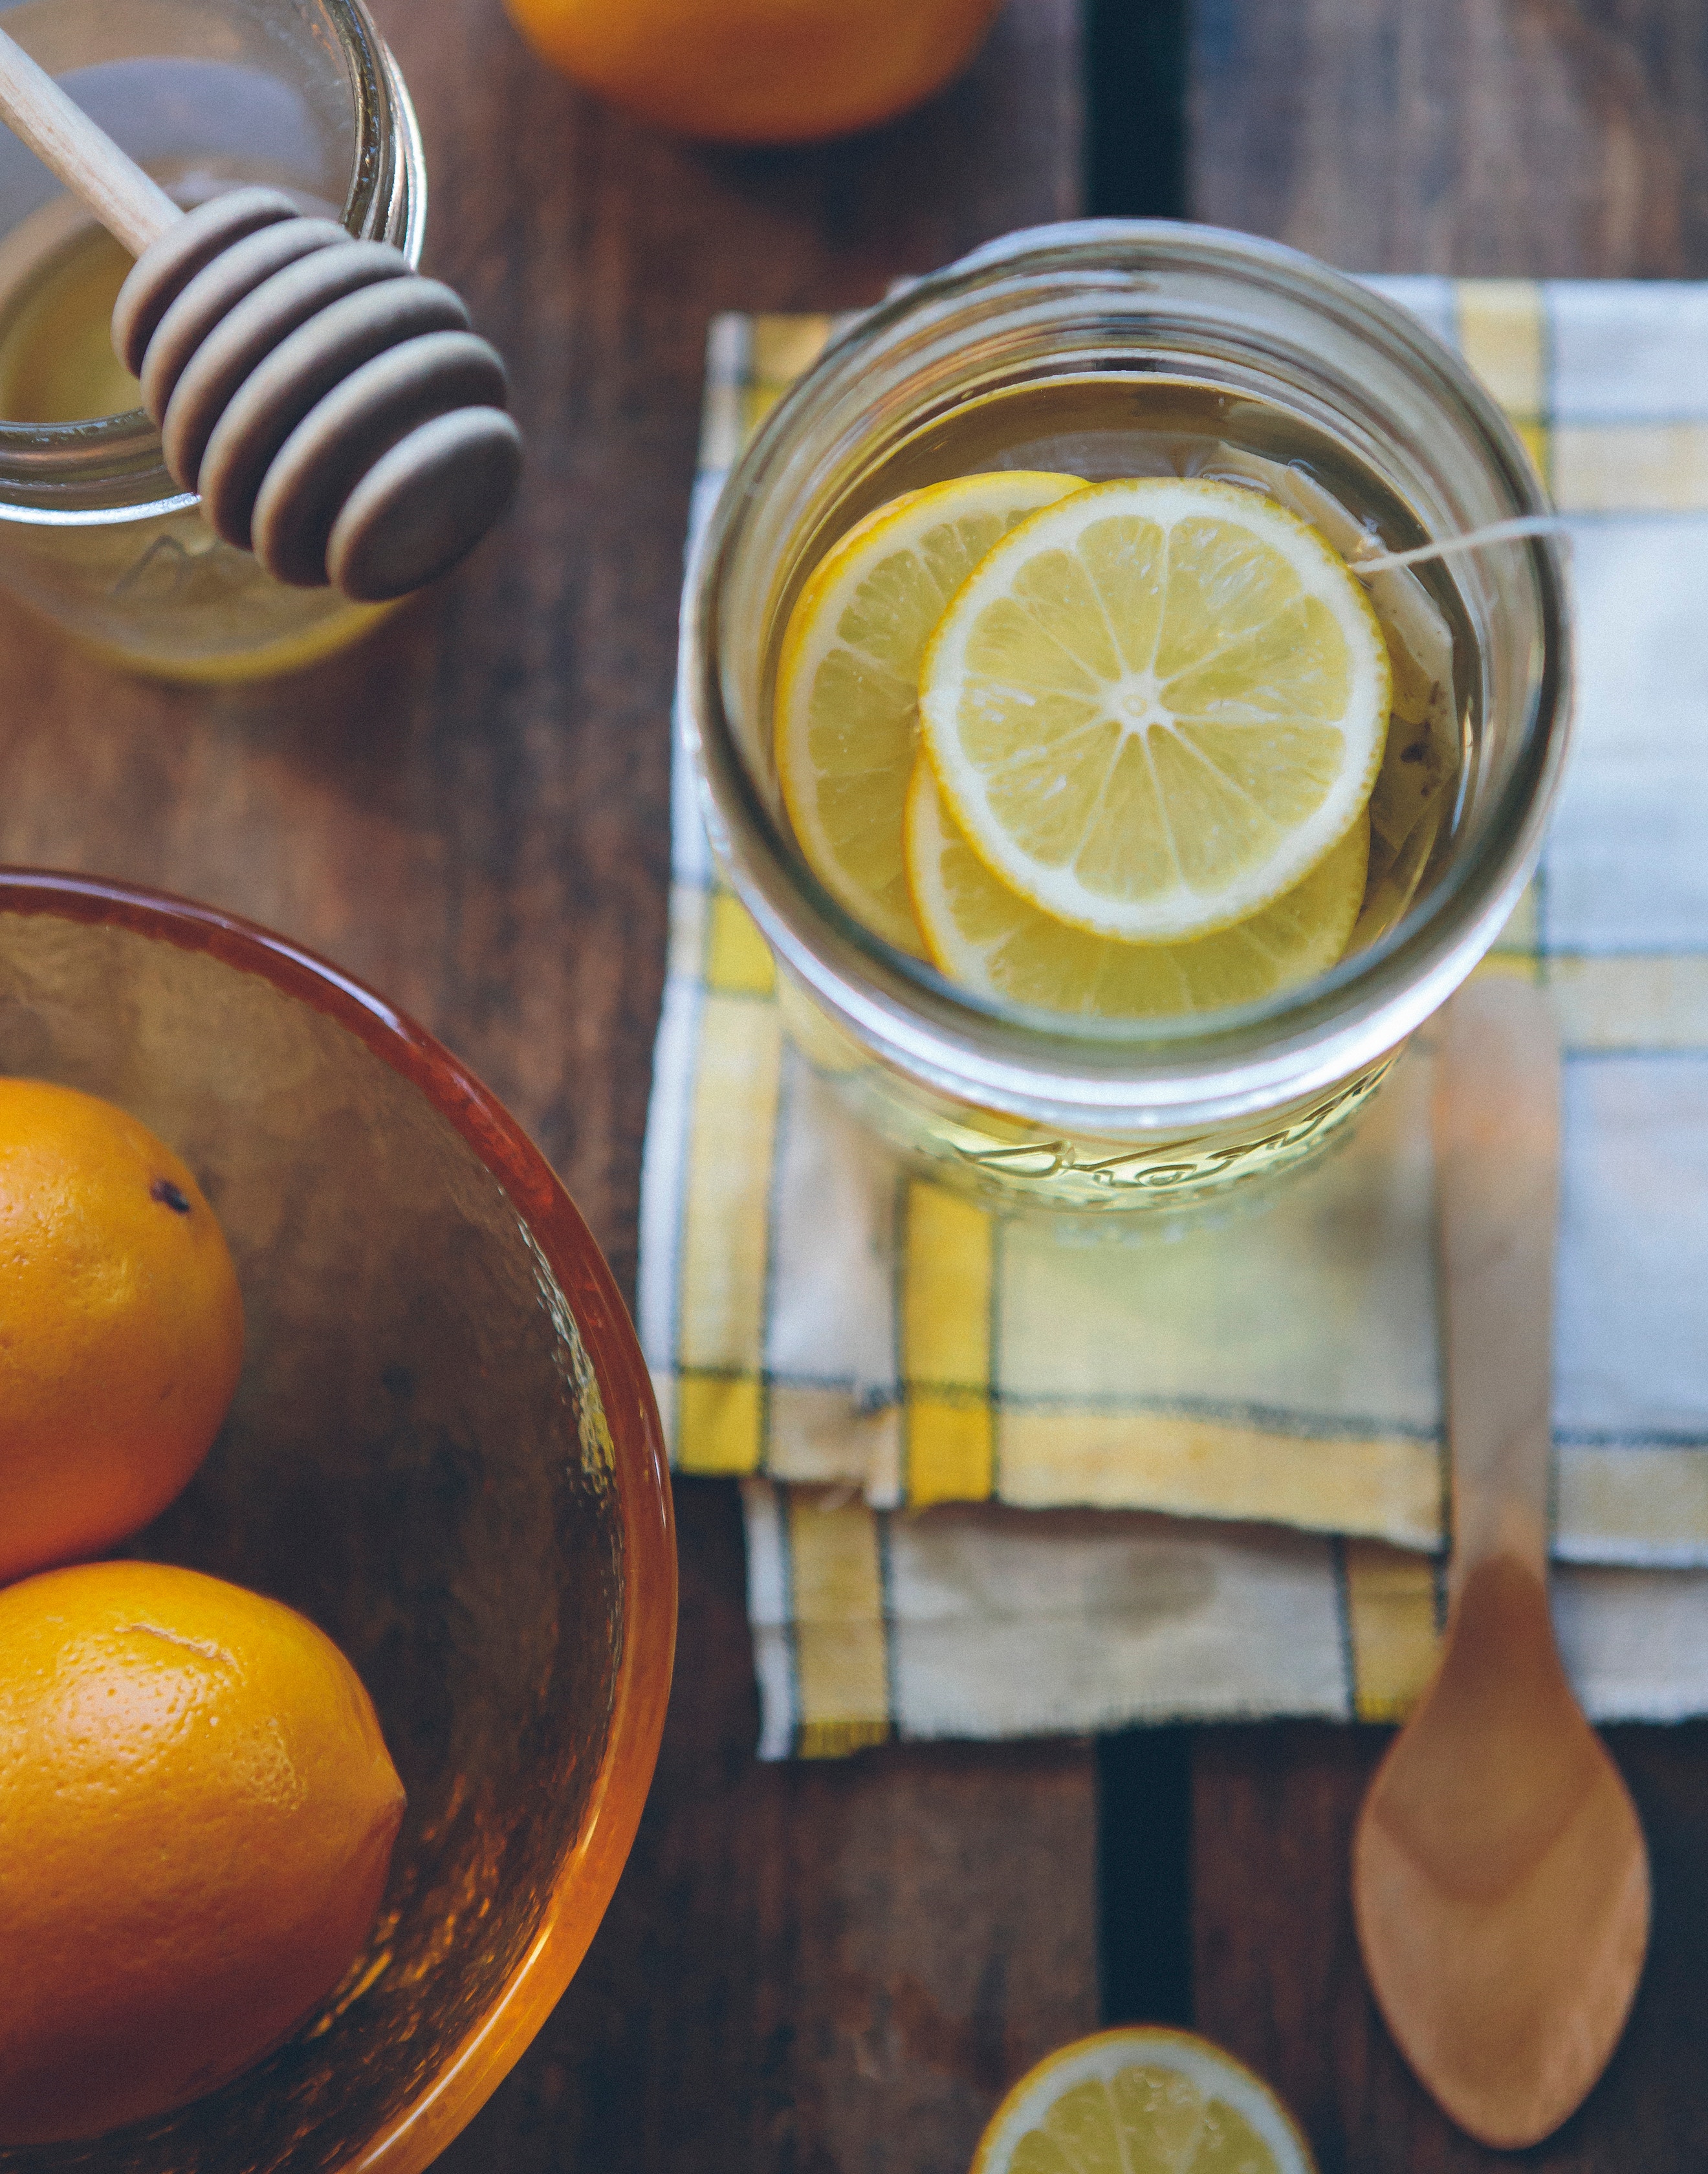
Lemon is packed with vitamin C and delivers around 90% of the recommended daily value – it’s like taking a supplement. That is so impressive to me. My favorite way to enjoy lemon is sipping on a warm mug of lemon water to start my day- it is such a comfort. And an added bonus is that it preps your digestive system for breakfast. That’s a win-win. Also, you can drink it any time of the day of course, and I find that adding a few slices in my water bottle is a delightful way to get even more Vitamin C in.
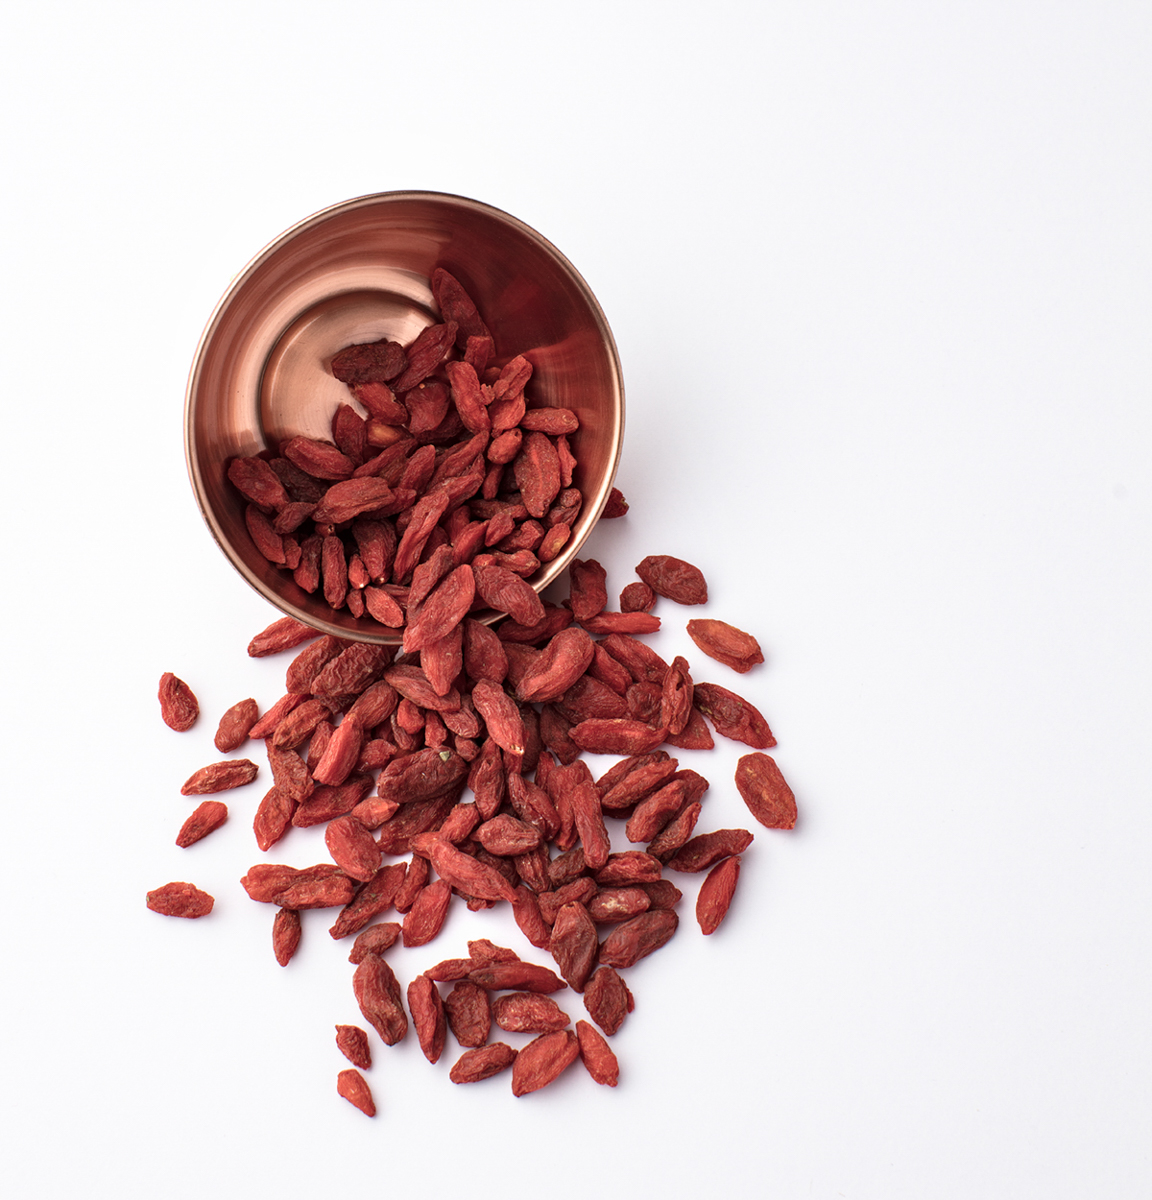
Goji berries are also antioxidant superstars and have been an important part of Chinese medicine for 5,000 years for good reason. They are rich in antioxidant vitamins C and E as well as B vitamins. Not only do I love that they taste great and support my immune system but they are known to be great for skin health and anti-aging. Just another reason to give them a try.
I like to add these to my oatmeal or to a smoothie. I also like to make tea by adding a 1/4 cup of berries to one cup of boiling water. Let it steep for at least 5 minutes and drink the tea hot or chill to make iced-tea. Once the tea is brewed you can eat the plumped up berries…which are also a complete protein source! These are the goji berries in my pantry.
I bet you have heard about how anti-inflammatory ginger is. That is because of its high antioxidant levels. Antioxidants reduce inflammation because they reduce damage. Ginger also improves circulation and soothes the digestive tract, so it is extra supportive if you have any tummy trouble.
My favorite way to enjoy ginger is making tea, noticing a theme yet? I like warm, cozy drinks! I drink a mug at least once a day, or more if I am already under the weather. My kids like it too….with a spoonful of raw honey.
Here’s how to make it:
Cut off 2” of ginger and slice into flat slivers.
Add 2 cups of filtered water in a saucepot, plus a cinnamon stick.
Bring to a simmer for 15 minutes.
Strain, add in the juice of half a lemon. Sweeten with a little raw honey if needed.
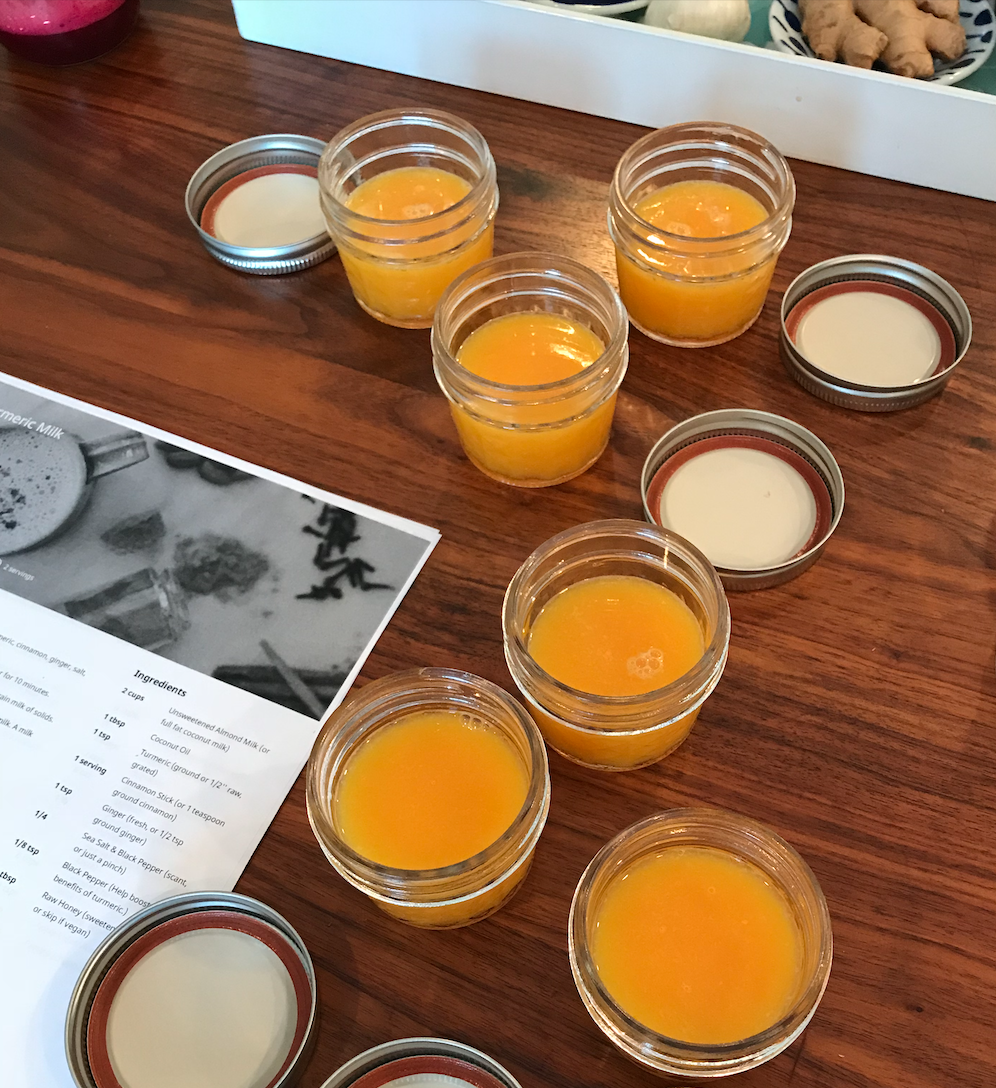
Have you heard of golden milk? Its key ingredient is another anti-inflammatory super root –turmeric. Like ginger, its immune-boosting ability lies in its high antioxidant levels. When you consume it fresh you will want to add a little black pepper to help activate it….don’t worry, you can’t really taste it!
In addition to being one of the best natural cold and flu-fighting foods, turmeric also has anti-cancer properties. It has the cancer-fighting compound curcumin, which has all those anti-inflammatory and antibacterial benefits.
Did you know that mushrooms are cancer-fighting superfoods? They are well documented to slow tumor growth and support the immune system in all of its functions. Even white button mushrooms are beneficial. But for an extra boost give some of the medicinal mushrooms, which have been in use since 3,000BCE, a try:
Their anti-inflammatory properties make them another natural cold and flu-fighting food. One way I love to incorporate these mushrooms varieties is by drinking one of Four Sigmatic’s elixirs warmed up in my favorite mug.
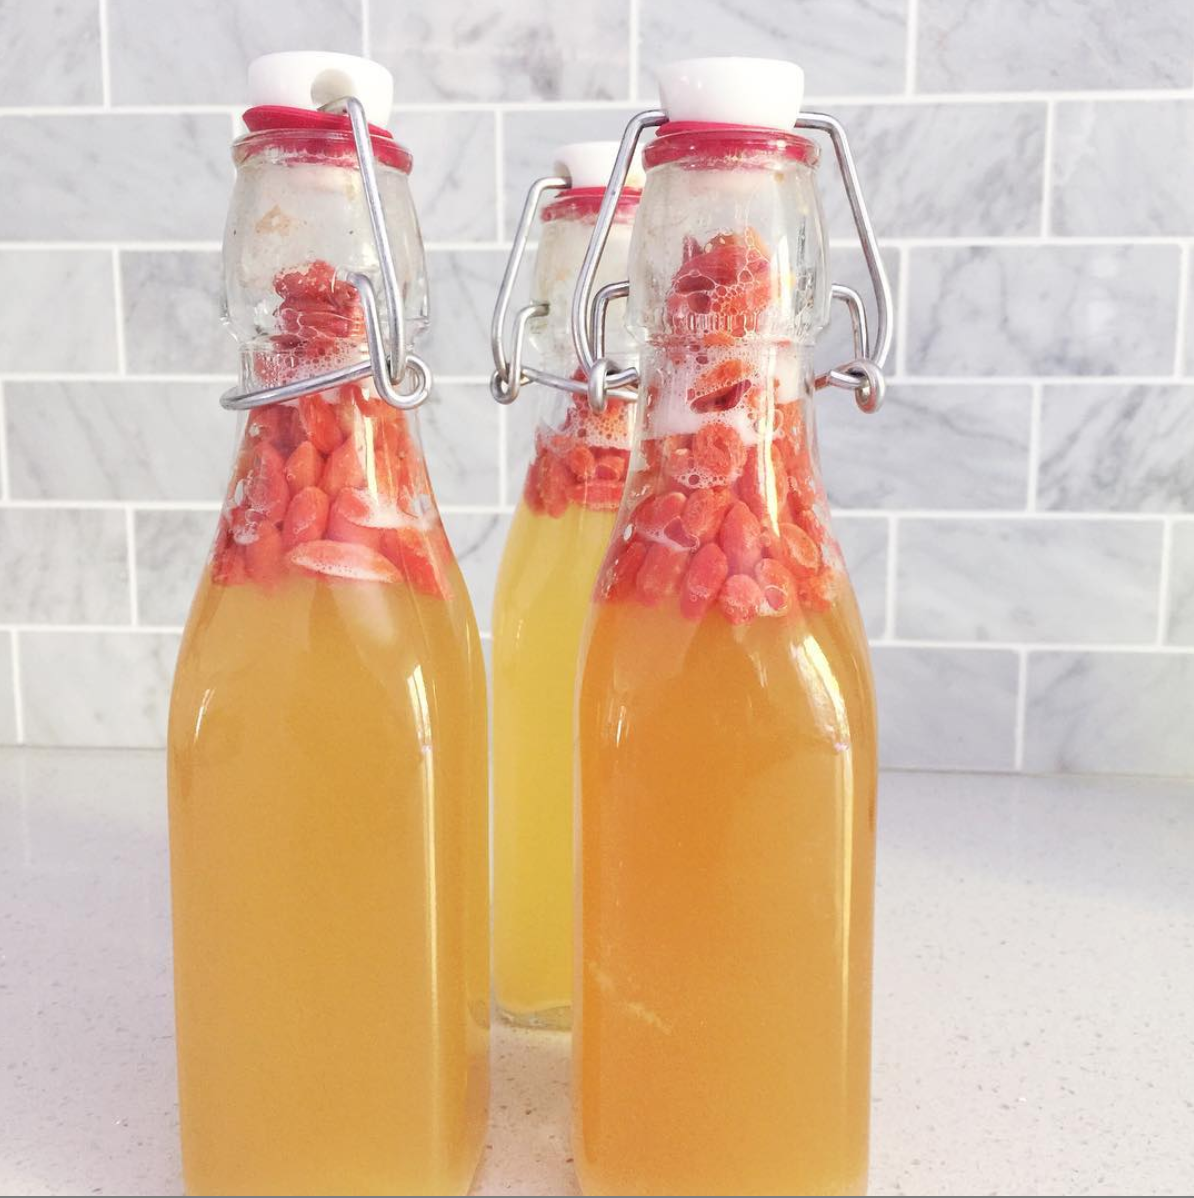
Kombucha is a fermented beverage that supports better gut health. That means it also supports your immune defense system! We make our own, but there are lots of good ones on the market. Look for ones low in sugar and be mindful of the serving size. I like to make a batch flavored with goji berries, and then I eat the berries for a natural energy boost!
This fizzy drink is full of probiotics, as the tea and sugar ferment, it creates a healthy bacteria that are good for the gut. Start with a simple one that is ginger or apple flavored. My kids love it too!

Water isn’t full of antioxidants but hydration is essential for our bodies to function efficiently. Dehydration can compromise your immune system by reducing the volume of lymphatic fluid, which circulates white blood cells and cleans out toxins. Dehydration also leads to inflammation and any time we are inflamed the immune system is taxed since it is called on to do damage control.
Perhaps there is a reason I am drawn to hot beverages with medicinal foods…after all I think our bodies know what we need and hydration is vital, especially for healthy immune function. You can eat all the natural cold and flu-fighting foods, but if you are dehydrated, your body’s immune system will still be compromised.
Not technically a food, but still so important. And here’s why.
Most of us don’t think about consuming air as we think about consuming liquids and foods, but we should. What comes in with our air affects our health and our immune system. When we breathe in toxins such as chemicals and mold, our bodies respond with inflammation which, over time, taxes the immune system.
I am a huge fan of filtering my indoor air and I personally use Air Doctor. It is SO quiet and I feel so much peace of mind knowing that their filter is certified to remove mold spores (100%), smoke, dust, cat and dog dander, virus, bacteria, and pollen; and the carbon filter will reduce many VOC’s such as formaldehyde as well as many other odor/odorless chemicals.
It feels so good to support the health of my family too. I may not be able to get my kids to drink mushroom tea so knowing that the air they are breathing in is free from toxins and pollutants makes me feel like a good mom. You can get your own Air Doctor Pro and save $300 automatically when shopping with me.

_____________________________________________________________________________________________________________________________________
Now, I know even a small list can be overwhelming, so I want to urge you to pick the ONE thing that caught your attention from my list of natural cold and flu-fighting foods. What feels exciting to try AND is doable? This resource will be here for you anytime you want to add another one in, so no rush. Try what feels good to you and let me know if you have any questions. I am here for you…with a warm mug of medicine cupped in my hands.