I am a member of the Collective Bias®  Social Fabric® Community.  This shop has been compensated as part of a social shopper amplification for #CollectiveBias and its advertiser. #WalgreensOlogy
Tips for Under the Bathroom Sink Organization

Time for some spring cleaning everyone! Every March I tackle a few organizing challenges and up first is the bathroom. In my Organization Pinterest Board, I noticed one pin has over 5,000 repins- it’s an Under the Sink Organization pin. I had two thoughts about this. One, I wish all the traffic was going to my site, and two, why doesn’t my bathroom sink look like this?! Now is the time to clear out the clutter and restock with some new cleaning supplies from Ology, which is endorsed by one of my favorite organizations, Healthy Child, Healthy World. The Ology product line uses sustainable raw materials, doesn’t test on animals and uses a variety of natural ingredients.

Ology endorsed by Healthy Child Healthy World

Just a few weeks ago I bought my own Ology product- toothpaste. We buy the same natural toothpaste but I noticed the Ology brand next to my usual one. I compared the ingredients and they were nearly identical so I gave it a try. Turns out I like the Ology toothpaste, and the lower price. When I started my bathroom organization product, I decided to give the Ology cleaning products a shot. There’s just something satisfying about having all the cleaning things match too, don’t you think?

Walgreens Ology Shopping Trip

I have to say I had fun doing this shopping trip. As I went from the beauty aisle to get some Ology Castile Soap (for my homemade soap recipe) and then to the cleaning aisle, I was impressed with how many Ology products Walgreens now carries. It’s a line of products for those of us who are trying to avoid using products with parabens, phthalates, fragrances, triclosan and a few other nasty ingredients. They are safe for me, but more importantly, they help maintain my healthy home for the whole family.

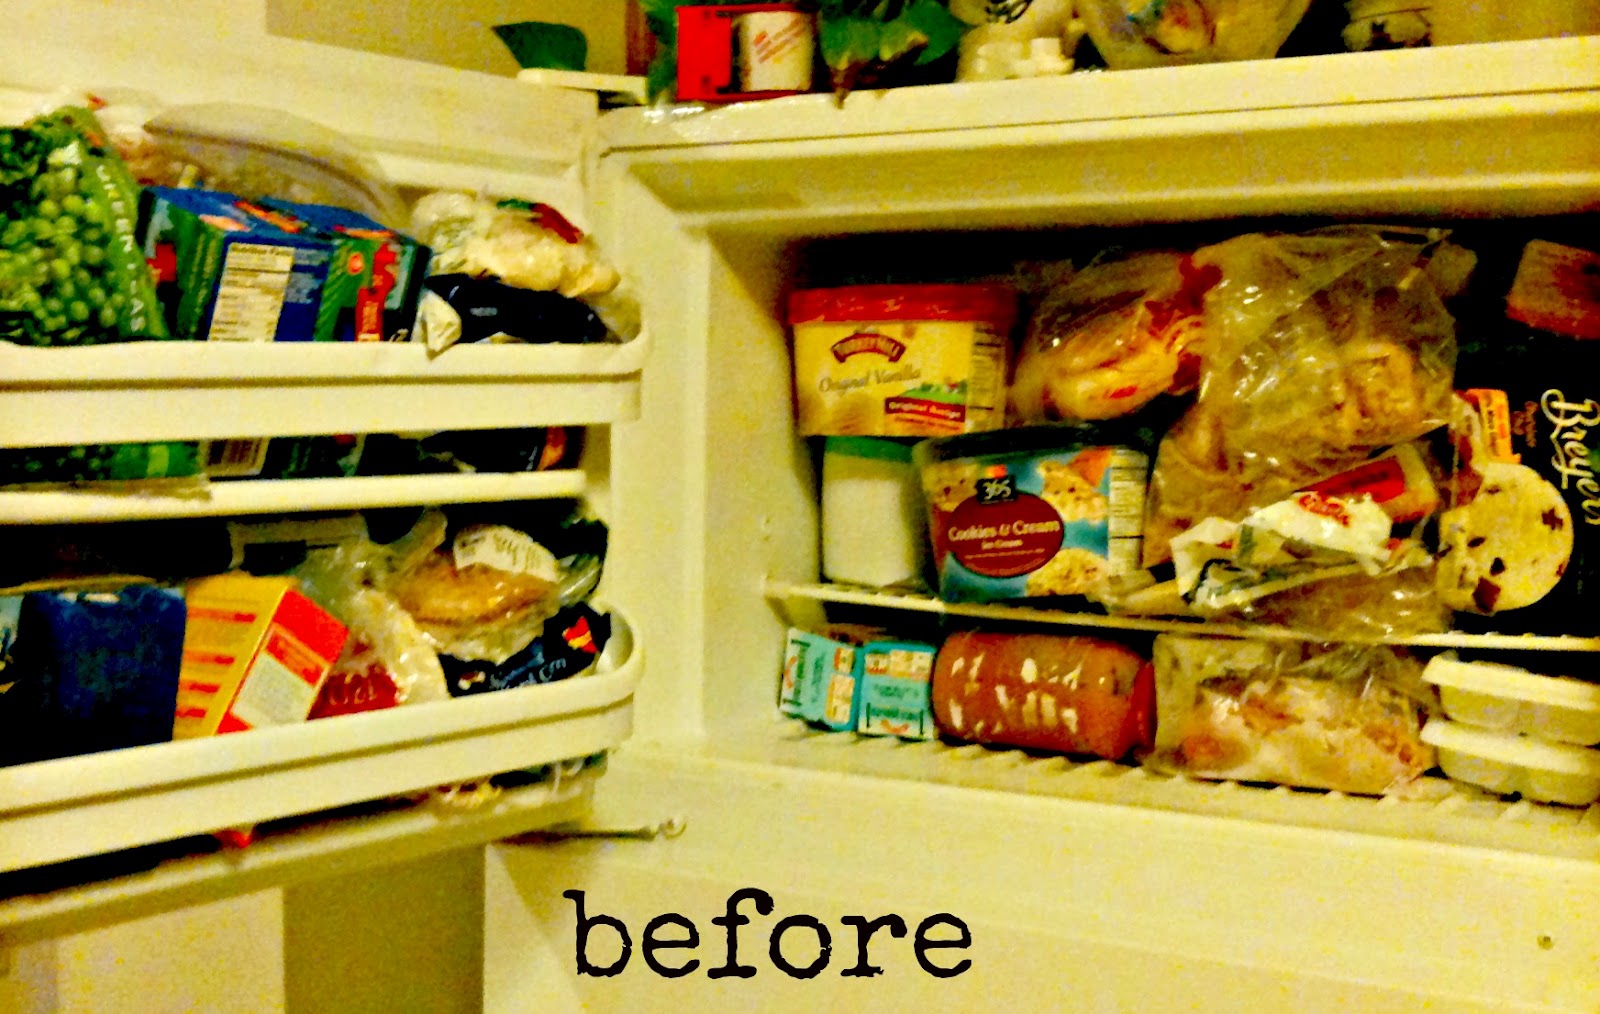
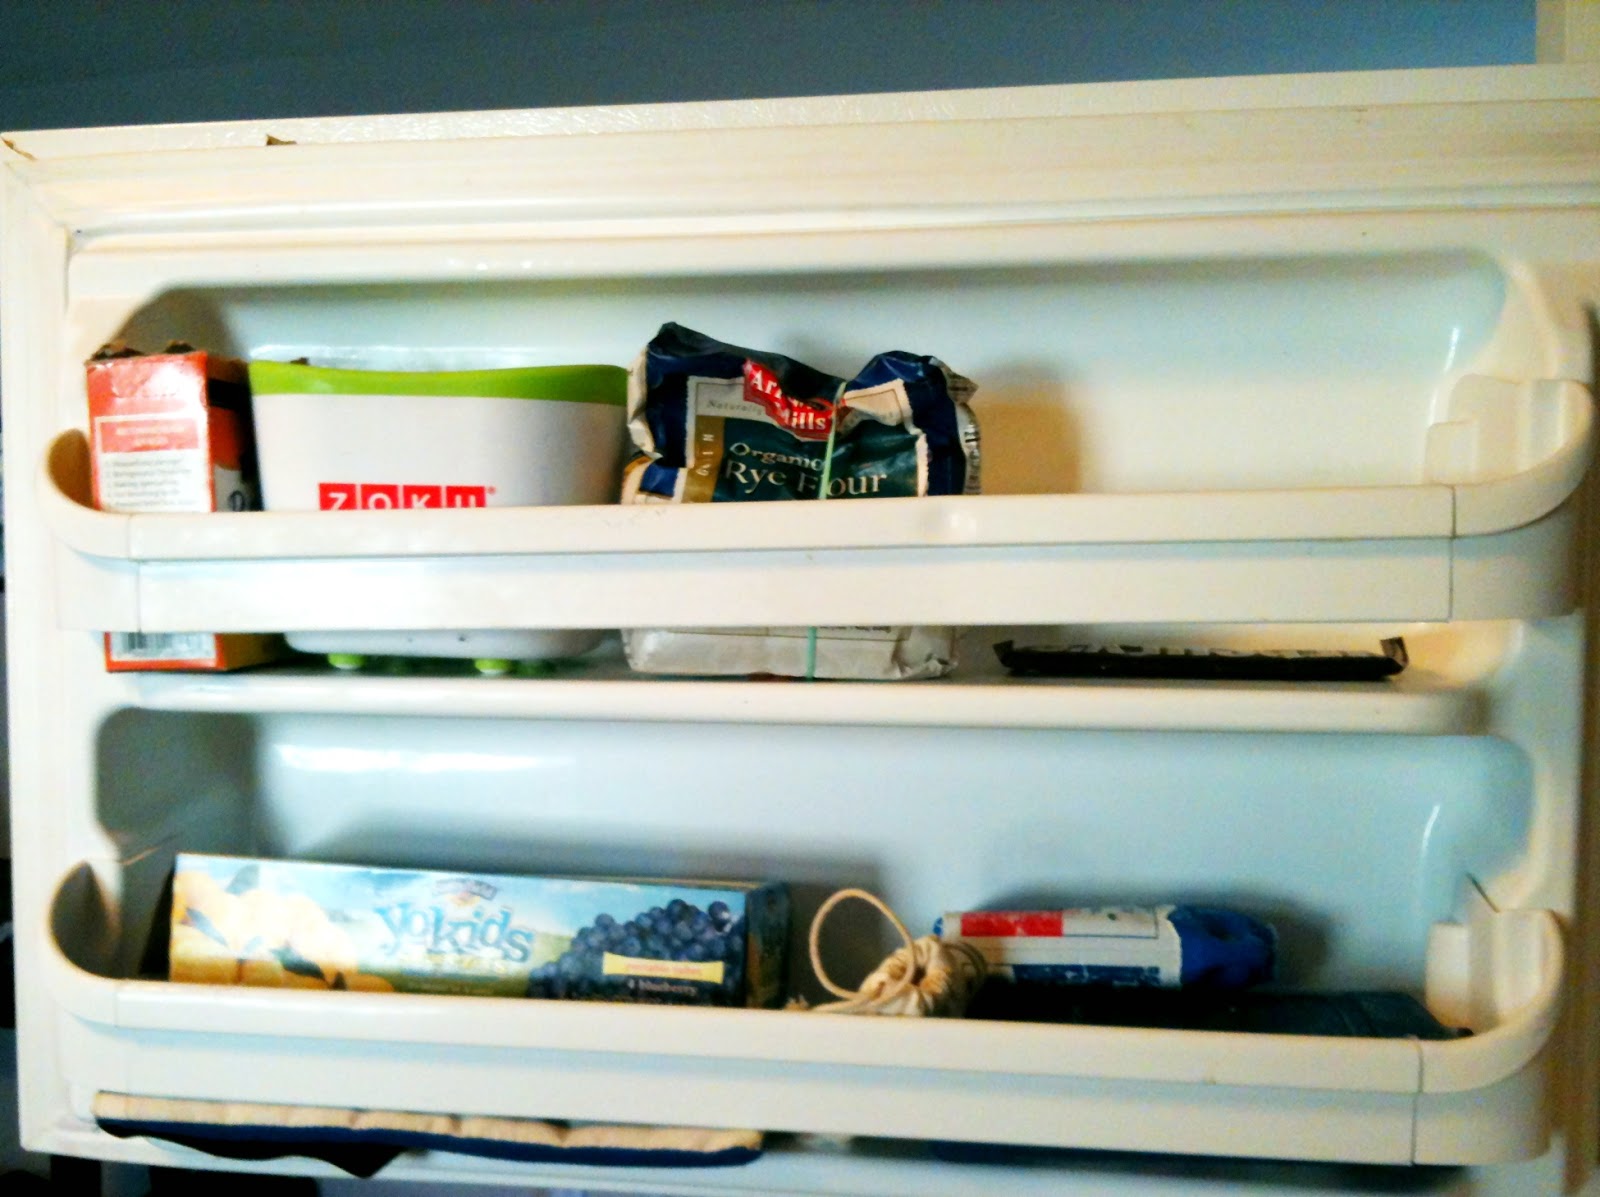
Armed with new cleaning supplies, in very cute packages, I started the big purge under the sink. It was a little scary down there and I was able to toss a lot of old cleaning supplies. If I hadn’t used it in six months, I decided it was safe to say it was time to get rid of it. I also found six empty spray bottles for creating my own cleaners. Clearly I had high hopes, but it’s just not something that I’m able to do these days. Once everything was sorted, cleaned and repurposed, it was time to set up a new system.

Create Cute Labels for Drawer Organizers

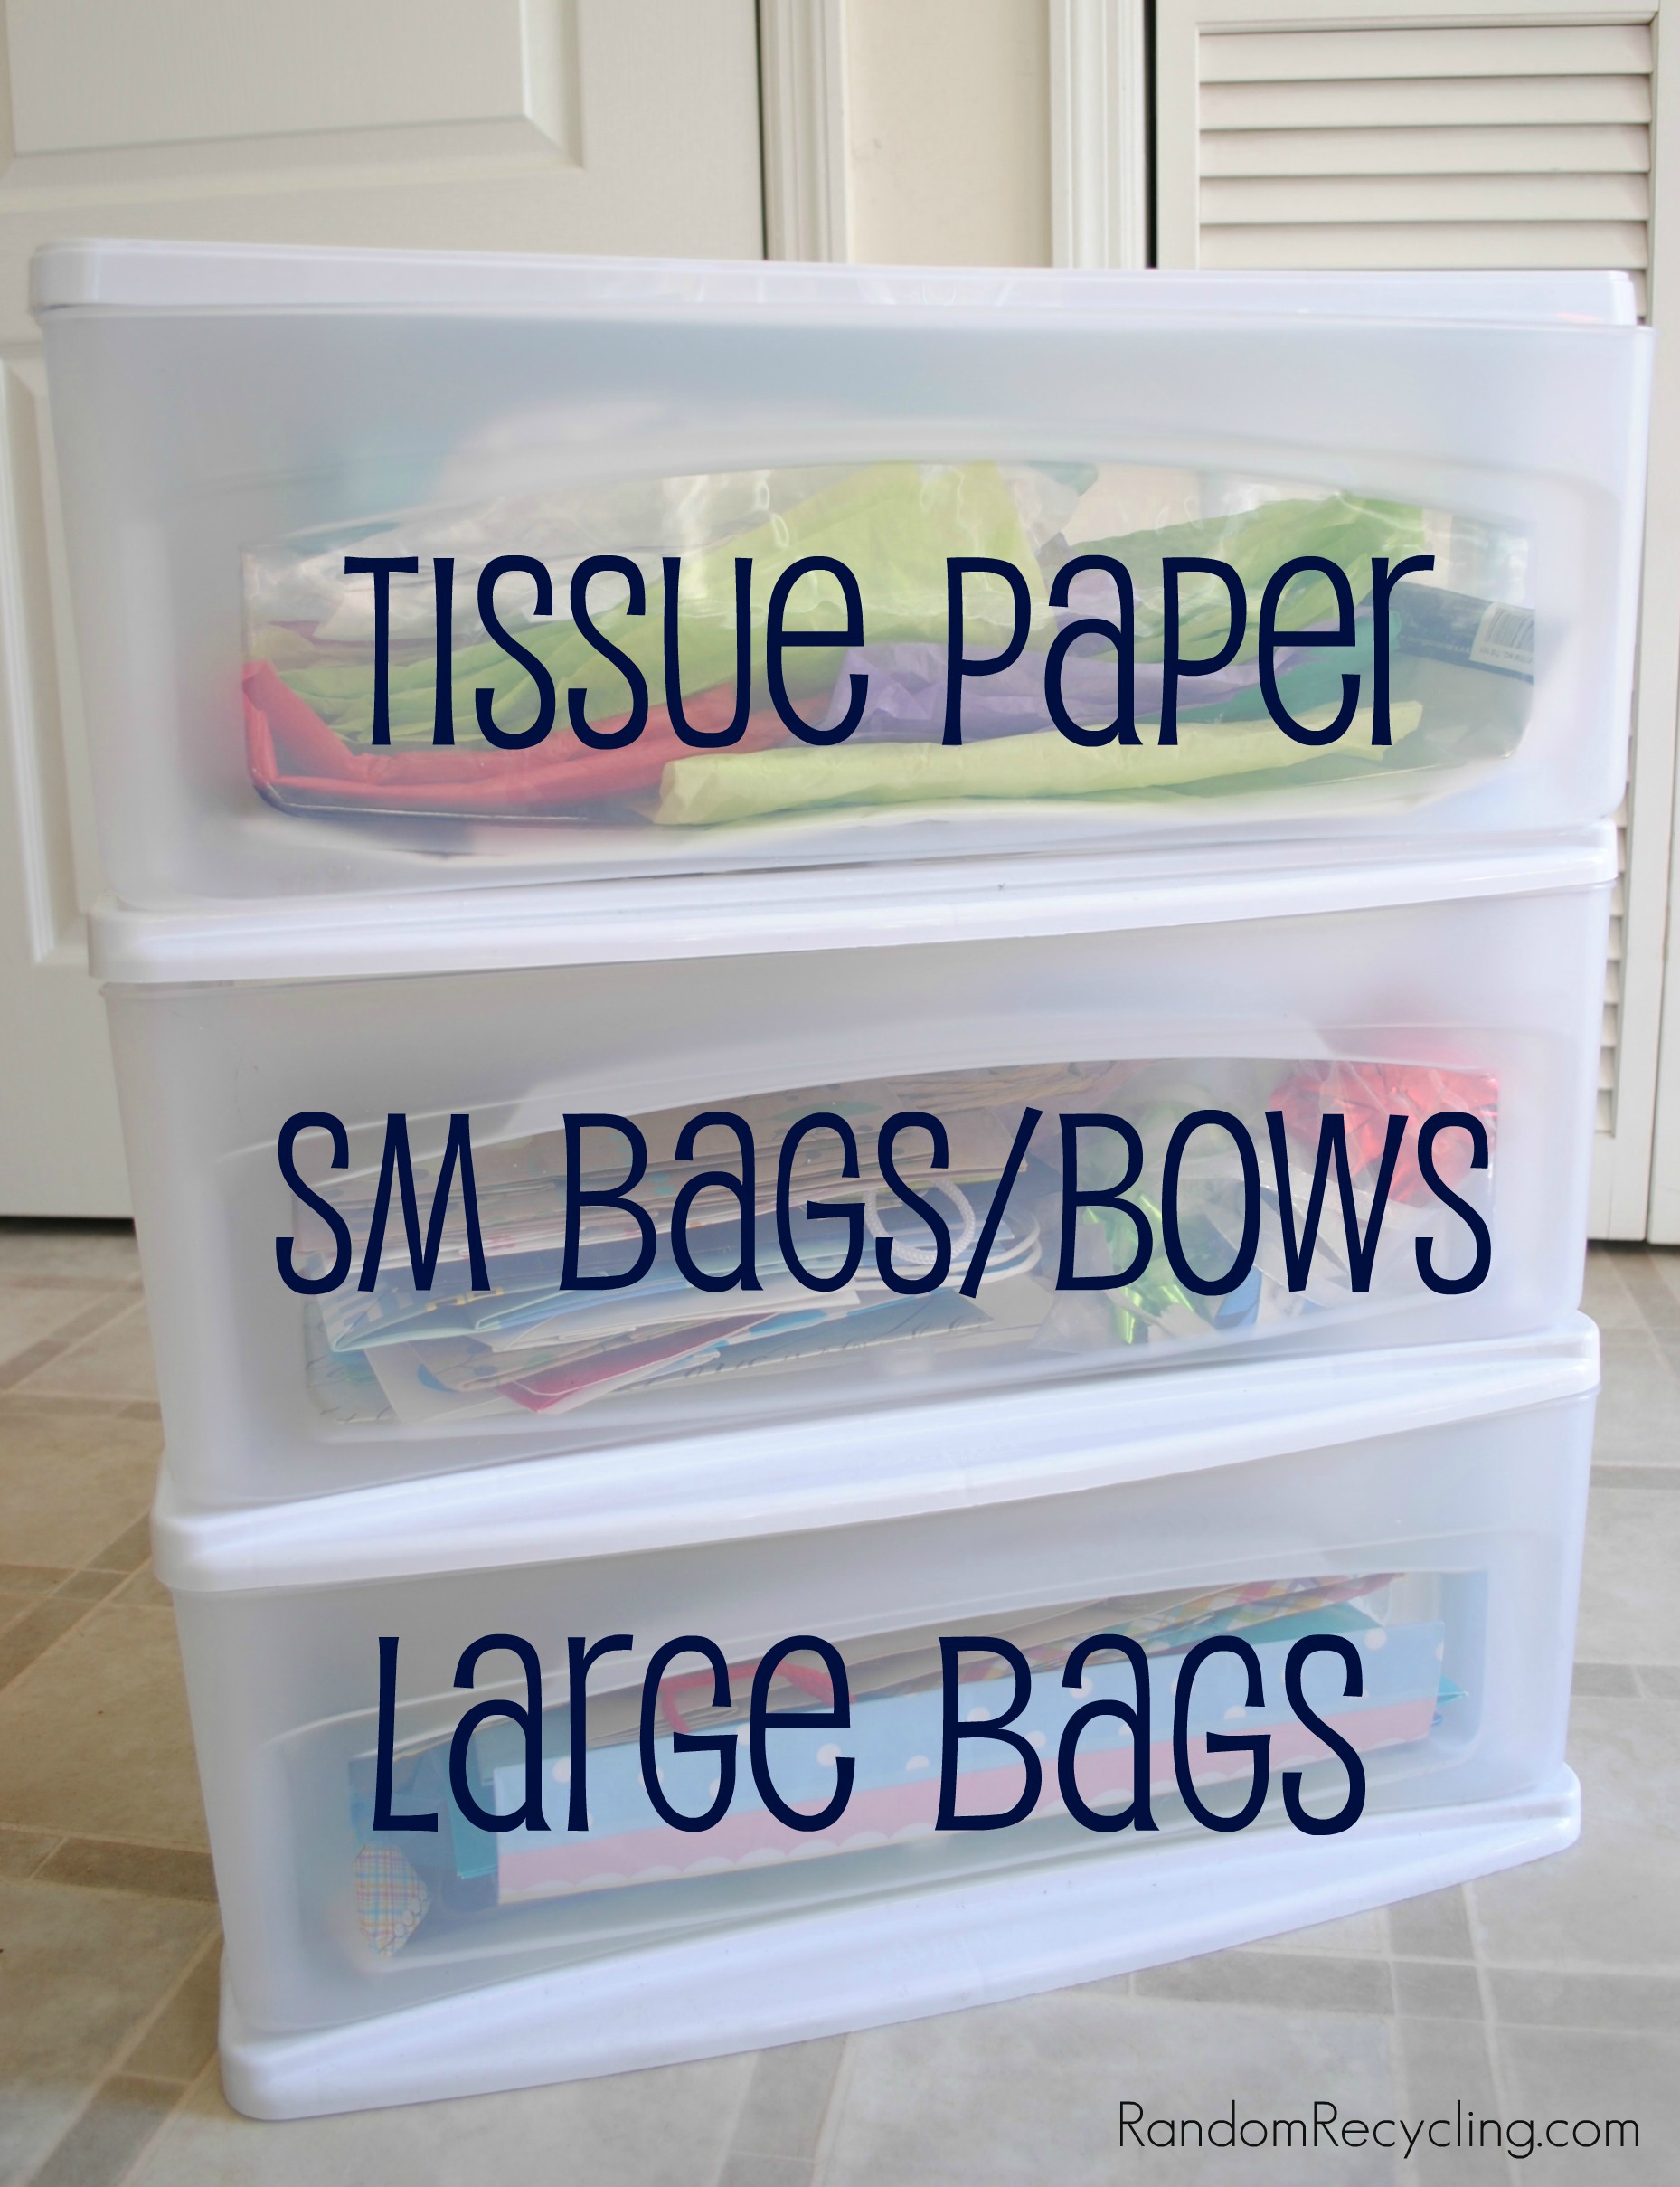
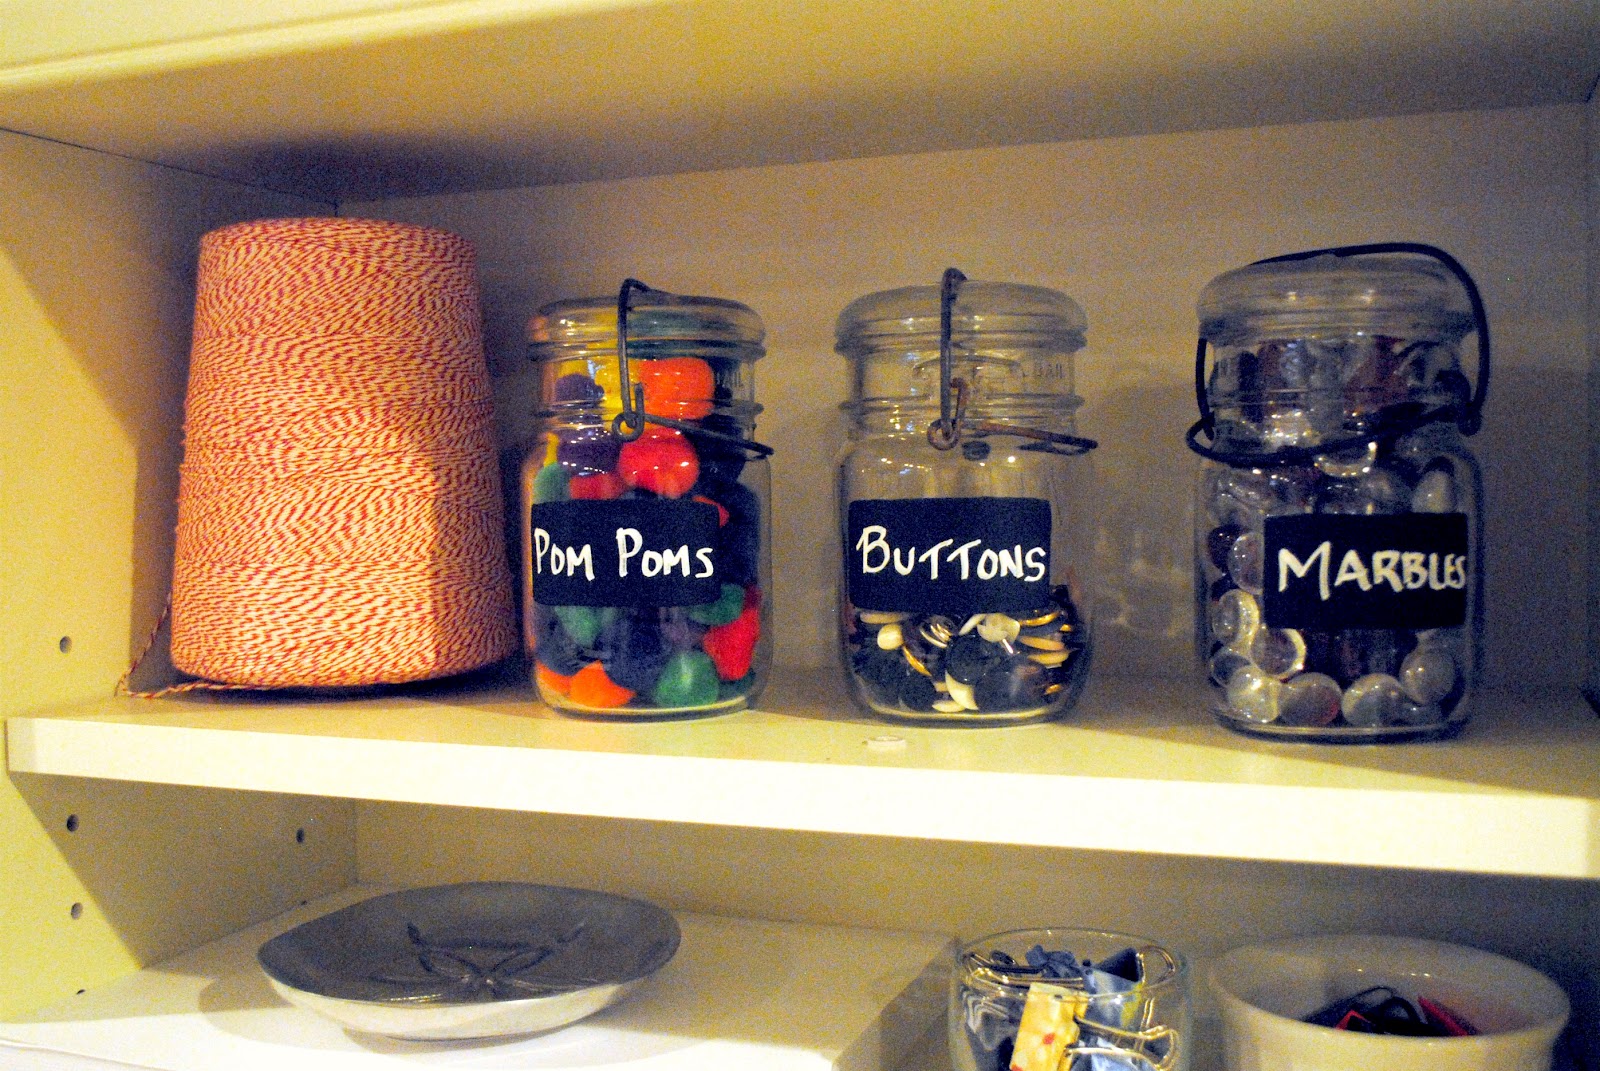
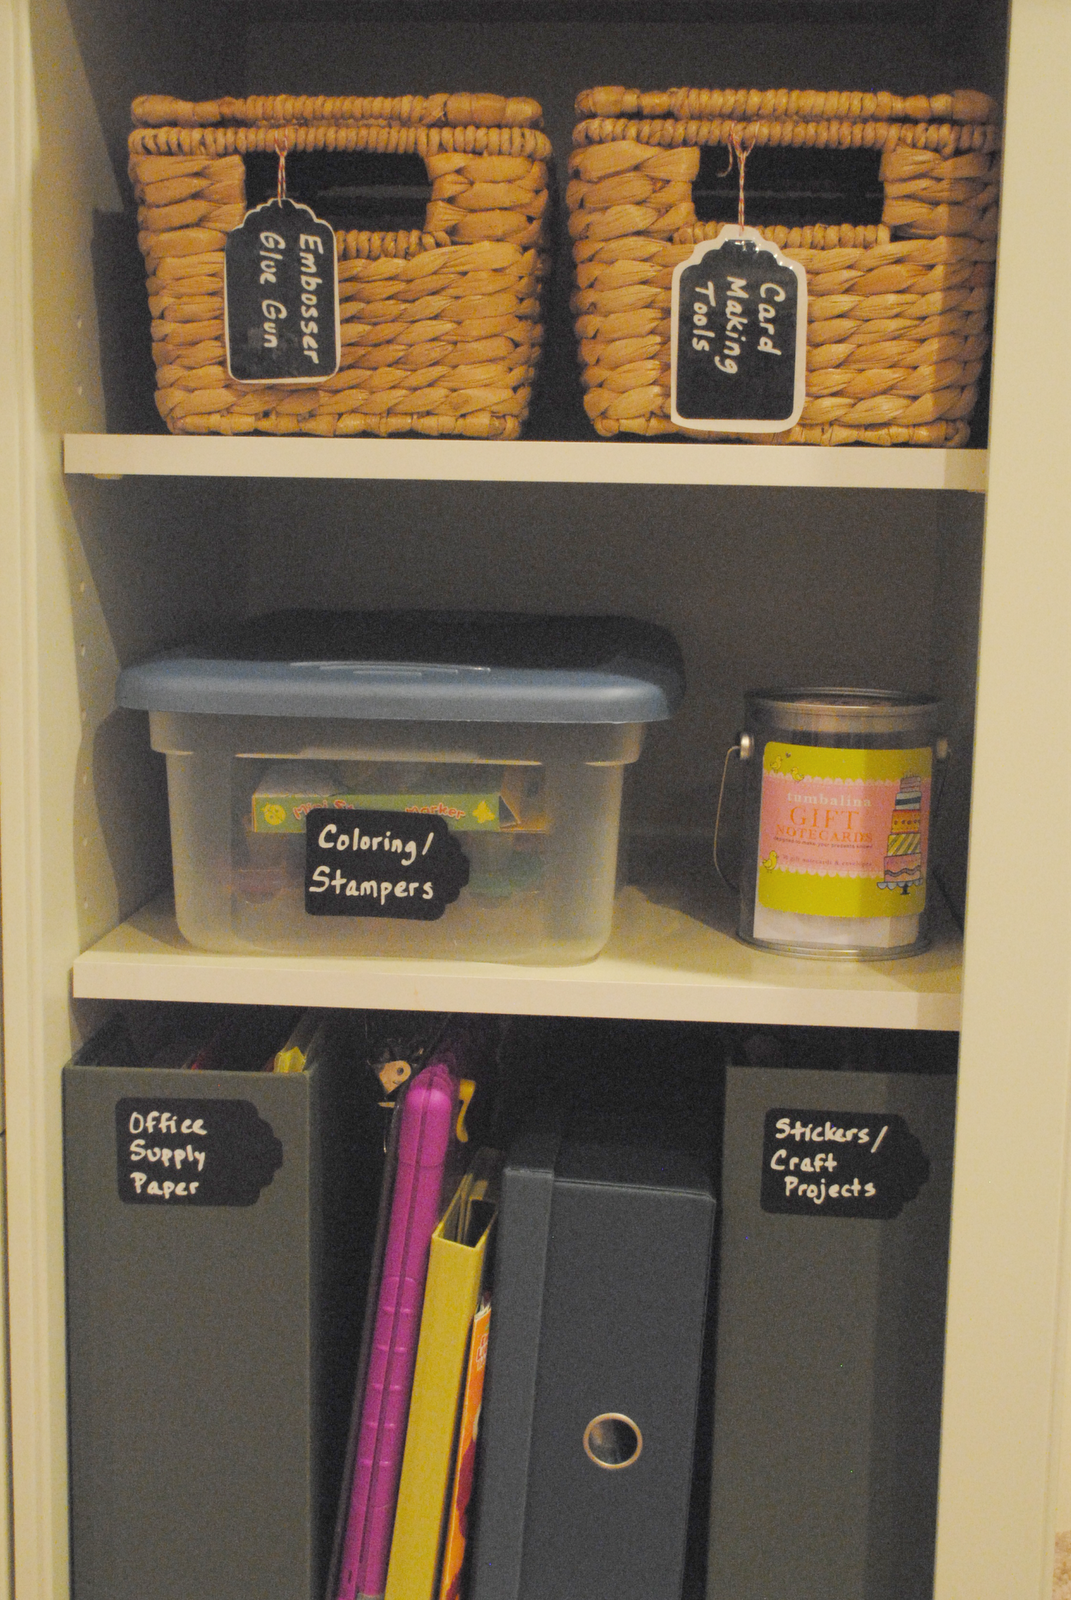
My advice for tackling an organization project, take the time to make it pretty. It may seem silly to make fancy labels, but I think the better it looks from the start, the more likely you are to maintain it. I made the labels above using PicMonkey and printed them out on sticker paper. You can also print them out on regular paper and laminate them with packing tape. The drawers fit so well and help use the space more efficiently. I think I’ll buy one more and label it Baby and include the wipes and a couple of diapers.

Label cleaning bottles from the top to easily identify them

The only tricky thing with having all your cleaning bottles match is you can’t see which is which when they are down low. Time for p-touch labels! I may move my all-purpose cleaner to the kitchen, but for now I like having all of them lined up. Yes, that’s how we Type-A people work.

Keep cleaning rags handy to wash the bathroom

The worst offenders under the sink were the towels and rags. I bought two drawers to contain them and I love how easy it is for me to reach for a rag when I need to spray down the bathroom after the three-year old goes potty by himself…and misses. If paper towels are more your thing, the Ology paper products are all tree free.

If you want to learn a little more about Ology, you can watch this fun YouTube video and get a quick flashback to Melrose Place…

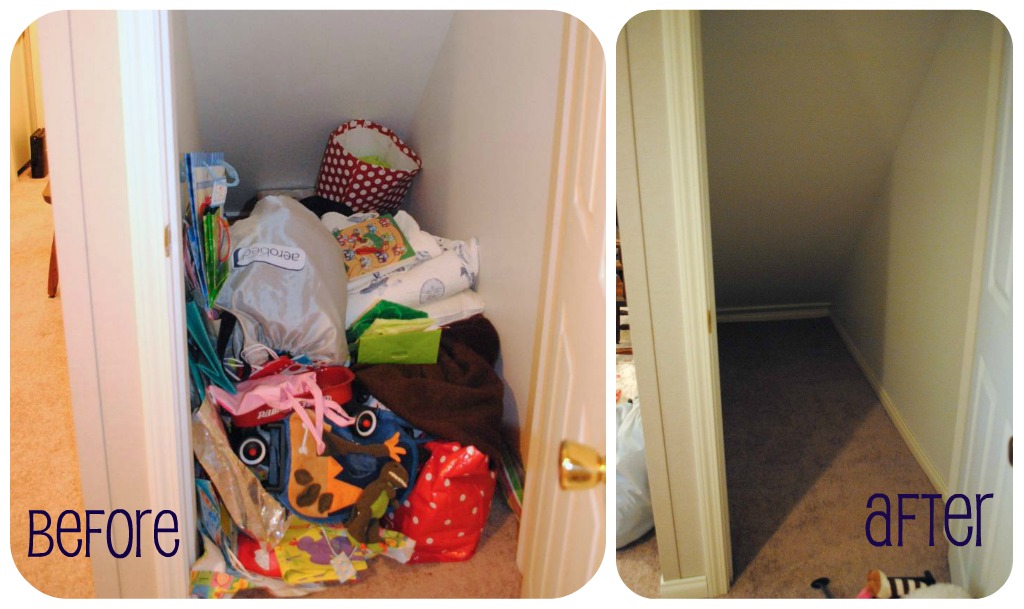
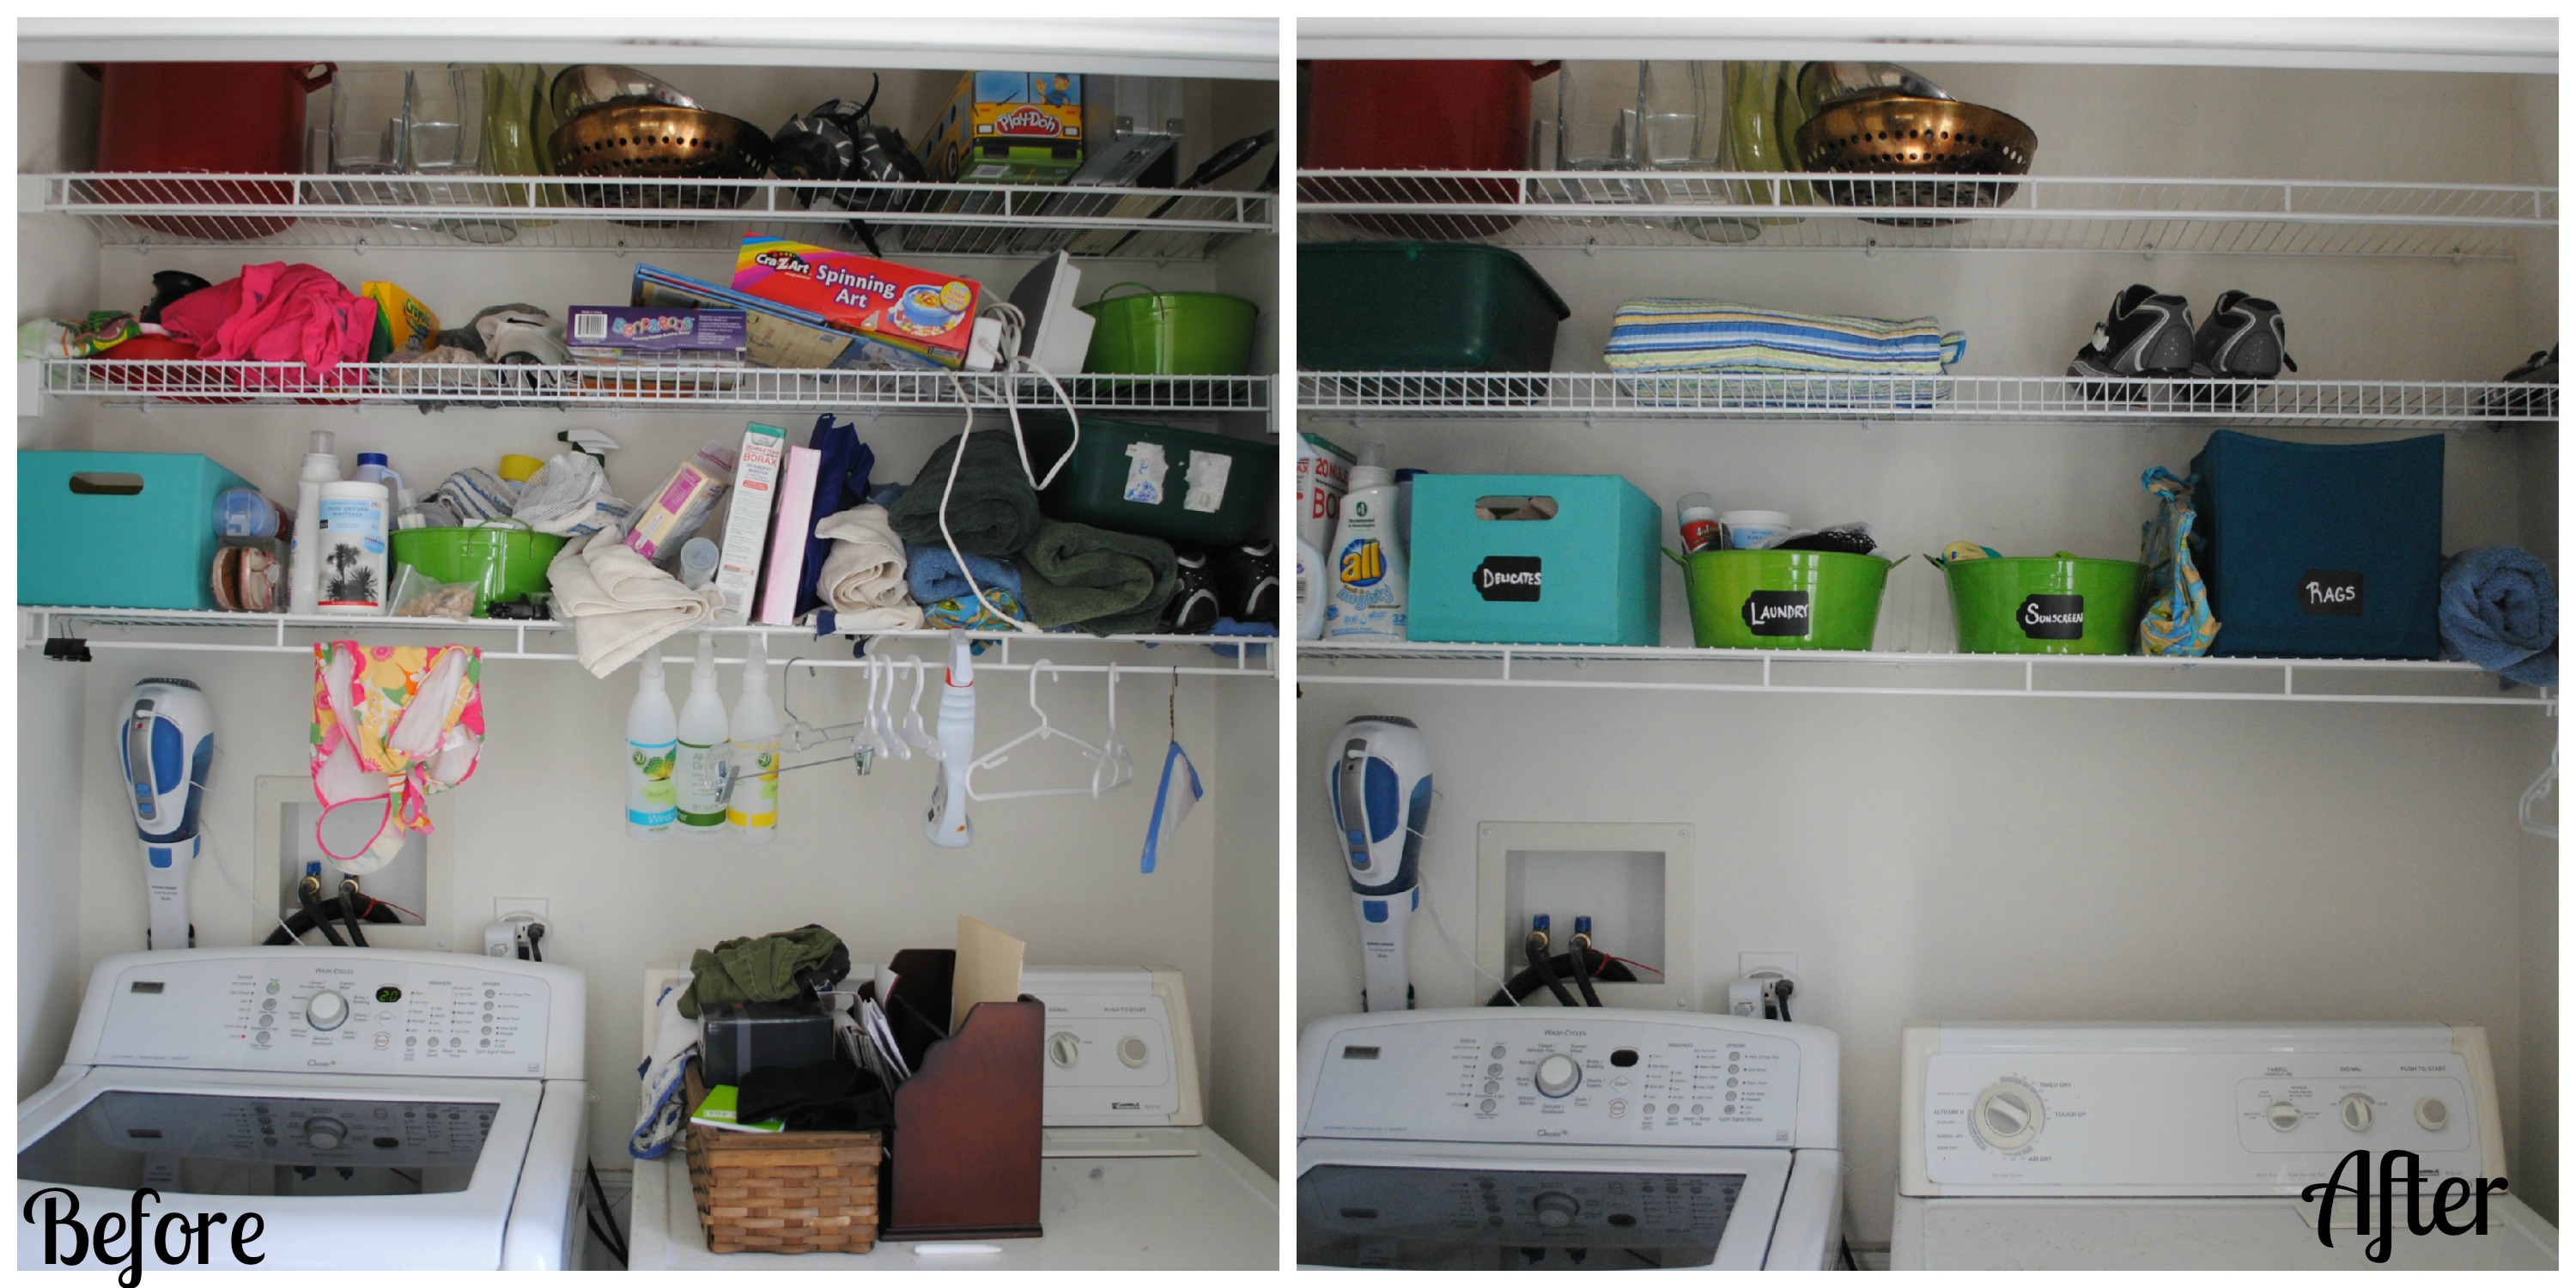
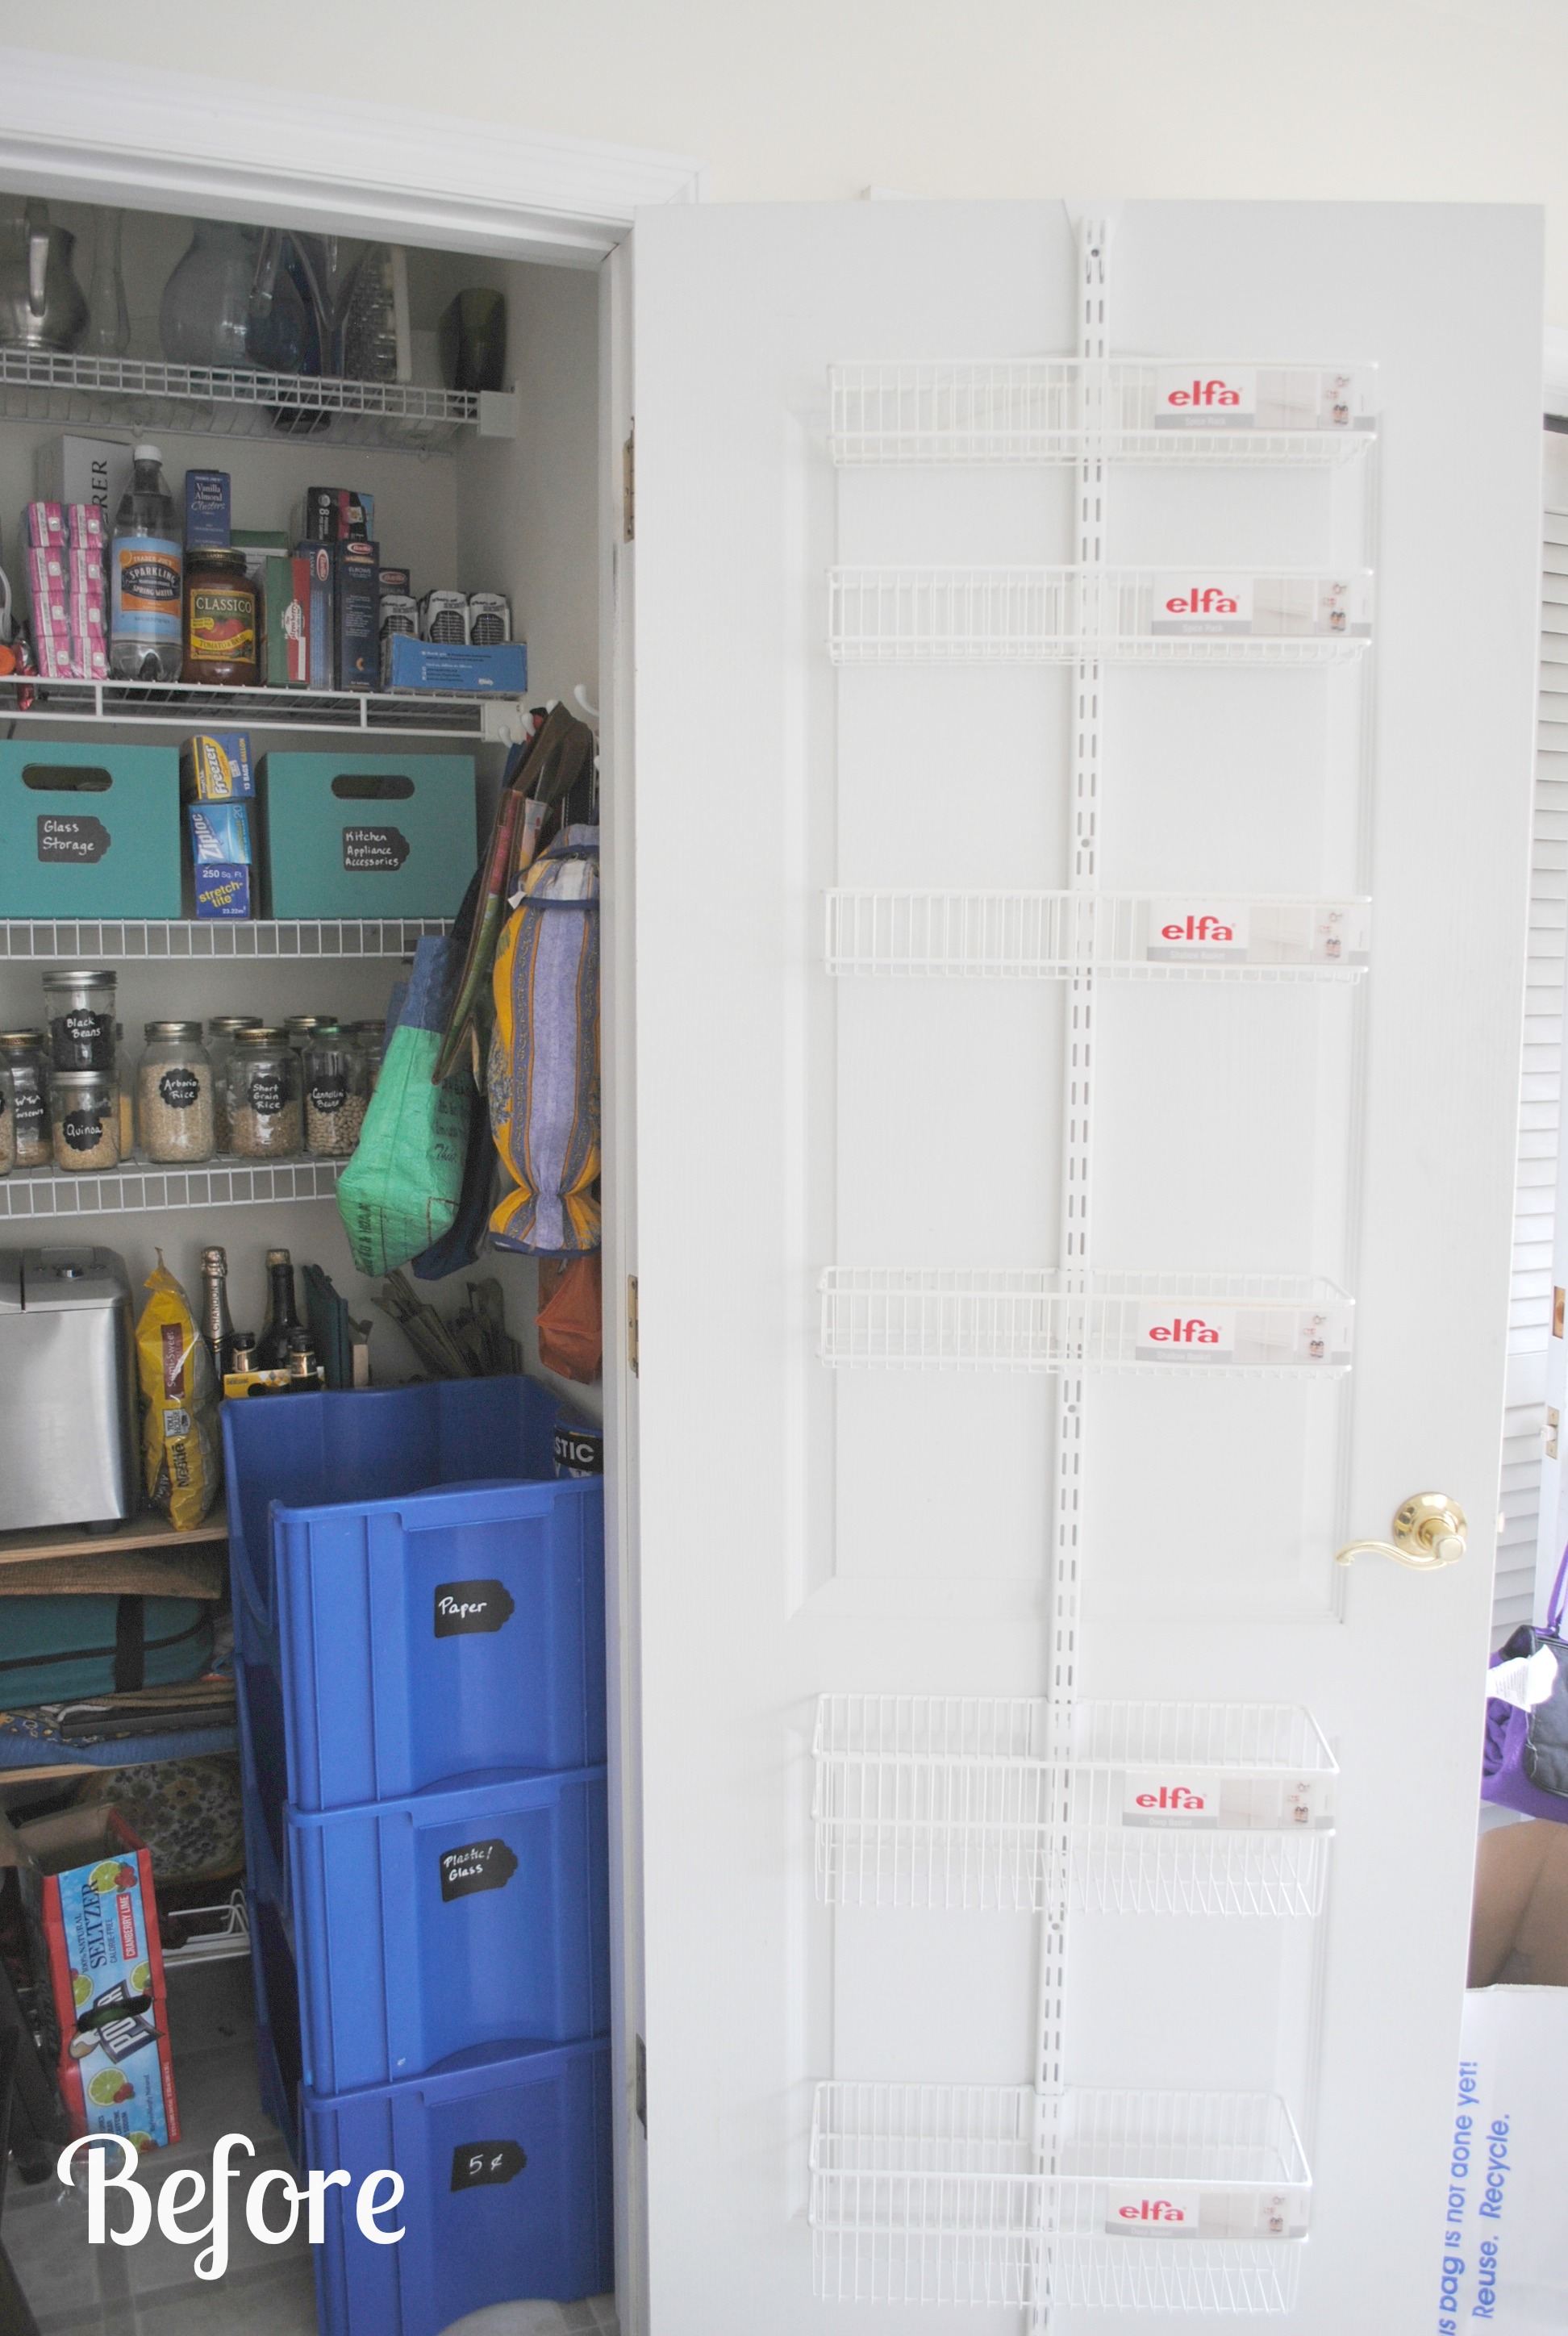
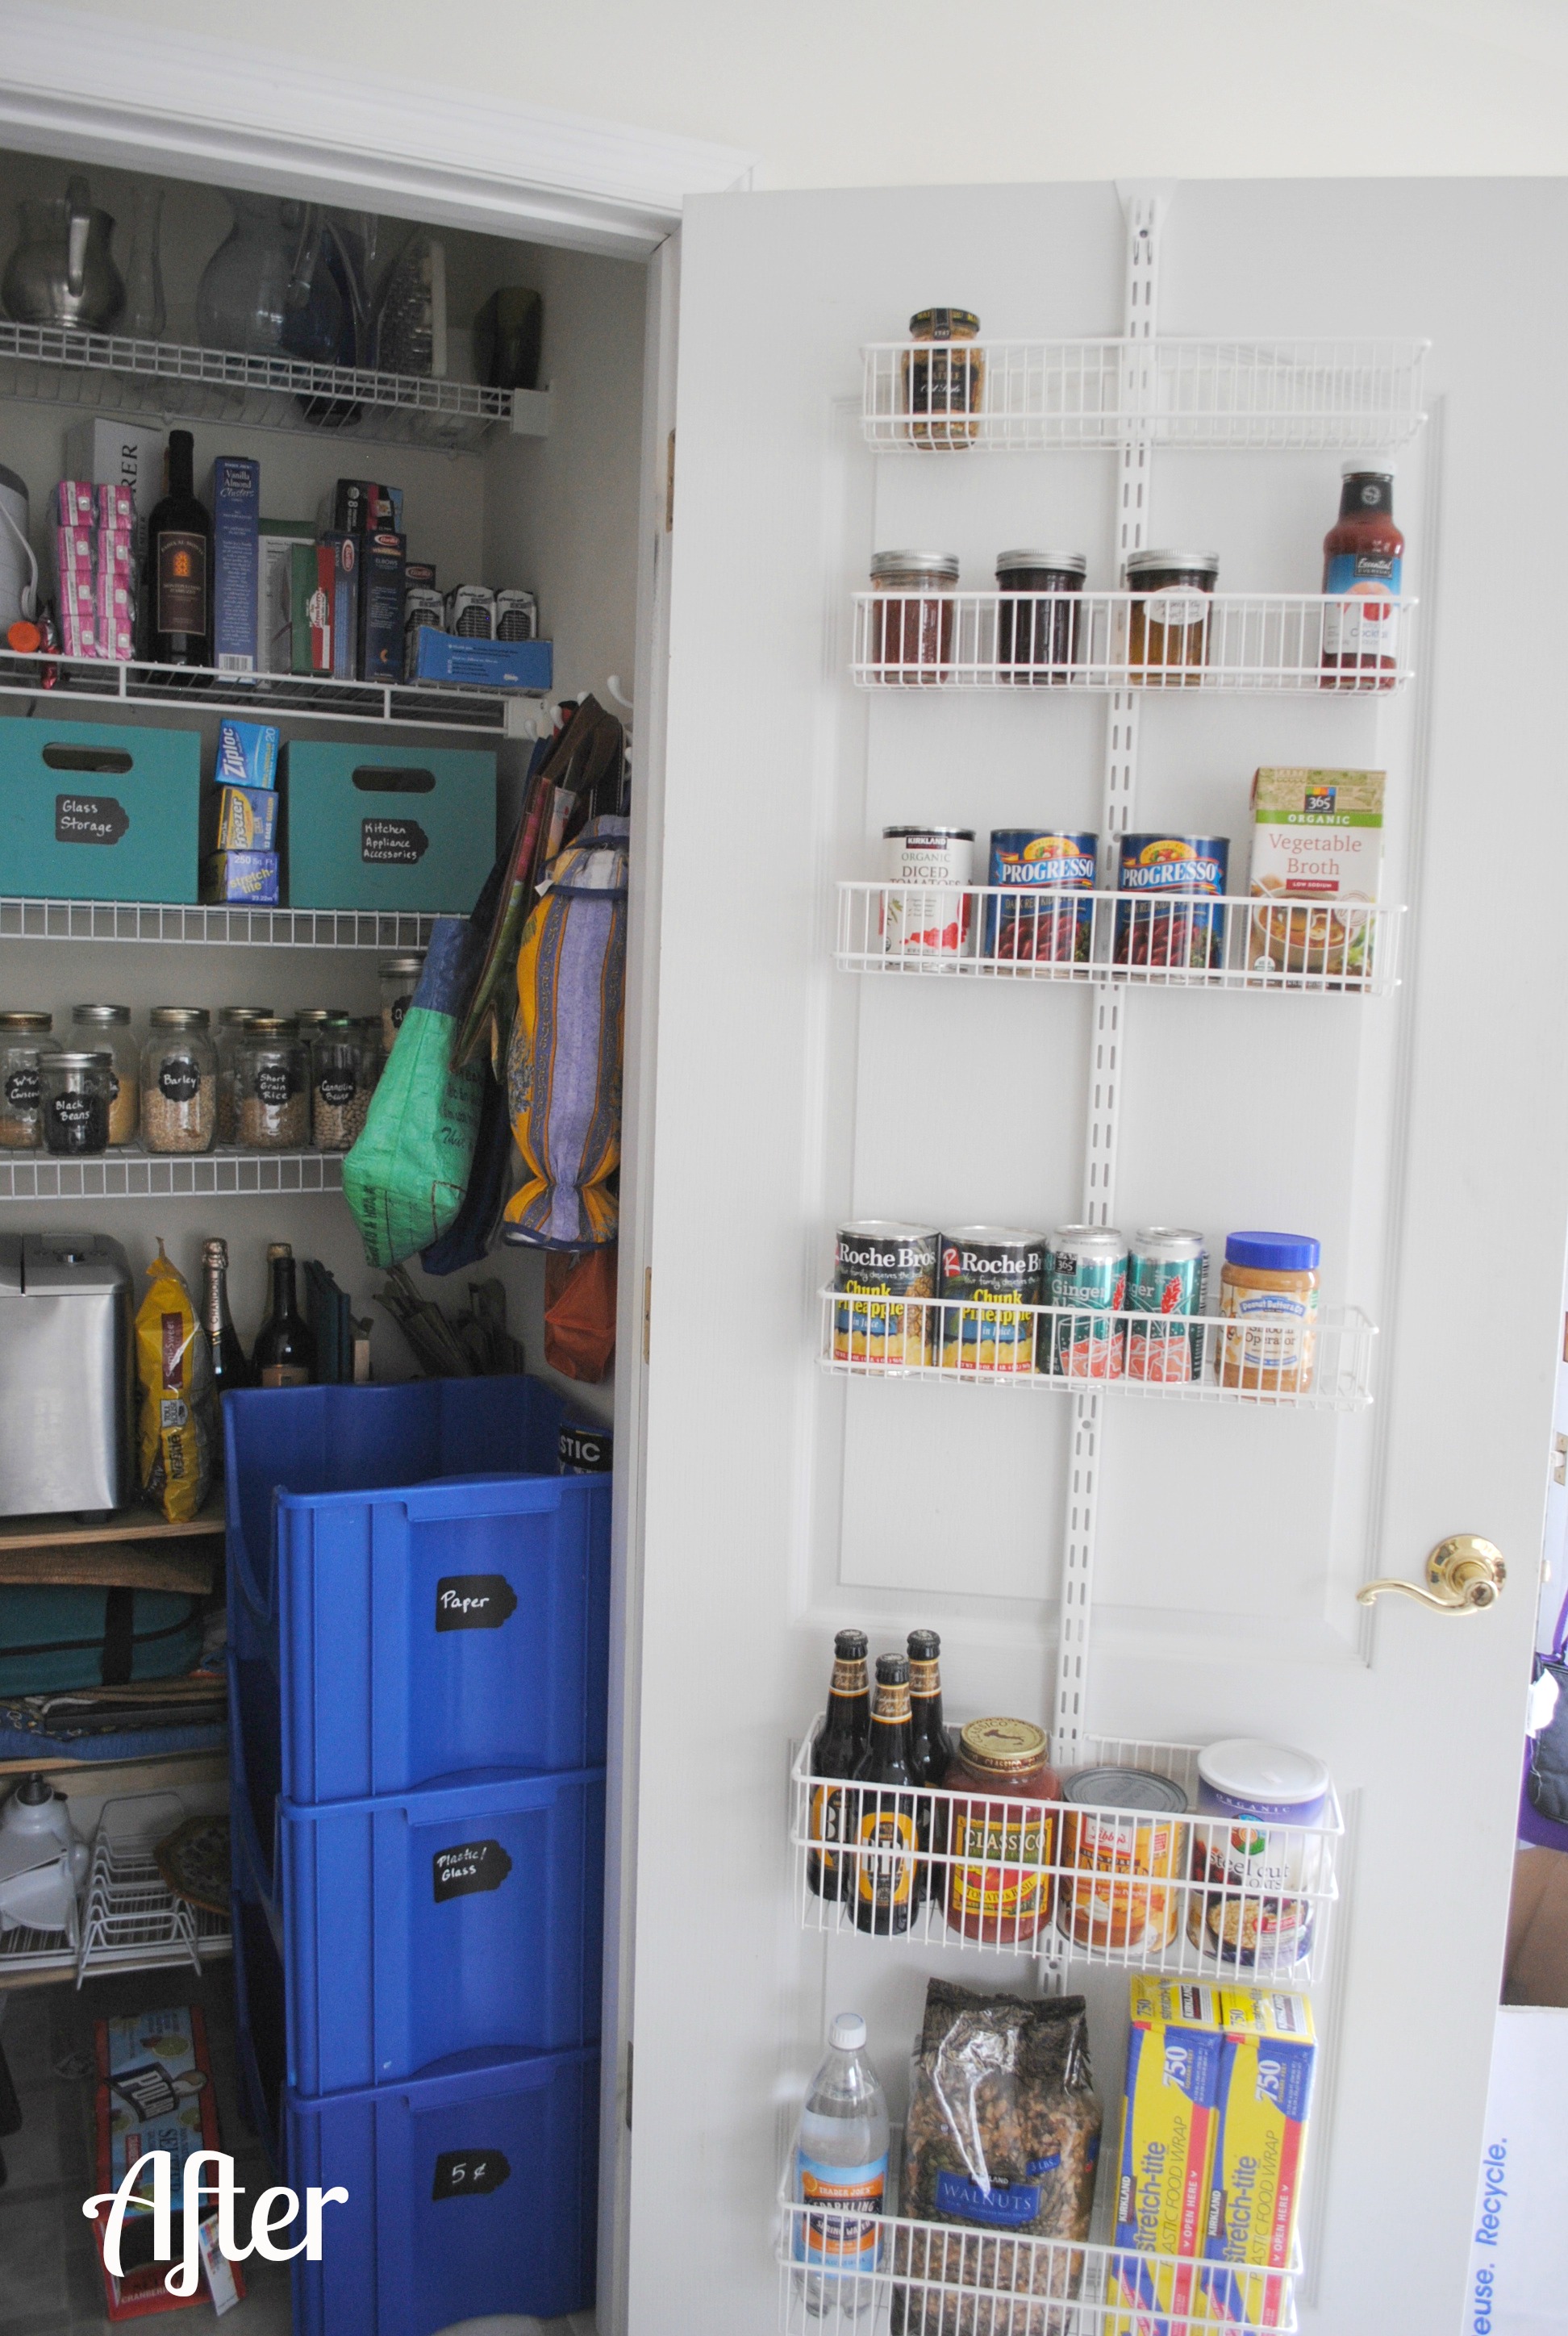
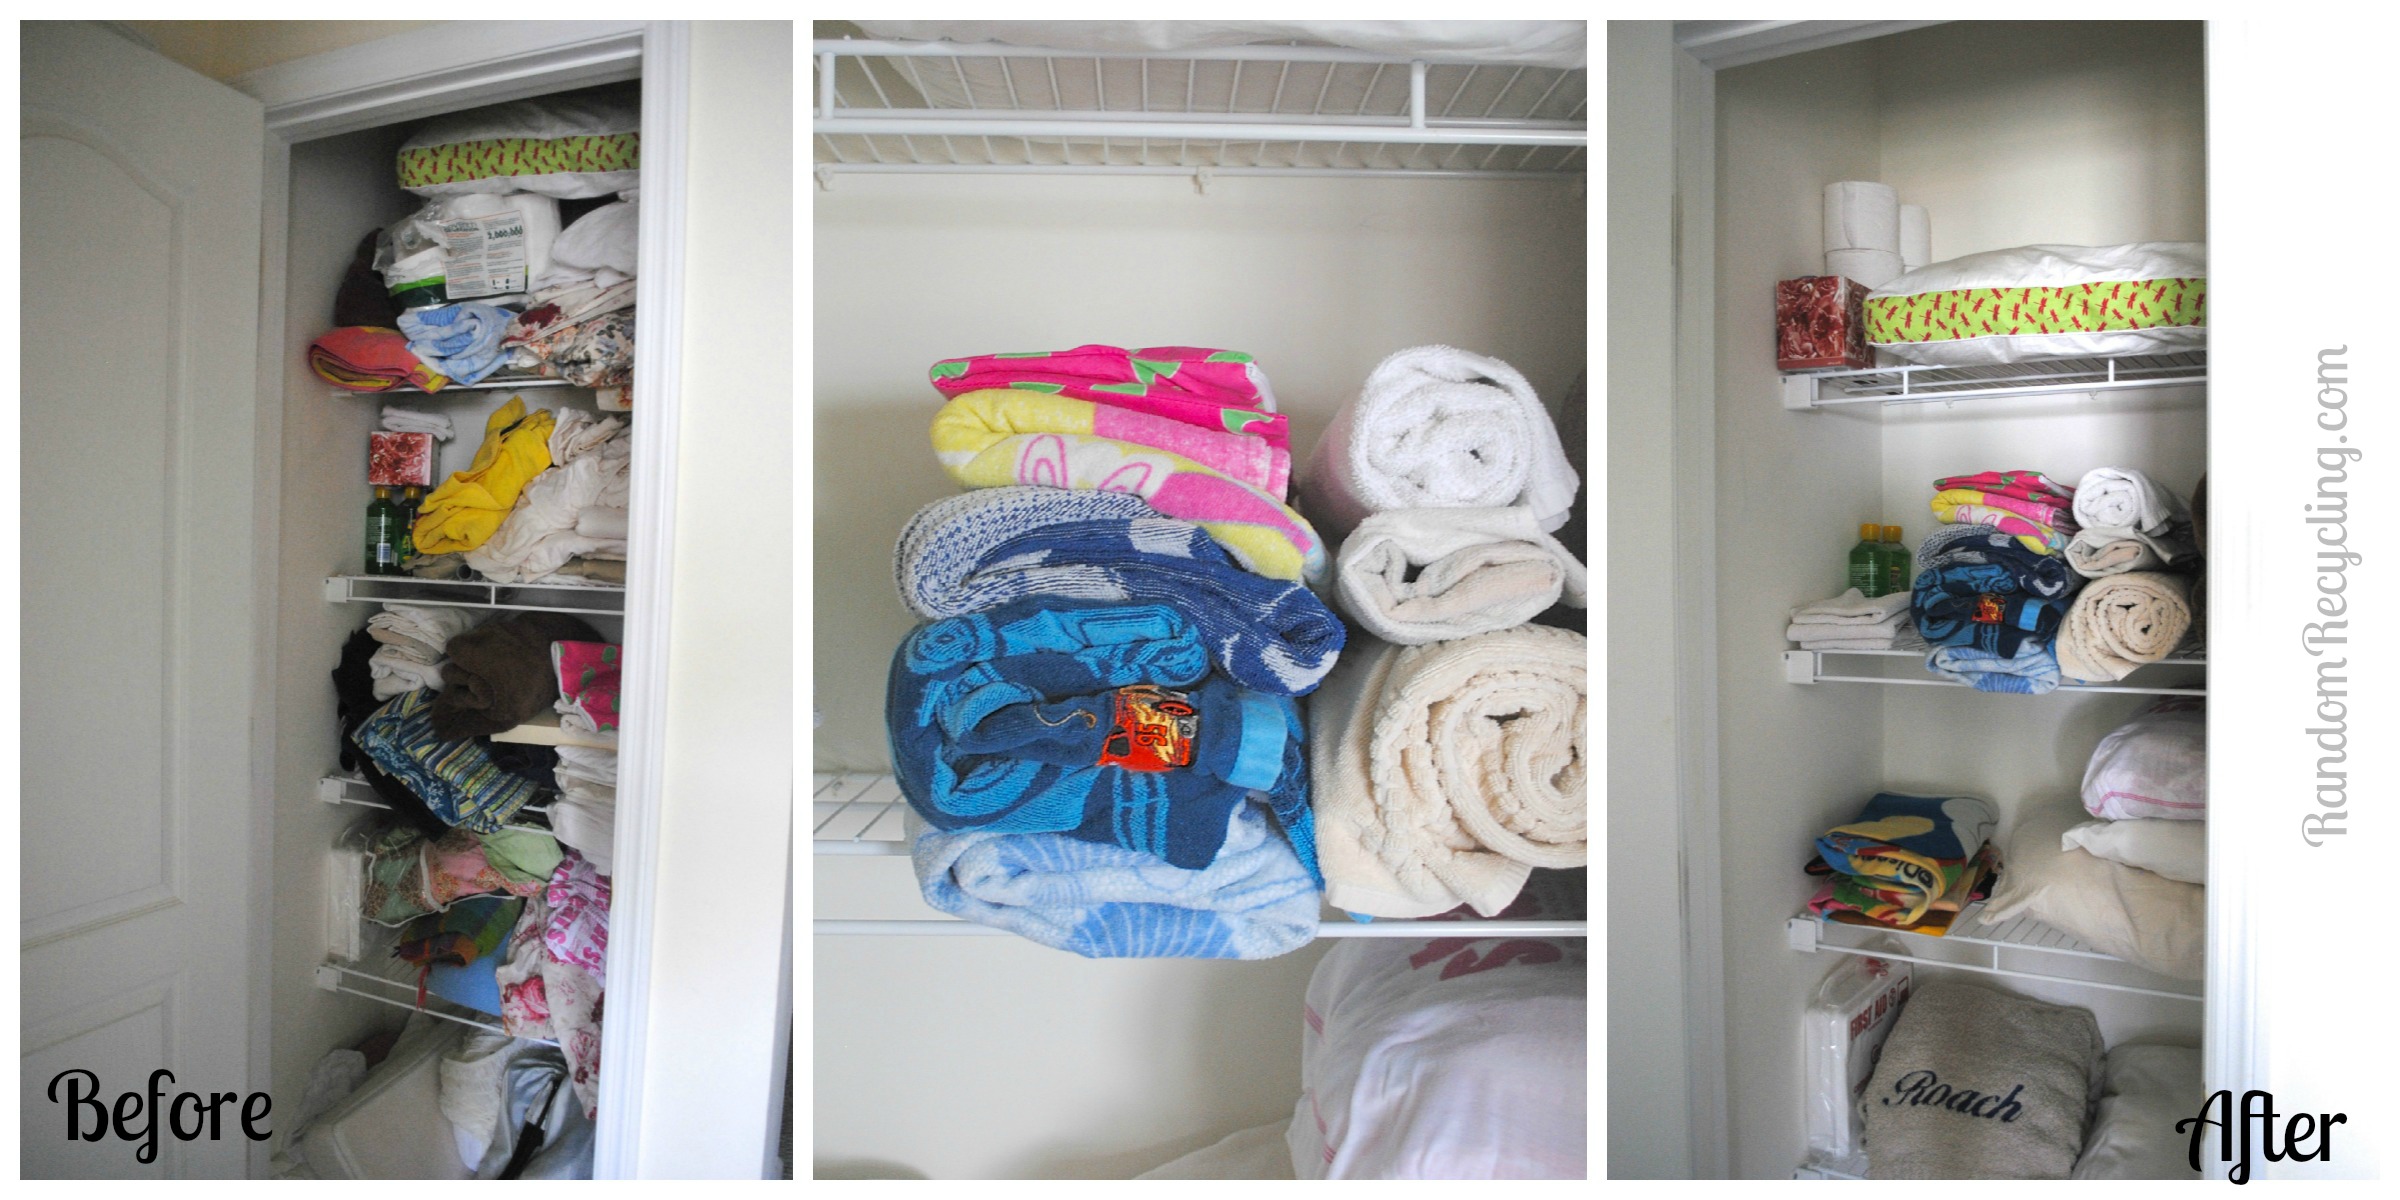
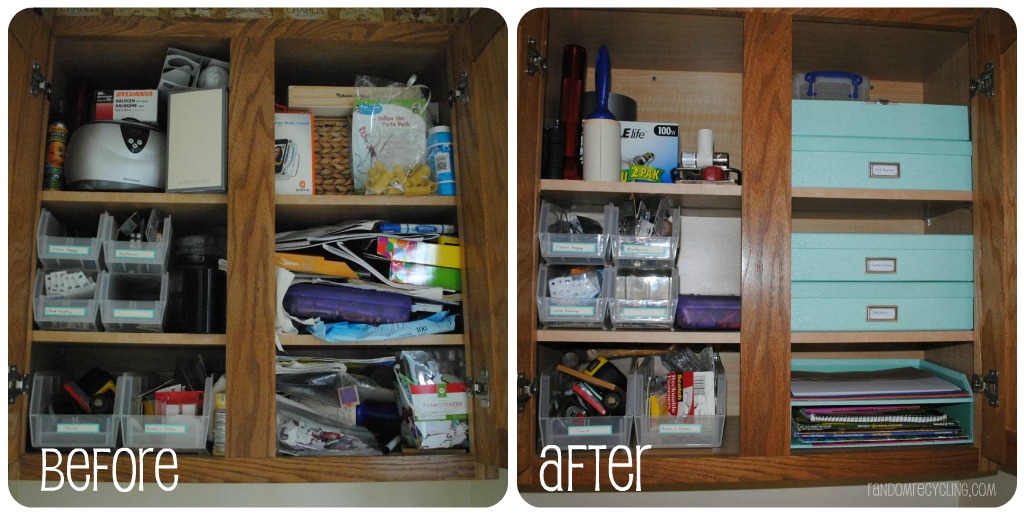
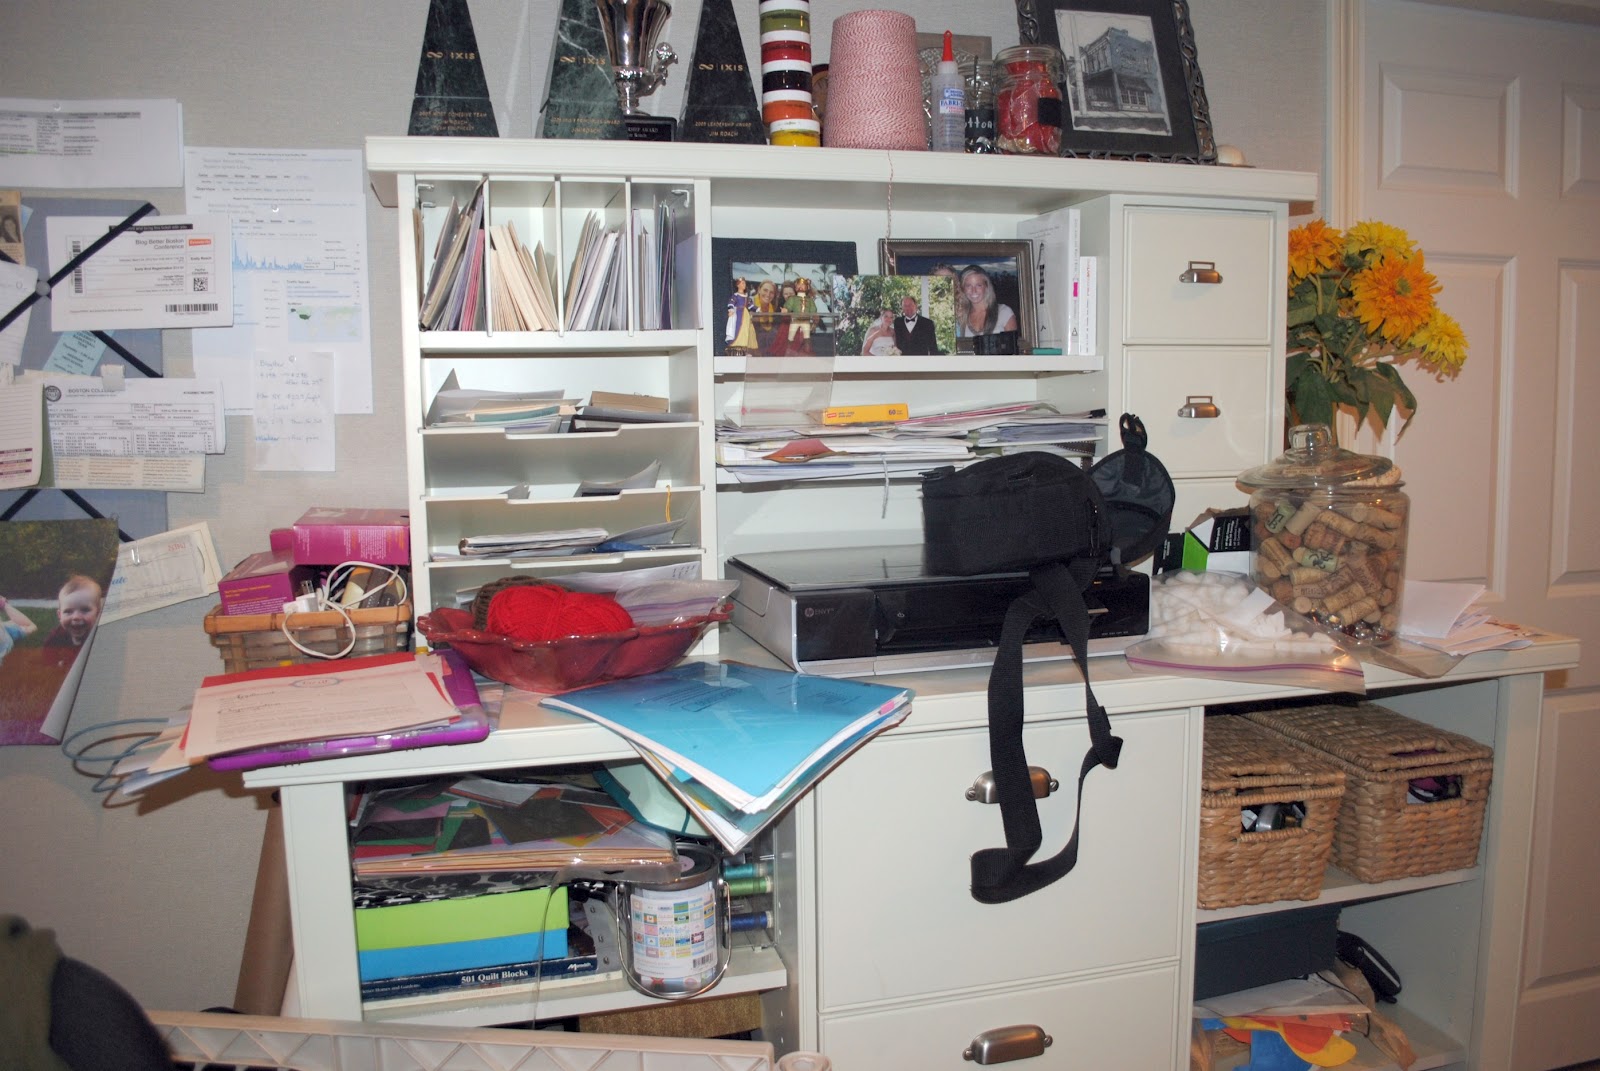
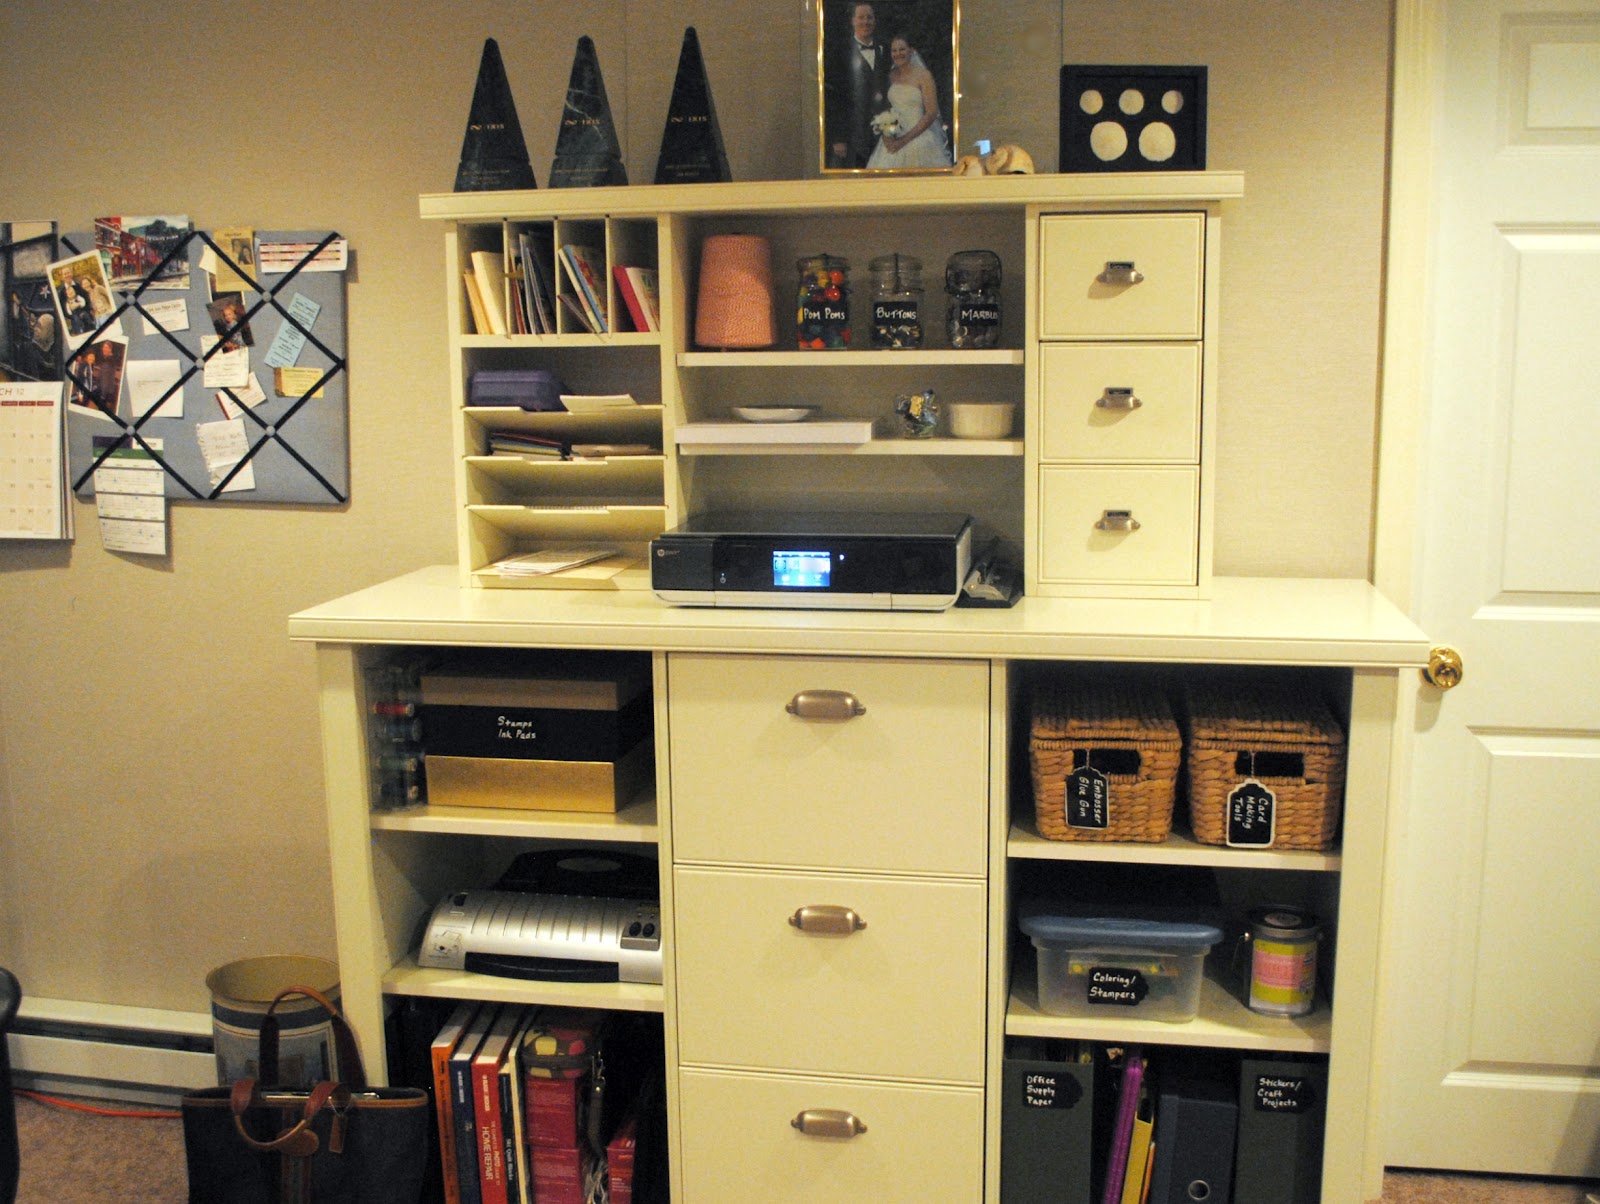
Here’s a peek at the full before and after shot…oh my is it better!

Before and After Under the Sink Organization

 What organization project is next on your list?

It’s the last week of Project Simplify and the task was to finish a “Put Off Project.” Hmmm…where to start? As we prepare for the new baby’s arrival in the coming month(?) we have been frantically purging the house of unused items, extra furniture and dealing with issues that come from having siblings move in together. The biggest task of all is to organize the kids playroom area. They have a great selection of toys, games, crafts and activities, but not a great place to store them. First part of Operation Playroom was to clean out an overcrowded closet and make it a cozy play closet for the kids.

This truly is a “closet under the stairs” play area. The before picture shows how crazy crowded the closet was with bedding, baby toys in storage, gift wrap and my wedding dress. (See how I organized my gift wrap stash in a previous post.) Some of the bedding was donated, the baby toys were paired down and stored in the nursery and my wedding dress actually still needs a new home. It is amazing to me how much dead space there was in the closet once I saw it in the photo. If the kids outgrow this space, I’ll add in some vertical shelving.

Crowded Closet Before

Next up was to add some light to the closet since there are no overhead fixtures. I found one nightlight that goes on the wall that the kids can turn on and it automatically shuts off. I plan to add another one for a little more light in case the kids want to read in the nook at the back.

Play Nook for Kids

There are two main activities in the cozy nook, dress-up and baby dolls. Both of these activities tend to sprawl when the kids get into them with their friends. My hope it to potentially contain some of the craziness behind closed doors. I used the removable Command Hooks to hang up the dress up items and the accessories are stored in two baskets below. A princess needs her shoes, bag, gloves and tiaras close at hand.

Dress Up Zone for Kids

Madison’s favorite part was actually the bedding at the back that we saved for guests. I may expand this space a little more so it’s truly a cozy spot for the kids. I’ll also be on the lookout for two additional dress up items when I shop the Parent Talk Sale this weekend. We have a large assortment of tutu’s, but not a lot of gender neutral options.

Wish Love Dream art

The other addition to the room is this sweet wall art I found and printed out myself. I may add in a few more frames of quotes in the realm of the importance of pretend play. I started saving a number of them, and other playroom ideas, on my Pinterest boards.

For more organizing ideas, head over to the collection of posts on Simple Mom’s week four round up of “put off” projects.  You can see all of my other Project Simplify posts here. Thanks for everyone’s comments on the past few Project Simplify projects. I hope to have more updates for Operation Playroom once our new storage unit arrives from Ikea!

I’m sharing this over at OrgJunkie too!

The Project Simplify challenge this week became a little more in-depth so I decided to split it out into two separate posts. This project features the creation of a quiet activity desk for my preschooler. I used some wasted space to carve out a special area for her to enjoy in the nursery when I’m busy with the new baby next month.

Preschooler Quiet Desk RandomRecycling.com

I recently had an interior designer, Dina from Honey & Fitz, come for a visit to help me plan out the kid’s room as it shifts from a girly one to a shared girl/boy bedroom.  We also reviewed the layout of the nursery and debated what to do with this random desk space that was built into the room. We never used it as a desk, even when the room was my home office. Once I cleared off all the clutter, including the day care notes from years past, the desk looked so lonely. I realized that it could be a good place for the kid’s to be entertained while I’m busy nursing the new baby. This led to the creation of the “Quiet Desk.”

The desk offers great work space and it’s just the right size for a child. Madison said, “I can do my homework here.” Cute since she is a long way off from homework days, but she already gets the concept of it. While I’m happy the desk is now functional, I would love to add a couple more interesting things on the wall to look at. Maybe a fun map to start talking about geography, or some hanging clipboards with activity sheets attached to them. The goal is to have some activities that the kids can do independently when I don’t have any hands free.

Create a Quiet Desk for Kids RandomRecycling.com

When I search on Etsy for Quiet Books, there are so many fun options, depending on the age of your child. I really like this quiet book from Handcrafting Harmony as it offers lots of fine motor skill practice.

I’m curious to see how well the two “big kids” share this new space. When I introduced it to them it was a hit, except it’s a little tight for two little people at the same time. I also need to find a little place mat as I think the crayons will soon decorate the desk instead of paper the way my little guy colors.

What other activities would you add to this quiet space? Any other tips for entertaining older kids while you are busy nursing a newborn? 

For Part 1 of this week’s Project Simplify, check out the How to Organize Your Gift Wrap post.

For more organizing ideas, head over to the collection of posts on Simple Mom’s week three round-up of “pile” projects.  You can see all of my other Project Simplify posts here. Up next week~ the put off project! You know you have one…

This is shared with Growing Slower’s Tuesday Baby link-up

Call it Project Simplify. Call it nesting. What I really call it is getting rid of the junk. This week’s Project Simplify focus is on “piles.” Pretty vague, but I know we all have them. Some of those piles had been there for just too long, so this week I tackled, sorted, purged and organized them. The hot spots getting organized were my gift wrap stash, the nursery desk, and the closet under the stairs.

Organizing the Gift Wrap

This turned into a fun project for me. While not all of our gift wrap is green, I do try to reuse a lot of the gift wrap that comes through our house. The biggest collection of gift wrap are the gift bags, both large and small. I found the perfect 3-Drawer organizer that could organize the gift wrap and tissue paper.

Organize Your Gift WrapI cleared out our gift wrap stash a few months ago, but after the holidays and the kids birthdays I needed to sort through it all again. I was left with good quality tissue paper, small and large gift bags, ribbons and bows. Going forward, I like the eco-friendly gift wrap line from Jillson Roberts.

Organized Gift wrap RandomRecycling.com

The Closet Under the Stairs

Feels very Harry Potter doesn’t it? This little room under the stairs is in our basement. We had it build in when we redid the basement a few years ago. It became a bit of a catch all: gift wrap, baby stuff when not in use, extra bedding for guests, and my wedding dress. (Still don’t know where to keep that huge box!) Everything got cleaned out and I have a new plan for the space. Look for the big reveal next week!

Under the Stairs Closet Project

For Part 2 of Project Simplify this week, check out the post where I create a Quiet Kids Activity Desk.

For more organizing ideas, head over to the collection of posts on Simple Mom’s week three round up of “pile” projects.  You can see all of my other Project Simplify posts here. Up next week~ the put off project! You know you have one…

Disclosure: Some affiliate links are included in this post. I’m sharing this over at TidyMom and at OrgJunkie too!

Today’s Project Simplify post is sponsored by Listia, a new online site where you can give away the items you no longer need or want. When someone chooses your item, you earn credits that can be used to buy something you can actually use.

It’s the second week of Project Simplify and the target area are closets. Organizing closets seems to be a bit challenging lately as we are still in limbo between the winter and spring season. I decided to focus on the other closets that needed attention, the laundry closet, pantry, and linen closet.

As the nesting phase begins before the new baby arrives, I find myself in purge mode. If I haven’t used it in the past year, or with the last baby, then it’s time to donate it. Once you get into this mindset, it’s so easy to keep going and clear through the clutter from room to room. I finally finished reading Organized Simplicity and it has helped me focus on what I really want to keep and what is just “noise.” Space is going to get a little tight in our house so I want to make sure what we hold on to really is usable and special.

The Laundry Closet

Laundry Closet RandomRecycling.com

I used my favorite chalkboard contact paper and my craft punch to label the first row. The shelves went in last year but I never really set-up a good system to keep things organized. It’s all fine and good to clean up a space, but unless you create a process that you can maintain, it’s not going to stay clutter free.

Laundry Organization RandomRecycling.com


The Pantry Closet

Pantry Before RandomRecycling.com


I purchased the elfa closet door organizer from Container Store for this project. I love that I could install it in 5 minutes and didn’t need to drill into the door. I think I have room for one more wide bin shelf to give me even more storage space.

Pantry Closet After RandomRecycling.com

The Linen Closet

I was amazed at how much stuff has accumulated in our linen closet. There were things in there we haven’t used in four years. Time to let go.  My motto was not to move, but to remove. Out went the extra sheet sets we no longer needed and the extra blankets we no longer used. Our local Community Council got a big donation of bedding, towels and curtains today. A few other things will go on Listia. The linen closet is not super pretty yet, but there is space.

Linen Closet Organization RandomRecycling.com

For more organizing ideas, head over to the collection of posts on Simple Mom’s week two post for Project Simplify. You can see all of my other Project Simplify posts here. Up next week~ piles! You know you have one…

On Listia, you can give away useable stuff you don’t want or need.When someone “buys” your items, you earn credits, which you can redeem for goods offered by other users.  Or, if you are trying to live simply and give back to the world, you can donate your credits to charity. I like that you can search by what’s local, which makes it more like a Craig’s List or Ebay service. As you participate in Project Simplify this month, you can list the items you no longer need, earn credits, then pick out something you can actually use. All opinions shared here are my own.

Also sharing this with OrgJunkie.

Craft Cabinet Project RandomRecycling.com

It’s the first week of Project Simplify and the focus is on shelves and drawers. I decided to put my efforts into creating a craft cabinet that is easily accessible,pretty and organized. Since we have limited storage space on our main level of living, I found the kid’s toys and crafts creeping into every corner. I like having a variety of crafts to play with, but I don’t want them too accessible for the kids. J.J. tends to draw on everything, including the walls and his sister. The elevated cabinet in our half bathroom became a good spot to keep things handy, but out of the reach of little hands.

I had already organized the left side of the cabinet a few months ago and used the Martha Stewart labels so I stuck with the same color story for the right side. The robin’s egg blue color is pretty and the material is pretty durable if I need to wipe off some markers or play dough from a box.

Craft Clean out RandomRecycling.com

The first step is to clean out and take an assessment of what you own. Organize it into like items, purge what you don’t need, move seasonal crafts (i.e. Christmas stickers) to the basement, and then decide the storage system that will work for you. I like the document boxes because I can reuse them long after the kids outgrow this craft organization system.

Budding Blogger RandomRecycling.com

I enlisted some help organizing the crafts. However my helper was quickly distracted by all the fun craft projects she found on the table.

Craft Cabinet Storage RandomRecycling.com

My organizing supplies came from Staples. I got free delivery and it basically came overnight since they are local. Nothing makes like easier than home delivery! I got three document boxes, a desk organizer with drawer and metal book-plate. Everything fit well, except the drawer didn’t quite have enough clearance to make it easy to pull out. I decided to separate the drawer from the box which created a two tier organizer for papers and coloring books, which actually worked out better. The drawer is open storage at the top for larger items like play dough and accessories.

Craft Cabinet Organized RandomRecycling

Part of what works in any organization system is making it easy to use and also making it pretty. I think it’s easier to maintain if both of these factors are met. So far I just love opening the cabinet and not seeing a jumble of crafts and “other” stuff. It’s amazing how many random things were tucked away on the shelves. I finally tossed some scented candles that I just don’t want  in my house any more. I felt guilty throwing out something that worked, but I just don’t want the toxic fumes in my house. I already feel better that the clutter is gone.

Up next week is closets…which one is on your list?  If you are tackling any spring cleaning projects, please share in the comments. I’ll be sharing my post over at SimpleMom each week of Project Simplify.

Craft Cabinet After RandomRecycling.com

It’s the most, wonderful time, of the year…Project Simplify time! This is my third year participating in Simple Mom’s annual spring organizing challenge. I look forward to tackling some projects around the house, both large and small. For all my past Project Simplify posts, you can find them in the menu bar above, or click here.

Here is the run down on what we will be tackling during the month of April.

  • Week of April 9: Drawers and Shelves
  • Week of April 16: Closets
  • Week of April 23: “Piles”
  • Week of April 30: The Put-Off Project
Project Simplify on Simple Mom
I know toys, kid craft supplies and our garage are big to-do’s on our list. Oh, and we need to move my little guy into his big sister’s room to make room for baby.
For more details on how to link up your completed projects if you have a blog, visit Tsh’s post at Simple Mom. I would love for you to share in the comments here what you are working on and any tips and tricks you have. I know I’ll be interested in them, plus I’ll be digging through my Organization Pinterest board. Good luck everyone. Stop in to see the progress over the next month, there will be two posts per week sharing the before and after photos.

Good news when you want to organize your freezer.  You have to finish this project, and finish fast.  When I started menu planning last week I realized my freezer had gotten a little out of control.  Usually I keep a running of list of what’s inside clipped to the side of the fridge.  I realized that the freezer was full, but not with anything useful to make dinner.  Time to clear it all out and start over. (And why exactly do I have THREE ice creams in there??)

I choose clear Fridge Binz from Bed Bath and Beyond for this project.  You can get them on Amazon for a lot less than I paid…lesson learned. Check online first! I liked the clear option and the durability of the material.  I don’t mind spending a little more money on an organization system if I think I can use it for the next 10 years.

The door now has some workable space.  So excited for the warm weather to break out our Zoku Popsicle maker and use up some of the frozen fruit I found.

The labels were made by the Chalkboard Contact PaperI have used in my other organizing projects last month.  I like the simplicity of the black and white labels so I just keep going with it for now.  I even like how the scallop punch label for the apple sauce came out.  I can reuse the jar, wipe off the label and then fill it with something else.

Anyone else have an organizing project ahead for the weekend? I love to hear what everyone else is working on and get inspired to tackle something else!

-Amazon links are all affiliate links. I you purchase through them, it will usually save you money and also kick back a little to support this site. Thanks for your support!

Do you have a room in your house that ends up being the dumping ground for papers, pictures and more?  That  is what has become of my home office.  It shares space with the playroom in the basement and over the past few months, it has been collecting more than its fair share of random items.  I am a big believer in finding a home for everything so this area was a big stress.

The scary “before” shot

Now it’s time for week 4 of Project Simplify.  It’s pick-your-own hot spot this week and I knew it was time to tackle the home office. Don’t miss the giveaway at the end of the post to help you get started organizing your home management projects!  

I realized that it was time for the home office to share the burden of organizing both the grown-up’s stuff and also the kids’ craft stuff.  It’s more fun to enjoy crafting time when you can put your hands on crayons and paper quickly.

Vintage glass containers with chalkboard labels

The clean out project came first.  It took a few hours, including a few with my husband to do the all important task of weeding through our filing drawers.  We were left with bags of papers to recycle, items to be donated, pictures to be added to albums (hundreds of them at that) and finally a clear work space to decide how to organize what was worth keeping close by.  I suggest doing this first to make it easier to then decide what types of containers you may need, instead of buying containers first.  I decided to use what I had and give them consistent labels to help create some cohesiveness.

The hutch is my favorite area as everything now has a home, and I can find my glue gun super fast!  I used the Chalkboard Contact Paperthat I also used for my Pantry Project during week 2. My favorite craft punch is the Tag Punchbecause I can create tags from any paper I have on hand.

I wrote on the labels with Wet Erase Chalk Marker for large labels and then use a very skinny line silver marker for mini drawer labels.  I like how the black and white labels looked so I tried to be consistent throughout the office area.

My working desk is now cleared off and I can give all three of my major projects their own space.  I am using a Naked Binder for my blogging paperwork, including their binder dividers and pocket folders. These binders appealed to my eco-friendly self as they are made from 100% post consumer waste board.  Absolutely no plastic. For my other two volunteer projects, I’m in the process of creating binders to keep the paperwork from getting scattered around.

Blogging Binder 

I’m also starting to use the invite.L daily planner.  It has grid lines and space for me to write to-do lists for the blog, farmers market, Parent Talk and just everyday home stuff.  Now I don’t have multiple lists going and it’s helping me prioritize what I need to tackle first.  Plus the cover is in French which always brings a smile to my face.

Leave a comment below to win a daily planner from invite.L and also a Naked Binder package!  Contest will be open until midnight April 10th, 2012. A winner will be notified via email.

a Rafflecopter giveaway
I hope this organization series has inspired you to tackle some of your own hot spots.  I think sharing organizing tips is relevant for Random Recycling as it can help you find items to repurpose, or save you from buying a new stapler when you really have two buried in a drawer.  I have found Organized Simplicityhelpful in reminding me that less is more.  The less stuff laying around, the faster it is to clean your house.  There is also a sense of calm that exists when you walk into a room and don’t see a pile of to-do’s staring at you in the face.  I hope you have enjoyed this series as much as I have, and your home has too.

Image and video hosting by TinyPic

Week 1: Kids’ Storage with Paint Buckets
Week 2: Creating a Pantry
Week 3: Laundry Closet

I love to hear your feedback and comments. Stop by and visit FacebookPinterest or Twitter for more conversation!  Or get posts delivered via Email or RSS Feed. Thanks!    


To see even more organization ideas: SimpleMom, TidyMom, BlueCricketDesign,  Frugally Sustainable, Your Green Resource, and OrgJunkie

This is the final week of Project Simplify.  It’s been so much fun tackling a specific area each week.  My husband likes it so much he has picked out our “mail table” for next week to continue our challenge.

Everyone gets to pick their own hot spot this week.  For me it’s the home office.  It has been a bit of a dumping ground since the holidays and it needs some TLC.  I have a variety of projects I work on, including the blog, social media marketing for volunteer organizations and helping to launch a farmers market in town.  There are too many piles of stuff so I will also be sharing some new organization systems for managing different projects.

Plus there will be a giveaway to celebrate the end of Project Simplify!  One winner will receive products from both Naked Binder and invite.L.

Here is the starting point for the home office…I’m already looking forward to cleaning this up!


What’s your hot spot for the week?

Image and video hosting by TinyPic

Week 1: Kids’ Storage with Paint Buckets
Week 2: Creating a Pantry
Week 3: Laundry Closet

I love to hear your feedback and comments. Stop by and visit FacebookPinterest or Twitter for more conversation!  Or get posts delivered via Email or RSS Feed. Thanks!