Zucchini Bread Recipe Quick Breads

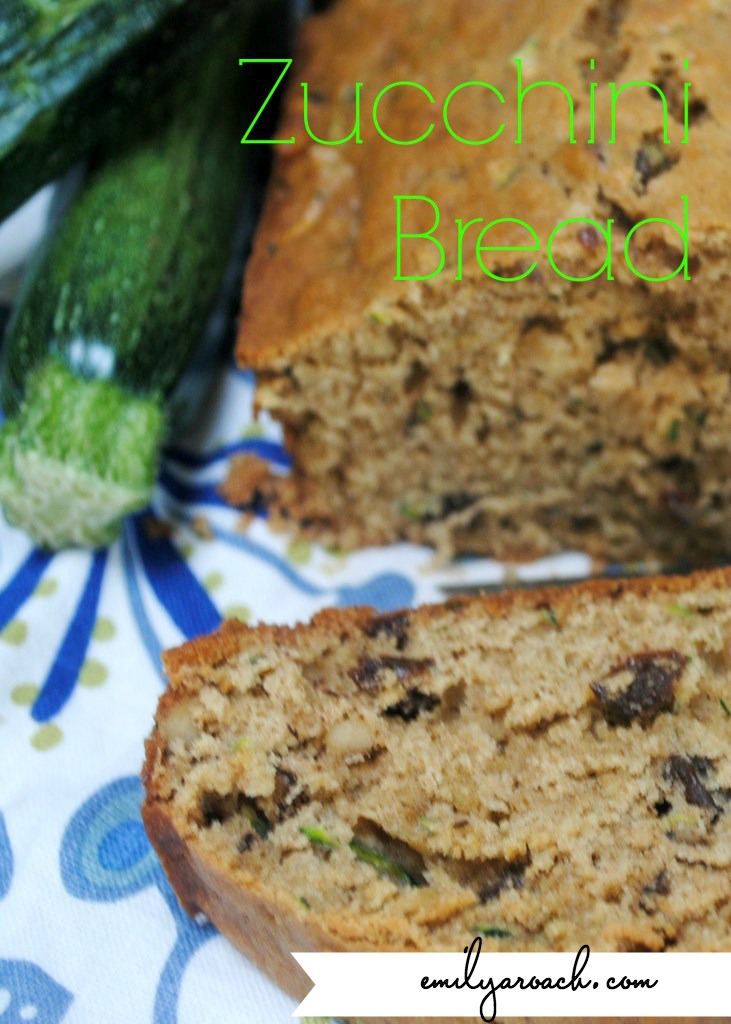
When I think of my Nana, I usually think of her in the kitchen.  Amazing things came out of that kitchen, including a fair share of baked goods.  I recently found her Zucchini Bread recipe and gave it a try.  Zucchini is in abundance this time of year so this is a very inexpensive snack for the whole family to enjoy.

Zucchini bread ingredients
 

Grate zucchini on a hand grater or in a food processor

Zucchini Bread Recipe Quick Breads

NANA’S ZUCCHINI BREAD

Course: Breakfast
Keyword: bread

Ingredients

  • 4 eggs
  • 2 cups sugar; 1/2 white and 1/2 brown. I used slightly less of each
  • 1 cup vegetable oil or coconut oil
  • 1 teaspoon vanilla
  • 3 1/2 cups flour I used white whole wheat
  • 1 1/2 teaspoons baking soda
  • 3/4 teaspoon baking powder
  • 1 1/2 teaspoons salt
  • 1 teaspoon cinnamon
  • 2 cups grated zucchini
  • 1 cup chopped nuts
  • 1 cup raisins

Instructions

  • Pour hot water over raisins in a separate bowl and set aside.
  • Beat eggs in a large bowl. Add the sugar gradually, beating as you go and add the oil and vanilla.
  • In a separate bowl, combine the flour, baking soda, baking powder, salt, and cinnamon.
  • Add the dry ingredients to the egg mixture, alternating with the zucchini.
  • Stir in the chopped nuts.
  • Drain raisins and stir in. (Nana's note: you may substitute another cup of raisins for the nuts.)
  • Bake in a greased and floured loaf pan in a 350 degree oven for 55-60 minutes. Makes 2 loaves.

Notes

My note: since this is a double recipe, I make one loaf of bread and one pan of muffins (12). Muffins take only 35 minutes so set a double timer. I use the timer on my iPhone so I always have it with me while I'm running after the kids.
Tried this recipe?Mention @emilyroachwellness or tag #erwellness!

I plan to bake and cook my way through some more of my Nana’s recipes.  Thanks for everyone who gave suggestions of how to preserve her recipes from the Facebook page. If you have another suggestion, please leave it in the comments.

Homemade Basil Pesto Recipe

The basil in the garden is growing like crazy.  Combined with the rain and the heat everything exploded over the past week.  Finally I could make some pesto.

I generally don’t measure anything when I am making it but I’ll assign some easy measurements as a guideline.  Usually it’s more like I harvest as much basil that is ready and go from there.

I tend to serve the pesto with fresh bread as an appetizer.  Even the kids love it.  Once our spinach is in, we can switch out the basil for spinach to encourage more healthy green eating.

Basil Pesto and Garlic Scapes

Homemade Basil Pesto Recipe

Homemade Basil Pesto

Course: Sauce
Keyword: pesto

Ingredients

  • 2 cups basil leaves packed. remove any hard stems
  • 1/2 cup walnuts or pine nuts, which I never have on hand
  • 1/2 cup shredded parmesan cheese not the Kraft powdery stuff
  • 1/2 cup olive oil
  • 3 tablespoons of chopped garlic
  • 2 garlic scapes chopped
  • salt and pepper to taste

Instructions

  • Pulse the walnuts in the food processor first to a finely chopped consistency.
  • Add basil, cheese, garlic and scapes to processor and blend well.
  • While machine is running, pour olive oil in slowly.
  • Add salt and pepper to taste and pulse well after each addition.
Tried this recipe?Mention @emilyroachwellness or tag #erwellness!

Garlic Scape and Pesto

The garlic scape was a new addition this week.  They come in lots of different varieties and the spiciness varies greatly.  Adjust the amount of garlic you add to the pesto if you have very spicy garlic scapes.  I used the Keith garlic scape this week and it wasn’t super spicy so I still used about 3 tablespoons of garlic.

Enjoy!

Image and video hosting by TinyPic

Did you know today is pie day?  I thought I would share my Strawberry Rhubarb galette, which is essentially a pie but sounds so much fancier.  Shhh, don’t tell anyone it’s even easier to make than a pie.

I have made the Martha Stewart Strawberry Rhubarb Pie, as seen here. Lattice pies are lovely but not something you can whip up in 15 minutes.  Yes, you can make pie in 15 minutes.  Yes, that includes making your own crust.

I make my pie crust from an old Betty Crocker recipe using flour, milk, vegetable oil (it’s the only thing I still use vegetable oil for!) and a little salt.

For this recipe, I made a 9″ pie shell mixing together 1 1/3 cups flour, 1/2 teaspoon salt, 1/3 cup vegetable oil and 3 tablespoons of milk.

Roll out and transferred to a parchment or silpat lined baking sheet.

For the filling, I used 2 stalks of rhubarb cut 3/4” thick.  Add 1/2 cup sugar, 2 cups roughly chopped strawberries, 1/8″ teaspoon of salt, 3 tablespoons of cornstarch and about 1 1/2 tablespoons orange juice.  Mix together and pour in the middle of the pie crust.

Fold the sides in towards the middle, overlapping slowly.  Bake in a 375 degree oven for about one hour.  Let cool and transfer to a cake stand and serve.  Goes great with a little strawberry ice cream.

Enjoy!

 strawberry rhubarb galette spring dessert

Oatmeal Chocolate Chip Sea Salt Cookies. Sweet and salty cookies, the perfect combo!

All parties are better with cookies.  Even better are cookies that are both salty and sweet like Chocolate Chip Oatmeal Cookies with Sea Salt.  This week I hosted a group of bloggers and blog contributors from the Parent Talk Matters blog.  We got our work done and then checked out these lovely cookies over a glass of wine. A perfect treat for the end of the day.

Oatmeal Chocolate Chip Sea Salt Cookies. Sweet and salty cookies, the perfect combo!

CHOCOLATE CHIP OATMEAL SEA SALT COOKIES

Course: Dessert
Keyword: Cookies

Ingredients

  • 2 sticks of butter room temperature
  • 3/4 cup brown sugar
  • 1/4 sugar
  • 2 large eggs
  • 2 tsp vanilla extract
  • 1 1/2 cup white whole wheat flour or all purpose flour
  • 1 teaspoon baking soda
  • 1/2 teaspoon salt
  • 3 cups old fashioned oats
  • 2 cups semisweet mini chocolate chips 12 oz package
  • Sea salt flakes or kosher salt

Instructions

  • Beat butter and sugars together in a mixer until creamy.
  • Add in the eggs and vanilla, beat until thoroughly combined.
  • In a separate bowl, mix the flour, baking soda and salt.
  • Slowly add flour mix to the egg and sugar mix.
  • Stir in oats and chocolate chips until combined.
  • Drop rounded teaspoons onto cookie sheet
  • Press down each cookie slightly and sprinkle with sea salt.
  • Bake 10-12 minutes in a 350 degree oven, or until golden brown.
  • Cool for 3 minutes and then transfer to cooling rack.
  • Makes 4 dozen small cookies or about 3 dozen large.
Tried this recipe?Mention @emilyroachwellness or tag #erwellness!

Enjoy!

Source: More Design Please

I love this idea for Memorial Day. So did a lot of other people when I noticed my pin was repined almost 500 times in one day.  There are so many fun holiday decorating ideas I want to do, but I hesitate sometimes because of my goal to reduce our intake of synthetic food dyes. Check out my earlier post on why it may be important for your family to make the switch.

If you are looking to make the switch to natural food dyes, I found a few options online that look good.

The India Tree Natural Decorating Coloursis a good option for coloring frosting or a batter.

The India Tree All Natural Nature’s Colors Decorating Sugars Variety Setis an investment.  The price we pay for natural ingredients I guess.  The blue should work for making these patriotic strawberries. Maybe lighten it up with a little white sugar.  You can make them for both Memorial Day and 4th of July parties!
Check out more Summer Holiday inspiration on my Pinterest Board! What are you making this weekend?

Reusable Squeeze Pouch

We are big fans of the applesauce squeeze pouches.  They are awesome for travel, church and the playground.  However, I’m not a big fan of the waste they create, and also the price tag.  So I asked around and discovered a reusable squeeze pouch.  My friend Amanda at The LittleLilyPad said her friend tested out five different options and this was the best one, the BEABA Babypote.

I don’t understand the name, but I do know that it works.  It’s easy to fill, easy to clean and both kids can work it.  For the little guy, I do have to help him get the last bit out, but that is no different from the applesauce squeezes sold in the store.  Plus, I discovered my choice in apple squeeze pouches  got a C+ rating from Fooducate. (an awesome iPhone app if you are interested) Turns out there is a lot of hidden sugar in each pouch.

I have only put in my homemade applesauce recipe, but I expect it would work great for traveling with your own homemade baby food.  I plan to make some mixes with fresh summer fruits, like banana blueberry or a raspberry apple blend.

Happy travels!

Image and video hosting by TinyPic
Disclosure: I bought this product on my own and was not compensated for this post. Affiliate links are included in this post. I’m sharing this post with Sustainable Ways & Your Green Resource, and Tuesday Baby Link Up.

We live in a small space, but I love to cook.  I would love to have a huge pantry someday, but in the meantime, I need space to do double duty. There were a few problems happening with our “recycling” closet.  As our family grows, along with appetites, I have seen an increase in our incoming groceries. There are large packages from Costco, bulk bin goods from Whole Foods, plus the items I stock up on when there is a good sale.  The items were not being stored well in our kitchen, so many things were getting crammed into this closet.  A closet which had a whole lot of dead space in it.  There were two upper shelves to start, plus we added in an old bookcase that’s been around since my first post college apartment.  I decided it was time to CREATE A PANTRY!

The first stop I made was Lowe’s.  After taking the measurements of the original wire shelving, I set out to get two more.  I love that you can get the shelving cut to order there so it’s the perfect size.  I also found some handy storage totes there too as you can see in the pictures below.

I figured out the drill and installed the shelves myself.  Measure twice and cut once, that’s what my Dad always taught me.  They were really easy to install and although wire shelves are not my favorite thing, they are inexpensive and allows for good lighting from the bulb overhead.

The next step was to clear out the whole closet.  We had way too many shopping bags and paper bags taking up space.  I reduced it to a few brown paper bags to line the recycling bins, plus my favorite rice sack bag.

Next up were some new labels for my glass jars.  I use a mix of glass mason jars, tomato sauce jars and coconut oil jars.  The glass coconut oil jars from Tropical Tradition are big, free of decoration, and just perfect for storing the shredded coconut I use for my granola.  Making the granola each week is one of the main reasons why I buy in bulk and needed a new system.  I’ll share more in a future post about how to create a real food pantry, without spending a fortune.

I ordered Chalkboard Contact Paperfrom Amazon, along with a wet erase chalk marker.  I wanted the label to be more vibrant than with just white chalk. I made a mistake on one label and this stuff really does wash off with a wet towel, and I reused the label with no problem.  I’m hoping that if I need to change a label in six months, I can still wash it off.  Time will tell!

I punched out labels using a 2″ scallop cutter for the jars (EK Success), and a tag punch which looks to be about 3″.  Then I wrote up all the labels and let them dry for about 5 minutes. I used Wet Erase Chalk Marker. I labeled everything that I felt would be a mainstay item in my pantry, including breakfast items like steel cut oats.  Random items like Israeli couscous I didn’t label as I only get it for specific recipes in small amounts.

The tag labels went on the new fabric totes I bought at Lowe’s.  They were on sale and quite a steal.  Plus I love the pop of color when I open up the pantry. The labels are now consistent on both new shelves.

Pantry Organizing RandomRecycling.com

Ready for the final ta da shot…this just makes me happy now when I open the door. The actual door now has additional storage too.

This project should have a disclaimer on it.  I did not do it in a week.  More like 2-3.  In the spirit of full disclosure, I don’t want anyone to think this magically happens in just a few days. At least I hope this can give you a road-map to how to get a similar project done in a few easy steps. Overall it was a low cost project that has huge rewards. Ready to stock your pantry with real food?  Check out my Create a Real Food Pantry post.

I also gave my trusty recycling bins some love and added labels to them: Plastic/Glass, Paper, and 5 cent bottles.  This system has worked great for us the past 6 years and there was no need to
fix it.  Now it’s even easier for us to access the bins.

If you are looking for more kitchen organization ideas, check out my Organization Pinterest board.  Over at Simple Mom, there will be many more posts too with before and after pictures all about Kitchens and Pantries this week.

Do you have a pantry in your kitchen?  Or somewhere else in your house?  What are the must have items that make cooking easy and healthy?

Image and video hosting by TinyPic

Want to see what I stock my pantry with? Here is a post on how I created a Real Food Pantry.
Project Simplify Week 1: Kids’ Stuff~ Paint Bucket Storage

Project Simplify Kick-Off

Project Simplify Home Office~ clear the clutter

I love to hear your feedback and comments. Stop by and visit FacebookPinterest or Twitter for more conversation!  Or get posts delivered via Email or RSS Feed. Thanks!    


To see even more organization ideas: SimpleMom and OrgJunkie, Tatertots&Jello;, Making the World Cuter, Spring Cleaning Challenge and Frugally Sustainable , A Bowl Full of Lemons, Metamorphosis Monday

Strawberry Fruit roll-ups, or fruit leather, are probably the kids’ favorite snack right now.  Both get excited when they see the blender come out.  The tricky part is the one year old is so slow eating his, big sister tries to take what he hasn’t eaten yet!

Strawberry Fruit Leather
Ingredients
1 lb Fresh Strawberries  
2 tablespoons honey

Instructions
Wash strawberries and remove the green stems.

Place strawberries and honey in a blender and puree.

Pour strawberry mix on a dehydrator tray with the fruit leather tray. Spread evenly.

Cook at 135 degrees overnight, or about 10 hours.
This is a bit trickier with an oven, as friends have confirmed that getting an evenly cooked roll-up is difficult. However, you can cook it on a very low oven temp on a parchment lined baking sheet.  I would advise using a cookie sheet with no sides to allow for better air flow, or turn on the convection oven blower.

It will be done when there are no sticky spots.  You want it to be pliable, not brittle.
Let cool completely, then peel fruit leather from tray and move to parchment paper.

Little hands got to this before I could get my picture!

Roll the paper and fruit leather together into a long roll.  Cut with scissors into desired length.  Store in an airtight container or zip top bag.

Strawberry Fruit Leather RandomRecycling.com

See the previous post for the Cinnamon Apple Ring recipe.
Enjoy!

Slow Cooker Tomato Soup at RandomRecycling.com

Ever try to make your own Tomato Soup?  After reading the label on my favorite tomato soup, I decided to test out other organic options.  Nothing ever hit the mark.  I’ve cooked it before on the stove and never really been happy with the results.  Finally tried it in the crock pot and it came out fabulous!  I served it alongside grilled cheese sandwiches for a simple dinner one night, then added barley to it to make it into a lunch.

Slow Cooker Tomato Soup at RandomRecycling.com

CROCK POT TOMATO SOUP

Course: Soup

Ingredients

  • 1 large Onion chopped.
  • 1 stick of butter
  • 28 oz Can of Whole Tomatoes
  • 1/2 Cup White Wine I used Sauvingnon Blanc
  • 1 Tbl Sugar
  • 1 Tsp Dried Tarragon
  • Sea Salt
  • Sour Cream for serving

Instructions

  • In a large skillet, melt the butter on medium heat. Add onion and cook for about 15 minutes until softened. Stir often. (Or, set slow cooker to saute and complete this task in the main cooker.)
  • Add tomatoes (do not drain), wine, sugar and tarragon into the crock pot. Add onion and butter. Cover and cook on Low for 5 hours.
  • Puree using an Immersion Blender
  • or in a blender in batches. Season with salt. Serve with cold sour cream.
Tried this recipe?Mention @emilyroachwellness or tag #erwellness!

Enjoy!


Healthy Homemade Chicken Nuggets

Skip the drive thru and the frozen food aisle.  Here is an easy chicken nugget recipe that is both kid, and husband, friendly.  I grew up eating these and I have hardly tweaked the original recipe from the Eater’s Choice cookbook.  Now I make sure to cook enough so there is leftovers for the kids lunches.

A note about breadcrumbs.  I use the heels of my bread and pulse them in the food processor.  I have also used panko breadcrumbs as well and they come out just as crunchy.

Healthy Homemade Chicken Nugget Recipe

Kid-approved healthy chicken nuggets are a winner at the dinner table.
Prep Time: 8 minutes
Cook Time: 15 minutes
Total Time: 23 minutes
Cuisine: American, dinner
Servings: 4 servings
Author: Emily

Ingredients

  • 3-4 Boneless Chicken Breasts
  • 2 Tbl Olive Oil
  • 2 Garlic Cloves
  • 1/4 tsp ground black pepper
  • 1 Cup Breadcrumbs 2-3 pieces of bread
  • 1/4 tsp cayenne pepper
  • Dipping Sauce~ 2 1/2 Tsp Honey and 2 Tbl Dijon Mustard

Instructions

  • Preheat oven to 425 degrees.
  • Cut chicken into bite size pieces, about 8 pieces per breast.
  • Mix oil, garlic, pepper and chicken in a zip top bag and marinate about 30 minutes. (You can do it in the morning and let it sit till evening, or just marinate for a few minutes, it doesn't make a huge difference in taste.)
  • Mix breadcrumbs with cayenne pepper. Roll chicken pieces in bread crumbs and place on a large cookie sheet. I line my cookie sheet with parchment paper to make clean up easy.
  • Bake 15-17 minutes until lightly browned and cooked through.
  • Use honey mustard sauce or ketchup for dipping.

Notes

Updated: Instead of a breadcrumb topping, you can coarsely chop 3/4 cups of nuts. Pecans, walnuts or almonds are all healthy choices. If you choose a nut topping, omit the garlic from the recipe.
Tried this recipe?Mention @emilyroachwellness or tag #erwellness!


Healthy Homemade Chicken Nugget Recipe


Chicken Nuggets Honey Mustard Sauce

Enjoy this healthy homemade chicken nugget recipe. I’ve been eating this version since I was a kid!