I have taught my eight year old daughter how to make almond milk so I think it’s time I teach all of you. It’s a lot easier than you think. With just two ingredients, almonds and water, you can create fresh almond milk. No added preservatives, “gums” or questionable ingredients. Just straight up homemade almond milk. It’s a normal part of our routine in the kitchen and we make it usually 3-4 times per week.

How to make almond milk

Why am I using almond milk anyways? Dairy is often very hard for us to digest, and is a cause for issues like constipation, IBS, the runs, skin breakouts, and more. Eliminating dairy is a great way to help improve your health. Conventional dairy is so full of junk it’s no wonder it causes digestive upset. But even quality, organic milk does the same thing. Depending on your ethnicity, you have a 25 to 97 percent chance of not being able to digest lactose, a sugar found in dairy products.(source)

Click here to read all about how to shop for high quality dairy if you are not ready to go dairy free.

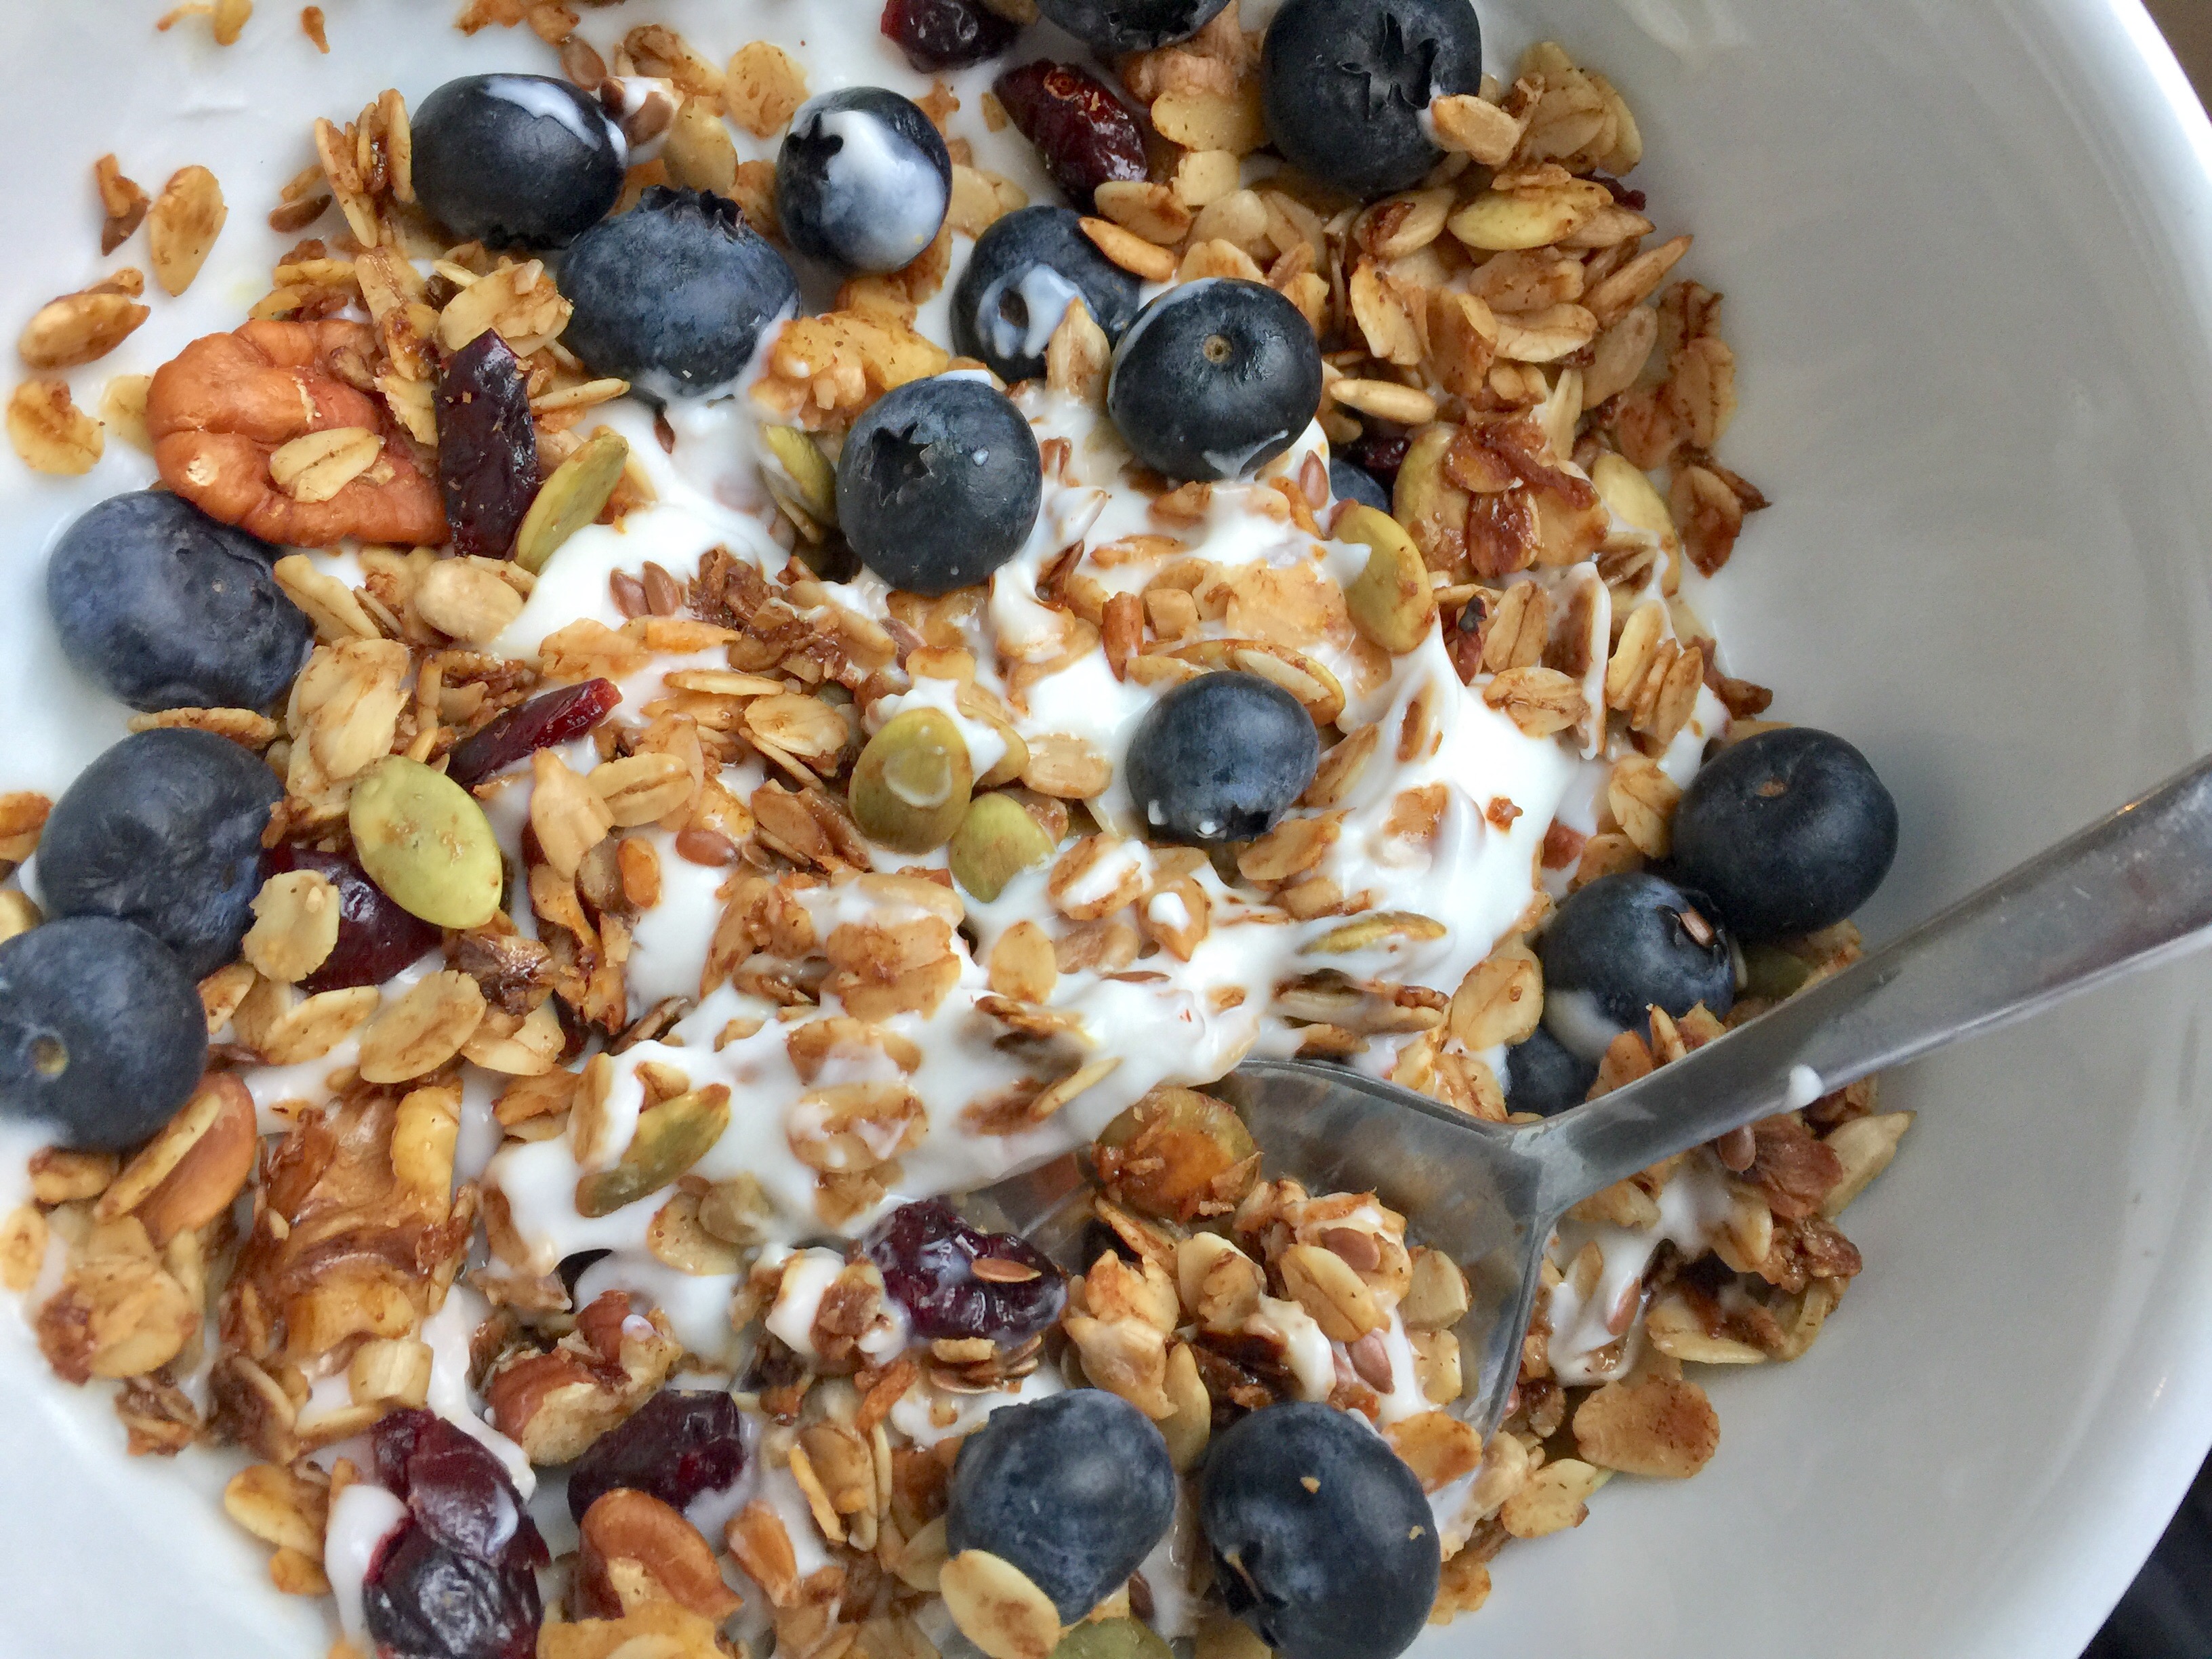
Almond milk can be used as milk in your baking recipes, your morning coffee or tea, or in some homemade granola. I love to use it for making elixirs, like turmeric lattes, or homemade hot cocoa for the kids. Do my children drink almond milk at dinner? No, instead we look for grass-fed, organic full fat milk. I offer it sparingly as dairy for children can often be the root cause of their ongoing bouts of the sniffles. Raw, unpasteurized grass fed milk is the very best, but very difficult to obtain. It’s still illegal in some states, but I see this beginning to change. To look for raw milk in your area, check out the Real Milk site.

How to make almond milk recipe and diy tutorial

A quick note about soaking your almonds. Soak the almonds in clean water for at least 6 hours to remove phytic acid. Often I will soak them overnight and process in the morning. You can see in the picture below what the water will look like after soaking is complete. Rinse away the phytic acid that has been drawn out. The acid is what makes nuts hard to digest. Now you have washed it away and are left with the good parts of the almond.

TWO KEY TOOLS YOU NEED TO MAKE ALMOND MILK.

  1. Nut milk bag
  2. High speed blender

I find the smaller size nut milk bag much easier to manage. This is one I recommend off Amazon, but you can also find them at Whole Foods or your local health food store. For blenders, the high speed ones include the Vitamix, or the Blendtec which I use. (I’ve have a refurbished one it’s going on 4 years.)  I can’t speak to other blenders, like KitchenAid’s new one, but if you have it and it works for you, let me know! If only these blenders were quieter I would be delighted.

HOW TO MAKE ALMOND MILK

how to soak almonds for almond milk recipe

Phytic acid is considered an “anti-nutrient,” making it harder for your body to absorb vitamins and minerals available from food.

Soaking

  1. Measure 1 cup of raw almonds and place in a medium bowl.
  2. Cover with filtered water until the almonds submerged, and covered by an additional 3″ of water.
  3. Let this bowl sit on your countertop for 6 hours, or overnight.


Blending

  1. Using a fine mesh strainer, drain and rinse your almonds. Dispose of the old water.
  2. In a high speed blender, measure 4 cups filtered water.
  3. Add almonds and blend on high for 1 minute.

Straining

  1. Holding a nut milk bag over a large bowl, pour the almond milk mixture into the bag.
  2. Squeeze all the milk you can out of the nut bag.


Storage

  1. Transfer almond milk to glass containers and store in the refrigerator. It will last at least one week. (although mine is gone before then!) These caps are awesome for pouring almond milk.
  2. Toss the almond pulp, or store in glass container to use later.

You can use the almond pulp for almond coconut macaroon cookies or almond pulp truffles. Here’s a great round up from my CNE program here of how to use leftover almond pulp. A fellow CNE grad Jessica Grosman also created this Chocolate Mousse recipe with leftover pulp.

making almond milk with kids

Let me know if you try to make your own almond milk. Don’t let this happen to you…our kids all love having a turn squeezing the milk out. Turns out it’s best to just let one kid at a time be a helper. We ended up with milk and almond pulp everyone after this picture was taken for my homework assignment this fall. What a mess! After restraining it all was not lost. Let me know if you have any hiccups with making your own almond milk. I may have already gone through it before!

I actually learned how to make almond milk when I first looked into The Academy of Culinary Nutrition. When I saw the teacher make the milk in a video and I realized how easy it is. I promise you this is one of the easiest recipes you can master and test out in your kitchen.

The quest for a delicious healthy granola bar has been a long one. Usually it needs to be a nut-free granola bar safe for school, and it has to pass the kid taste test. Plus it has to be refined sugar free, use real food ingredients, and give adults the protein we need in a snack. A long time ago I shared this recipe for a homemade granola bar, now I’ve updated my standards and sharing with you my latest healthy granola bar recipe. The new recipe guide is dairy free, gluten-free, (nut-free if needed,) and full of flavor.

Old fashioned, or large flakes, oats are still the base of my granola bar. They are fairly inexpensive and adding them helps to stretch your dollars. However, I do recommend the gluten-free organic oats when you can find them. Oats are a heavily sprayed crop with pesticides so it’s in your best interest to opt for organic when possible.

NATURAL SWEETENERS FOR HEALTHY GRANOLA BARS

You won’t find any refined sugar in this granola bar, or sugar hiding as brown rice syrup or tapioca syrup and so on. The two sweeteners I’m using here are Medjool dates and a little bit of molasses. The dates provide fiber, plus vitamins B6, potassium, magnesium, copper, and manganese. The molasses contains manganese, copper, iron, calcium, potassium, magnesium, vitamin B6, and selenium. Always opt for blackstrap molasses and not the imitation stuff. It’s also rich in antioxidants, which we need to help rid ourselves of toxins that can build up in our body from the environment.

Use medjool dates as a natural sweetener

Regular sugar doesn’t have any of that good stuff, and instead can aggravate anyone with inflammatory conditions like headaches, joint pain, skin issues, and autoimmune conditions. Generally everyone I know suffers from something on this list. Swapping out our sweeteners to use unrefined sugars 9 out 10 times has really helped our family’s health this year. (I haven’t mastered sugar cookies without sugar, but let me know if you do!) The less sugar you have in your diet to begin with, the less you crave it.

Take a look at the granola bars from the stores and you will often find sugar as the first ingredient. It may be hiding under a different name, but it’s still there. I’m not just talking about kid granola bars either, those energy bars everywhere are like candy bars for grown ups. Always read your label and you may be surprised that a real food isn’t the first ingredient.

[clickToTweet tweet=”Those energy bars everywhere are like candy bars for grown ups. Always read your labels.” quote=”Those energy bars everywhere are like candy bars for grown ups. Always read your label and you may be surprised that a real food isn’t the first ingredient.”]

Sesame seeds add calcium to granola bars

Did you know sesame seeds add a dose of calcium to these granola bars?

My healthy granola bar recipe is easy to update to a nut-free version. You can make them safe those with nut allergies by using sunflower butter instead of almond butter. I baked them once with both sunflower butter, and sunflower seeds, and it was just too much sunflower! The recipe is easy to adapt to your personal likes/kids’ dislikes and it will still come together. You will need to bake them for a short time, and let it cool thoroughly, which helps it retain its shape. No one wants a crumbly granola bar!

How to bake your own healthy granola bars

HOW TO MAKE HEALTHY GRANOLA BARS AT HOME

How to make healthy granola bars dairy free and gluten free

EMILY'S HEALTHY GRANOLA BARS

You will get a dairy-free, refined sugar-free recipe for healthy granola bars that everyone will love. Swap in your favorite dried fruits, superfoods, and even protein powder for an added boost of energy.
Prep Time: 15 minutes
Cook Time: 20 minutes
Total Time: 35 minutes
Course: Breakfast, Snack
Keyword: granola, kids
Author: Emily Roach

Ingredients

  • 2 cups organic gluten-free oats old-fashioned/large flake
  • 6 pitted Medjool dates chopped
  • ½ cup dried fruit unsweetened cranberries or cherries
  • ½ cup raw pumpkin seeds
  • 2 tablespoons sesame seeds
  • 1 teaspoon cinnamon
  • ¼ teaspoon sea salt
  • 1 cup almond butter or nut-free butter
  • ½ cup raw honey
  • ¼ cup coconut oil
  • 11/2 tablespoon blackstrap molasses

Instructions

  • Preheat oven to 350F. Line a 9x11 baking pan with parchment paper.
  • In a large bowl, combine the oats, dates, dried fruit, pumpkin seeds, sesame seeds, cinnamon, and salt.
  • Over low heat, add the almond butter, honey, coconut oil, and molasses to a small saucepan. Gently warm and stir until thoroughly combined.
  • Pour the wet ingredients over the oat mixture and stir to combine.
  • Transfer the granola mixture to the baking pan and press down evenly using your hands or a spatula.
  • Bake for 18-20 minutes, or until lightly golden. Remove from heat and let cool for at least 30 minutes.
  • Cut into desired size and store in an airtight container.
Tried this recipe?Mention @emilyroachwellness or tag #erwellness!

Have fun making your own healthy granola bars. Let me know how they turn out!

Everyone needs quick and easy dinner recipes, and those that work in the slow cooker are even better. This easy curry chicken slow cooker stew is a favorite in our house, even with the kids! I had to share it with you for those days when you need an easy one-pot-meal to be ready when you walk in the door.

This recipe offers a lot of different variations. You can make it as is, or follow some of the substitutions here:

  • Omit lentils to make it Paleo and Whole 30 friendly
  • Swap the lentils for cooked chickpeas instead
  • Swap carrots for the sweet potatoes, or add both!
  • Use mini corn as a surprise instead of frozen corn (opt for organic to avoid GMO’s)

An easy chicken curry is a great base for adding in extra root vegetables. Carrots, turnips or celeriac root are all good vegetables you can add to this meal to increase the plant ratio. My favorites are sweet potatoes and carrots as they work well for the young palettes in our house.

Curry is a healing spice and if you can make your own homemade batch to keep on hand, even better. Curry includes the all important turmeric, which is both an anti-cancer, anti-depressant, and an anti-inflammatory root. Turmeric also helps aid digestion, which can be helpful if anyone has had issues with lentils (or chickpeas) in the past. It’s a detoxifying spice and we can all use that on a regular basis.

How to make your own curry powder

BONUS!! HERE’S A QUICK RECIPE FOR YOU TO CREATE YOUR OWN CURRY POWDER:

  • 3 tablespoons coriander seeds
  • 2 tablespoons cumin seeds
  • 2 tablespoons turmeric
  • 1 tablespoon yellow mustard seeds
  • 1 tablespoon fennel seeds
  • 1 tablespoon cardomom seeds
  • 1 tablespoon cloves
  • 2 teaspoons ground ginger
  • 1/4 teaspoon fresh grated nutmeg
  • 1/4 teaspoon cayenne

Gather all your spices in a large bowl, then transfer to a lined baking sheet. Gently roast at 250°F for about 20 minutes, or until fragrant. Watch the spices to avoid burning them! Let the spices cool off before grinding them. I use a spice grinder like this one. Grind in small batches, then transfer to a glass storage jar and store in a dry, cool place.

Using homemade curry powder in the Slow Cooker Curry Chicken Stew just takes it up a notch. No time for homemade curry powder? Grab one from your favorite store (or this organic curry from Amazon) that does not include irradiated spices.

A note about slow cookers. If you are shopping for a new one, here are the features I think are most important. First, it needs to be digital. Next, it needs to be flexible so you can can adjust the cook times. Having the slow cooker switch to “warm” when complete is very helpful. I love that feature when I make overnight oats. Lastly, look for a model with a ceramic or stainless steel insert. Avoid any that use non-stick surfaces. My favorite slow cooker to recommend is the Bella Slow Cooker, as it allows you to also sear meats over the stove top too in addition to the other functions I mentioned.

EASY CURRY CHICKEN SLOW COOKER STEW

EASY CURRY CHICKEN SLOW COOKER STEW

An easy weeknight meal in the slow cooker, Curry Chicken Stew is a one-pot-meal with loads of vegetables and flavors.
Course: Main Course
Cuisine: Indian
Keyword: curry, slow cooker

Ingredients

  • 1 sweet potato diced
  • 1 cup red lentils
  • ½ cup frozen corn
  • ½ cup frozen peas
  • 1 tablespoon curry powder
  • 1 teaspoon cumin
  • 2 garlic cloves minced
  • 2 cups chicken broth or vegan broth
  • 3-4 organic chicken breasts

Instructions

  • In a large slow cooker, add the sweet potato, lentils, corn, peas, spices, garlic, and broth. Stir to combine.
  • Lay the chicken breast on top of the mixture and set to low for 6-8 hours, or on high for 4 hours.
  • Remove from heat and shred the chicken breast. Add back to the mixture and gently stir to combine.

Notes

Enjoy as is, or serve over quinoa or brown rice. Make it vegan and skip the chicken and use vegan broth. (see link below) Add additional root vegetables like carrots, turnips or celeriac root to the stew.
Tried this recipe?Mention @emilyroachwellness or tag #erwellness!

Slow Cooker Easy Curry Chicken Stew

I hope you enjoy this easy curry chicken slow cooker stew. Let me know what you think!

It’s been nearly one year since I started drinking bone broth every morning. Today I’m telling you why I started making my own homemade bone broth in the slow cooker, and the benefits of a daily dose. It’s a question that comes up often in conversation so I thought it was time to walk you through why I added this to my morning routine.

In article after article, bone broth is being treated as the next new thing. The funny part is that it’s not new at all. Bone broth has been around nearly as long as fire. Our ancestors were so much better at using all of an animal when they hunted for food, all the way down to the bones. Bones were used as tools, and later simmered to create nourishing broths. These broths were used to treat digestive upset, and today they do the very same thing.

Last year was a tough time for our family. We moved to a new country away from all our friends and family. We had a. lot. more time on our hands, and I found myself spending it in the kitchen. Although I was lonely in a new place, I found joy in the kitchen.  I dove head first into reading more nutrition books, instead of my usual slew of cookbooks. (I get new cookbooks out of the library weekly!) I registered for The Academy of Culinary Nutrition and started to make some changes to our eating habits. Making our own bone broth was a big part of the change.

It was the book, The Stash Plan, that first explained to me why bone broth was so nourishing. When we drink a rich, bone broth first thing in the morning, our body is best able to absorb all of the minerals available to us. It’s also the perfect opportunity for healing to take place in the digestive tract.

Our bodies are constantly in need of detoxifying, it’s not a yearly thing like many people believe. It’s a daily thing. Bone broth helps eliminate the waste products that builds up in the gallbladder and liver. Bone broth gives us the amino acid glycine, which helps with the production of glutathione, and helps to detox the liver. Those popular juice cleanses are missing the element of fat that is necessary for toxins to glob onto to exit the body. A homemade bone broth provides the structure needed to clear the pipes.

How to make your beef marrow bone broth

After a year of drinking bone broth, I feel ready to share my knowledge with you. I think it has been crucial for helping me fit strong enough to play tennis four times a week, and still have energy for the rest of the day. I drink both beef bone broth and chicken bone broth and rotate between the two. I use a slow cooker method and keep letting it cook for at least 24 hours, and then until I have 15 minutes to strain and store it. I took a break over the summer for a couple of weeks, but used a Collagen supplement in my smoothies instead. I recommend either Great Lakes or Vital Proteins brands. It was drinking bone broth that also helped me give up my coffee addiction…but that’s another long post.

WHY SHOULD WE DRINK BONE BROTH?

Bone broth is one of the best healing foods for the gut. New science is teaching us about the unique microbiome of bacteria that lives in, and on, each of us. There’s a new focus on keeping your gut microflora healthy and resilient, and bone broth is one of the best ways to do this.

BONE BROTH DOES ALL OF THE FOLLOWING:

  1. Heals the digestive tract
  2. Improves your immune system
  3. Provides a wide variety of rich minerals and amino acids, including calcium, iron, magnesium, potassium, zinc, and selenium.
  4. Anti-aging! Support skin health
  5. Reduces chronic inflammation

WHAT MAKES BONE BROTH SO MEDICINAL?

Both gelatin and collagen are present in bone broth. These proteins help reverse damage in your digestive tract. Our digestive tract gets damaged by using antibiotics, aspirin, Nsaids, refined sugar, flour, caffeine, alcohol, and fried food. Bone broth can also help heal leaky-gut syndrome, which affects many women with autoimmune conditions and children with Autism.

Collagen provides us with glycine, lysine, and proline. These are the amino acids that help keep our skin looking younger. Did you know the collagen in topical skin products really won’t get absorbed because the molecular structure is too large to penetrate the skin? You have to work from the inside out.

WHAT ARE WE TRYING TO AVOID IN STORE BOUGHT BROTH/STOCKS?

Many of us know we need to avoid MSG, or Monosodium Glutamate. MSG creates free glutamic acid in our body, which quickly becomes a neurotoxin. Many people often get a headache or nausea after ingesting MSG, however, there are worse side affects now documented. MSG is an excitotoxin, and it pushes our metabolism into an insulin- or adrenaline-dependent mode, which makes us store more fat. MSG is often found in processed foods or fast-food, but also in store bought stocks.

Here’s the current list of food additives or ingredients that may contain MSG (source, UnDiet):

  • Autolyzed yeast
  • Bouillon
  • Broth
  • Calcium caseinate
  • Corn oil
  • Flavor enhancer
  • Flavoring
  • Hydrolyzed oat flour
  • Hydrolyzed plant protein
  • Hydrolyzed protein
  • Hydrolyzed vegetable protein
  • Malt extract
  • Natural flavors
  • Plant protein extract
  • Seasoning
  • Sodium caseinate
  • Stock
  • Spices
  • Textured protein (TVP)
  • Yeast extract

WHY IS BONE BROTH CRUCIAL FOR CONCUSSION PATIENTS?

Bone broth helps reduce inflammation, including that in the brain, and it’s a lot harder to heal the brain if the gut is unhealthy. There’s new studies that show brain inflammation is linked to ADHD, depression, and dementia. People who switch to a diet that includes bone broth report an improvement in both mood and memory.

SHOULD I DRINK BEEF OR CHICKEN BONE BROTH?

The main difference between beef bone broth and chicken bone broth is flavor. Beef broth is better for richer stews, or for combining with roasted vegetables. Chicken broth is more mild and great for vegetable purees.

CAN I MAKE A VEGAN BROTH?

Yes, a vegan medicinal broth is possible, although it will be missing the amino acids from collagen and gelatin. If you want to upgrade your traditional vegetable broth, add seaweed. Seaweed enriches the broth with a wide variety of nutrients as well, which supports thyroid health. Get my recipe for vegan broth here.

CAN I BUY BONE BROTH FROM A STORE?

Yes, if it’s labeled as bone broth and not “stock.” I’ve heard great things about Kettle & Fire bone broth, which is available via Amazon. (Amazing, right?)

HOW DO I MAKE BONE BROTH?

There is a variety of opinion when it comes to how to make bone broth. The key factor is to make sure you have the right ratio of water to bones to make sure you get that beautiful, gelatinous consistency at the end. If you use too much water, it will cause the broth to be diluted. Also, low quality bones will also alter the broth consistency. Conventional factory farmed animal bones don’t produce as much gelatin as pasture-raised animals.

HOW LONG DOES IT TAKE TO MAKE BONE BROTH?

The longer the better! A slow cooker is a great tool to set it and forget it (mostly.) Here’s a general guideline for cooking times:

  • Beef, Lamb, and Pork Broth: 12-48 hours
  • Chicken and Turkey Broth: 12-48 hours
  • Fish Broth: 4-24 hours

WHAT TEMPERATURE SHOULD I COOK THE BONE BROTH?

After the water is brought to a boil, reduce the heat to the lowest setting. If the heat is too high, it will destroy the collagen.

CAN I MAKE BONE BROTH IN MY INSTAPOT?

Yes, you can. However, it often doesn’t gel in the same way as traditional bone broth methods. The best way to make it is by following my recipes, but use the Soup setting on Low for 120 minutes (or longer if you have the newest versions.) Let it release the pressure naturally so you still need at least 3 hours to complete the broth. If you want to make sure you get the good gel at the end, add some chicken feet to your chicken bone broth! I have not purchased an Instapot yet, as I already have an electric pressure cooker that I love and does the same thing.

DO I NEED TO USE APPLE CIDER VINEGAR IN MY BONE BROTH?

After researching this question, my conclusion is to include either apple cider vinegar (ACV), or wine, in your broth. The acidic nature of the vinegar, or wine, helps to draw out more of the minerals from the bones. What is not suggested is to use ACV in your broth and let it sit before cooking it. In the interest of food safety, include the ACV along with your water when covering the bones to cook.

WHAT CAN I DO WITH MY BONE BROTH IF I DON’T WANT TO DRINK IT STRAIGHT?

Not everyone is keen on a mug of bone broth, but that doesn’t mean you can’t enjoy the benefits of including it in your daily routine. You can make your rice or quinoa using bone broth, use it as a base for soups, or warm it up and serve over some greens for a warm winter meal. I really enjoy the recipes for various bone broths in the Broth and Stock from the Nourished Kitchen cookbook.

How to Make Bone Broth, recipe for beef bone broth

HOMEMADE BEEF BONE BROTH

A homemade bone broth provides so much nourishment for your body. It helps heal the digestive tract, improve immunity, fights wrinkles, and reduces inflammation.
Prep Time: 45 minutes
Cook Time: 1 day
Total Time: 1 day 45 minutes
Course: Soup
Keyword: beef, bone broth

Ingredients

  • 4 lb. Organic meat marrow bones have butcher cut bones so marrow is exposed
  • 2 large yellow onions washed and quartered, skin on if organic
  • 3 carrots roughly chopped, ends removed
  • 2 celery ribs roughly chopped, woody stem removed, leaves can go in
  • 4 cloves of garlic smashed
  • 1 ” fresh ginger root roughly chopped
  • 2 tablespoons black peppercorns
  • 2 bay leaves
  • 4 sprigs of thyme
  • 6 quarts of filtered water 24 cups (Cover the bones/vegetables)
  • 2 cups mushrooms optional
  • ½ cup red wine

Instructions

  • Preheat oven to 375°.
  • Place bones on a roasting pan in a single layer. Roast for 45 minutes.
  • Transfer bones to a heavy stock pot, or slow cooker.
  • Add the onions, carrots, celery, garlic, ginger, peppercorns, bay leaves, and thyme. Cover everything with water and wine.
  • Bring the liquid to a boil. Skim off any foam or impurities that rise to the top. Turn heat down to the lowest setting while maintaining a simmer for at least 12 hours, and up to 48.
  • Add additional water if necessary to keep bones submerged.
  • Strain broth into a large bowl through a fine mesh sieve. Discard the solids.
  • Transfer broth into glass jars. Store in the refrigerator for up to one week, or in the freezer for up to 6 months. Leave at least 1” of space at the top of a glass jar if you plan to freeze it. The broth will expand.
Tried this recipe?Mention @emilyroachwellness or tag #erwellness!

Click here to get my Homemade Chicken Bone Broth recipe.Click here to get my Vegan Broth Recipe.

Finding a healthy chocolate recipe is always on my radar and these Mini Chocolates I created are my new favorite. I’ve tried a bunch of different options and they often come out too grainy. Not these little gems, they are rich while also full of healthy fat and a secret superfood! I think you will be surprised how easy it is to make your own chocolate.

Conventional chocolates are made with refined sugar, which has two big negatives connected to it.

  1. It causes inflammation in the body…which is what can lead to weight gain.
  2. Sugar is made from sugar beets, a GMO product.

When you take a few minutes to make your own chocolate you get the relief of knowing exactly what’s in it. Did I mention raw cacao? By using unrefined chocolate, you get the nutritional benefits of chocolate. One of the key nutrients is magnesium, which is considered the “love vitamin” so it’s a perfect time to treat yourself to a little chocolate.

Healthy Homemade Mini Chocolate Dessert Recipe

I used cute mini muffin liners in the spirit of Valentine’s Day, but you can make it work for any holiday or celebration. If you are serving to kids or anyone with a sensitive palette, you may want to omit the cayenne pepper. Otherwise, cayenne is a warming spice and is great for those chilly months of the year.

The secret ingredient in my mini chocolate recipe is Spirulina, a blue-green algae. This offers you a dose of B vitamins, including B12, iron, and antioxidants. You can’t taste it in the chocolates and it’s a great way to add in a superfood.

Click here to print your recipe for the Homemade Mini Chocolates and enjoy with someone you love!

p.s. Double the recipe…you’ll be glad you did! Those mini chocolates didn’t last long in my house.

My homemade granola recipe has been a staple in my home for years. I’ve given it away to teachers, as a hostess gift, and for new mothers. However, it’s time to share how I’ve given my tried and true recipe a face lift.

Ever since I worked through the culinary nutrition expert program this fall, my tastes have changed. I eliminated all processed sugar and instead rely on natural sweeteners for the majority of my baking these days. What does this mean? Well, we go through a lot of maple syrup and honey. Real Canadian maple syrup and raw, unpasteurized honey to be exact. These two powerhouse sweeteners do the trick, plus they provide us with some health benefits too.

Making my own granola was one of the first ways I started cooking from scratch when I became a parent. As I started reading through cereal labels, I didn’t like what I was reading. My granola was a way to take a break from store-bought cereals and avoid damaged oils (like canola/sunflower/safflower) and also skip the preservatives. What it didn’t do was reduce the amount of sugar to a level I’m now comfortable with.

Easy Healthy Homemade Granola Recipe Breakfast

One  note about oats. I have learned that oats are often heavily sprayed with pesticides. I look for organic oats whenever possible…even better is when I can find gluten-free, organic oats. (But it’s often quite tough!) You can get it from Amazon currently in the US, here.

In the new granola recipe, the flavor is amazing and you can doctor it up to make it your own. Sometimes we eliminate the nuts so I can send it with yogurt as a school lunch. (My kids get so sick of sandwiches.) It’s a healthier version of the original recipe with less sugar, plus Omega 3’s! Both walnuts, and flaxseeds added at the end of the baking, contain Omega 3’s. This mighty essential fatty acid is an antioxidant and an anti-inflammatory. Chronic inflammation is a problem so many people are dealing with and I love adding health-supporting anti-inflammatories whenever possible.

Easy Healthy Homemade Granola Recipe Breakfast

Easy Healthy Homemade Granola Recipe Breakfast

EASY HEALTHY HOMEMADE GRANOLA RECIPE

Easy Healthy Homemade Granola to give you energy to start your day.
Prep Time: 10 minutes
Cook Time: 45 minutes
Total Time: 55 minutes
Course: Breakfast, Snack
Keyword: granola, kids

Ingredients

  • 3 cups gluten free oats large flakes or old fashioned
  • 1 cup pecans chopped
  • 1 cup walnuts chopped
  • 1 cup raw pumpkin seeds pepitas
  • 1 cup raw sunflower seeds
  • 1 cup unsweetened shredded coconut
  • ½ cup coconut flakes raw
  • 1 teaspoon cinnamon
  • ½ teaspoon sea salt
  • ¼ cup raw honey
  • ¼ cup maple syrup
  • ½ cup coconut oil
  • 1 tablespoon blackstrap molasses
  • 1 cup unsweetened dried fruit optional
  • 3 tablespoons flax seeds

Instructions

  • Preheat oven to 300°F. Line a large baking sheet with parchment paper.
  • In a large bowl, combine oats, chopped nuts, seeds, coconut, cinnamon, and salt.
  • In a small saucepan, melt honey, maple syrup, coconut oil and molasses. Add melted wet ingredients to the bowl of oats and stir to combine.
  • Pour granola onto the prepared baking sheet.
  • Bake in oven for 45 minutes total, stirring every 15 minutes. Remove from oven and let cool for 5 minutes. Add flax seeds and cranberries, stir to combine.
  • Store in an airtight container once cooled completely.
Tried this recipe?Mention @emilyroachwellness or tag #erwellness!

I hope you enjoy the updated version of my healthy, homemade granola. It truly is one of our favorite things to bake as a family and I hope it will become a tradition in your home too. Next up I’ll have to update my post on How to Make Your Own Yogurt. Till then, happy baking!


What’s your favorite no-cook dinner for hot nights?! As the temperature rises, cooking in a hot kitchen just isn’t fun. Some nights you just want to skip using the oven or stove for dinner, and maybe it’s even too hot to grill outside. You might need something a little lighter, more refreshing, and healthier, of course. For those times, look to these recipes to help you out. None of these requires you to heat anything up, yet all are still full of the nutrients your body needs to feel its best.

    1. Chicken and guacamole tortilla roll-up
    2. Gazpacho
    3. Open face tuna salad on whole grain bread
    4. Huge chopped salad (farm share!) with feta and nuts/seeds  (from Julia M.)
    5. White bean and roasted chicken salad
    6. Shrimp salad-grab shrimp cocktail from the store and layer on your favorite greens.
    7. Minty chickpea salad with couscous (okay, so you need to heat up a cup of water in the microwave for the couscous. I think you can handle it.)
    8. Veggie/hummus/hard boiled egg/pita/tabbouleh platter  (from Cerissa L.)
    9. Arugula, Italian tuna and white bean salad
    10. Thai beef rolls 
    11. Watermelon steak salad
    12. Cucumber avocado soup
    13. White bean caprese salad
    14. Southwestern salad with black beans, shredded cheddar, avocado, romaine and tomatoes
    15. Sesame lime chicken salad
    16. Smashed white bean and avocado club, mash cannellini bean beans on whole grain bread, top with avocado, tomato and sprouts.
    17. Antipasto plate with marinated olives, chickpeas, prosciutto and cheese
    18. Shrimp Caesar salad
    19. Lobster or crab roll
    20. Waldorf chicken salad – use rotisserie chicken: chop chicken, grapes, walnuts and combine. Mix with a little greek yogurt or mayo.
    21. Curried tofu salad
    22. Tuna or chicken salad stuffed into a pepper or tomato
    23. Picnic in a glass

    What are your favorite no-cook meals? Pop over to our Facebook group and share a recipe or strategy working for you this summer. 

Sometimes you get really lucky with a new recipe. The one when every child enjoys it and asks for more until you realize you have run out. Steak quesadillas may not be gourmet, but they keep everyone very happy at our dinner table. I just had to share it with you.

You can mix up the recipe by trying different cheese varieties in the quesadillas. We tried both cheddar and mozzarella and they were both kid-approved. Quesadillas also lend themselves to adding in healthy extras like avocado slices or baby spinach to up the nutrition factor.

Not only do the mushrooms in the recipe give it a more meaty flavor overall, but they also offer a bunch of vitamins and minerals. Mushrooms contain Vitamin D, riboflavin, biotin, niacin, and and pantothenic acid. I love adding them to meals this way to get the benefits as they are usually picked over in a green salad. Pin this post to your dinner board for those nights when you need something quick!

EASY STEAK QUESADILLAS

An easy weeknight dinner with a balanced amount of protein with top sirloin steak.
Prep Time: 10 minutes
Cook Time: 10 minutes
Total Time: 20 minutes
Course: Main Course
Cuisine: Mexican

Ingredients

  • 1 lb. top sirloin steak thinly sliced
  • + ¼ teaspoon salt divided
  • 1 tablespoon butter
  • 2 garlic cloves minced
  • 1 8 ounce container cremini mushrooms (presliced saves time!)
  • 1 cup shredded cheese mozzarella or cheddar
  • 6 whole wheat tortillas 8" size

Instructions

  • Heat a large skillet over medium high heat. Spray with cooking spray.
  • Add steak to pan and sprinkle with ⅛ teaspoon of salt. Cook 3-4 minutes or until browned, then transfer to a medium bowl.
  • Add butter to pan. Once melted, add remaining ¼ teaspoon salt, minced garlic, and mushrooms. Cook 5-6 minutes until mushrooms begin to reduce (get smaller.) Add mushroom mix to steak.
  • Wipe the pan clean. Toast tortillas on one side, then flip and fill with steak mixture and a scattering of cheese. (1/3 cup) Cover with another tortilla. Let cheese melt enough to allow you to flip the tortilla in the pan without losing all the goodness inside.
  • Repeat with remaining two tortillas.
Tried this recipe?Mention @emilyroachwellness or tag #erwellness!

Ready for a fast 5 minute hummus recipe?! For a long time, I didn’t think I could make my own hummus. After many failed attempts of gritty, flavorless hummus, I gave up. However, with energy this month, I decided it was high time to try a homemade hummus recipe again. This time it was a win.

I was motivated to find the right recipe since the kids go through a lot of hummus. Those little plastic tubs from the store can be licked clean at one sitting between the three of them. Although they prefer it with whole wheat pita bread, we often serve it with veggies at snack time. I’m all for anything that provides encouragement for more vegetables in their tummies.

Lemon-Garlic-Hummus-recipe

Our latest creation comes out smooth and yummy. The biggest difference in the texture is probably due to using a Blendtec blender. We have been so happy with ours and it’s at least two years old now. (Although I would love a quieter one!) The hummus came out quite smooth. If you don’t have a high speed blender, a food processor can work almost as well.

This recipe is for a basic lemon and garlic hummus. You can create variety with this recipe by adding in more garlic to make it spicier, roasted red peppers, beets or chives to start. Create your own version and have fun playing around with it. The recipe makes over 4 cups so you could also take half out and then add some extra ingredients to give yourself two different flavors to choose from. Store it in an airtight container and put a layer of plastic wrap over the top to keep it the freshest.

Enjoy. {recipe adapted from Oh She Glows cookbook}

Easy healthy 5 minute hummus recipe

Prep Time: 5 minutes
Total Time: 5 minutes
Course: Appetizer, Snack
Keyword: hummus
Servings: 4 cups

Ingredients

  • two 15 ounce cans of chickpeas drained
  • 10 tablespoons of olive oil
  • juice of 2 lemons
  • 3 tablespoons water
  • 2 tablespoons tahini
  • 2 cloves of garlic peeled
  • 2 teaspoons ground cumin
  • salt and pepper to taste

Instructions

  • Add all ingredients to a blender or food processor and blend until desired texture is reached.
  • Store in an airtight container in the refrigerator for up to one week.

Notes

One to two garlic cloves may be enough for little kids. If they find it too spicy, stick with one clove and no pepper.
Tried this recipe?Mention @emilyroachwellness or tag #erwellness!

Healthy Homemade Hummus Recipe for Snack. Cute washi tape labels!


Lemon garlic easy hummus recipe

This is a compensated post in partnership with DOLE and the Mom It Forward Blogger Network. All opinions shared are my own. 

Go Green Spinach Smoothie

Spring has finally sprung! After leaving town for a couple of days, I was amazed to come home and see flowers everywhere. The trees are pink and the tulips are all standing at attention. It’s days like this that I love being a stay at home mom and get to relax and watch the kids play in the backyard for hours.

My other favorite thing that happens in spring is snack time takes place outside. Two less rounds of crumbs to clean up in the house! It’s the little things that make me happy in the spring.

The kids were excited when we tested out a new smoothie recipe shared with us from DOLE Pineapple Juice. I usually don’t add juice to our smoothies, but I was happy to learn that Dole’s juice is 100% juice and GMO-free. Two great things in my nutrition playbook. Plus with the “pollen tsunami” taking place, increasing our Vitamin C intake can be a helpful remedy for allergy symptoms.

Silly smoothie faces
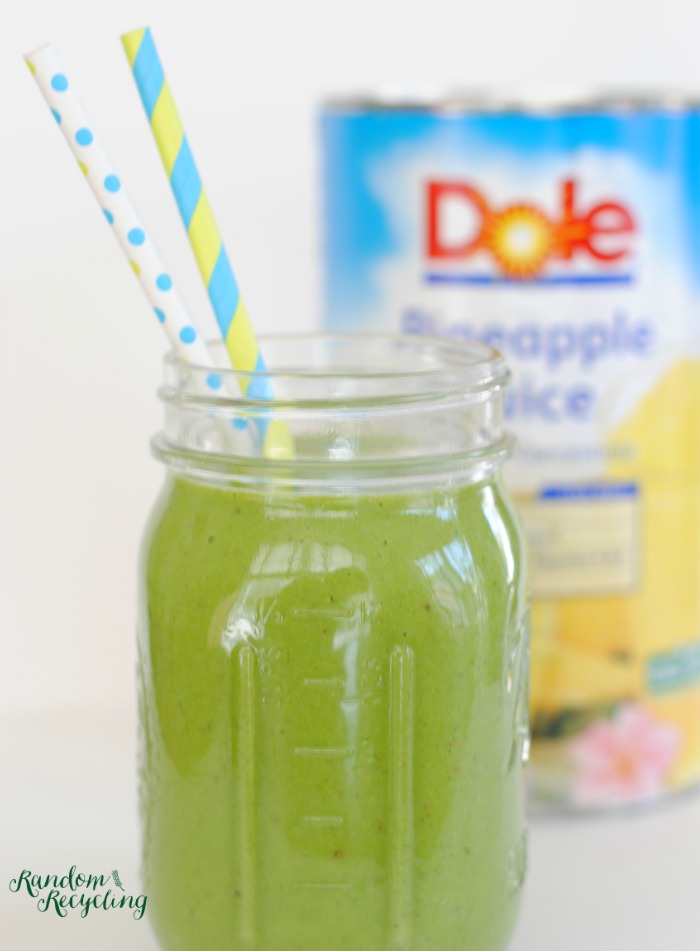
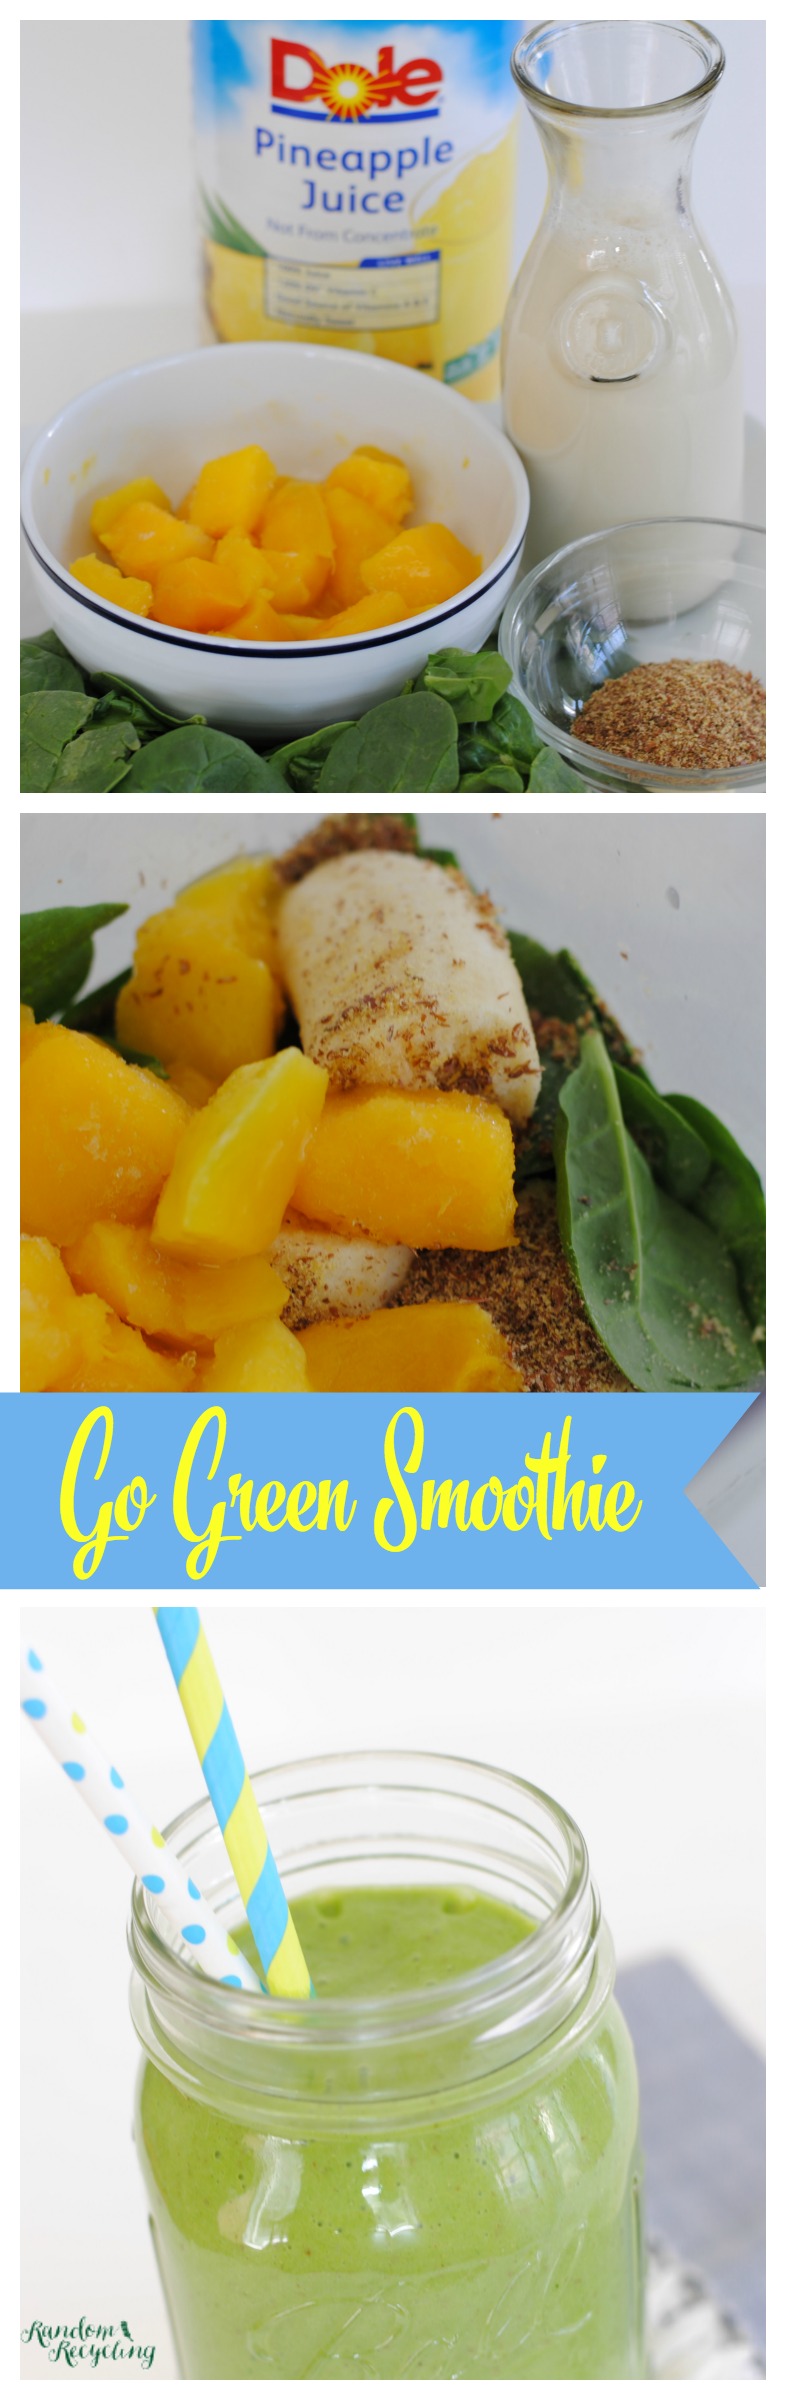
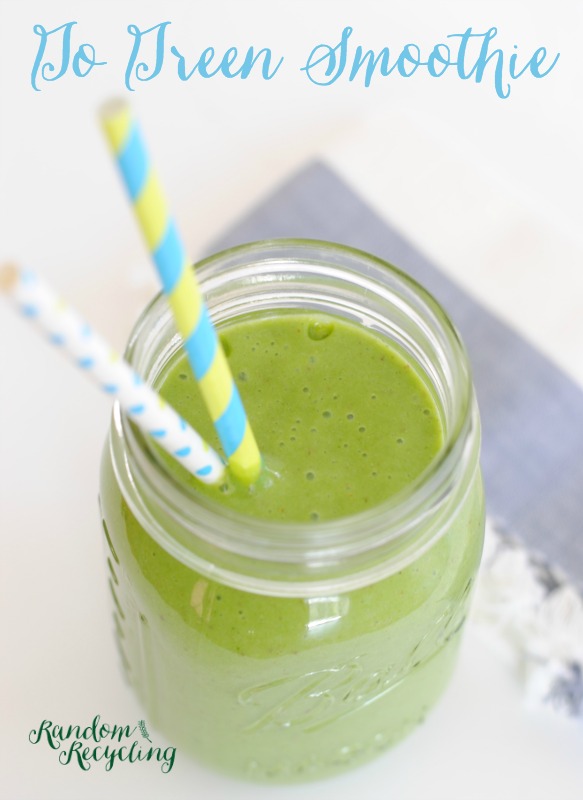
The Go Green smoothie won over our neighbor’s daughter who isn’t always a green smoothie fan. The silly green mustaches everyone was wearing at the end of snack time was a sign of success!

One note, since we try to avoid GMO’s I swapped out the soy milk for almond milk. It can be tricky to find organic GMO-free soy milk so almond or coconut milk are alternate suggestions.

How to make a green smoothie

Healthy Green Smoothie Recipe

Go Green Smoothie

An energizing green smoothie to kick start your day.
Prep Time: 5 minutes
Total Time: 5 minutes
Course: Smoothie
Cuisine: American
Servings: 2 servings
Author: Emily

Ingredients

  • 1/2 cup DOLE pineapple juice chilled
  • 3/4 cup vanilla soy milk or almond milk
  • 4 cups baby spinach
  • 1 cup frozen mango chunks partially thawed
  • 1 banana peeled
  • 1 tablespoon whole ground flaxseed meal

Instructions

  • If you have a high speed blender, add all ingredients to blender starting with the Pineapple Juice.
  • If you have a traditional blender, add juice thru spinach and blend before adding the balance of ingredients.
  • Blend and enjoy!
Tried this recipe?Mention @emilyroachwellness or tag #erwellness!


You can make your own Go Green smoothie and get coupon here for your next sunny day smoothie snack break!

  • $1.00 off #coupon for any 46oz or 6oz 6-pack of DOLE Canned Pineapple Juice.

Learn more about what you can make with healthy pineapple juice on DOLE’s Pinterest boards, Twitter channel or facebook page. I’ll be checking out some fun summer cocktail recipes here so I can use up my leftover pineapple juice. You can also buy the small cans and have them in the pantry for when inspiration strikes.

Healthy Green Smoothie Recipe

What’s your favorite activity to do in the sunshine?

Share the love of sunshine! Click to Tweet: Try this Go Green Pineapple Smoothie! @DolePackaged #ad #dolepineapplejuice #ayearofsunshine #smoothie http://bit.ly/1EqW2RE