Posts

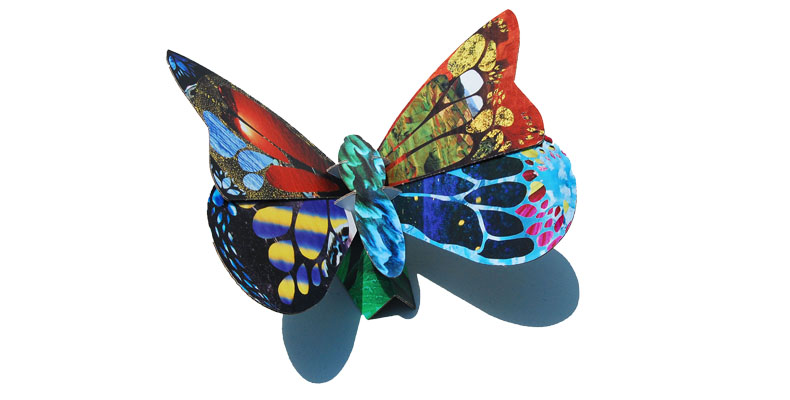
The Butterfly is my favorite Urban Canvas project.

Ever notice how excited kids are to play with a box instead of the toy that came in it? There is just something magical about cardboard boxes and a child’s imagination. Urban Canvas brought these elements together to create a line of design oriented art projects using recycled cardboard. The line of art projects is designed by a mom of three who has a background in interior design and art education. She also had children who loved the cardboard box as much a my two kids. Urban Canvas just launched this year and I love their commitment to using sustainable materials, very little packaging and creating a project that eventually can be recycled.

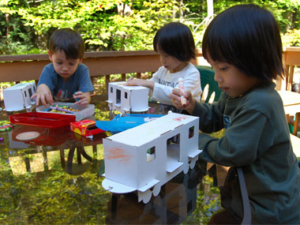
The train set is appropriate for ages three and up.

Want to try out an Urban Canvas project with your kids? Or maybe give one as a gift? You can get 25% off using the code: COOLTOY. If you buy one now, you can also snap a picture of the finished project and enter it into a contest. All entries will get another Urban Canvas toy. You can also buy these projects in a few local retailers, including Henry Bear in the Boston area.

To celebrate the holidays, Urban Canvas is also going to give a lucky reader their choice of an art project! Take a look and see which one you like; there is also a note about the appropriate age for each project in the details. Contest is open to US residents and runs until midnight 12/22.
a Rafflecopter giveaway

Good luck!

As you work through your holiday shopping list, here is something for the tech savvy kids in your house to check out.  My tech savvy kids are little, but they do love playing around with my iPhone and iPad.  We use it as a treat but careful to make sure what they are doing is educational in some way. When I got the chance to review the new Cypher Kids Club Augmented Reality Cards, I was curious to see if my (nearly) four year old would enjoy them.

Cypher Kids Augmented Reality Cards

My daughter is learning how to identify her numbers so we started off with the interactive Numbers learning cards.  We downloaded the app from the iTunes store quickly and got started. (The app is free.) It’s easy to find if you have a QR scanner on your phone. The front of the box has a code that will direct you to the right app in the Apple App Store.

QR code to scan for the app

I played with the program first, which I always recommend when you are going to let your kids use a computer program. Also, I turn the phone to the airplane setting.  This reduces any possible radiation exposure to the kids using a phone.

She had fun testing out the numbers cards.

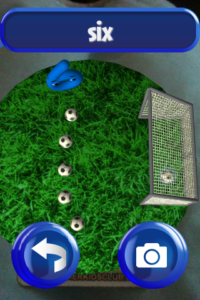
The flashcards themselves are bright and colorful. The application allows you to scroll through and pick the numbers you want to find. I mixed up the cards 10 and under for Madison to work on. Once we matched the number on the screen to the number on the flashcard we flipped it over so my phone’s camera could identify it. It’s like a kid’s version of a QR code on the back. Then the fun starts with an animated 3D-like experience where you can count the number of items from the card and watch them in action.

Screen shot from Numbers

It took me a few tries to get the hang of seeing the 3D images.  The trick is to hold the card a little further away until the entire image fills the screen.  When Madison tried it, she often held the card too close so we worked together on it so she could see the “reward” image once she was able to match her numbers.

She figured it out pretty fast.

The other cards we have are the Wild Animal Adventures and Letters. My little guy had some fun flipping through all the flash cards of the animal set without using the phone. Making the animal sounds is all he needs to practice!

Cypher Kids Augmented Reality Cards

The cards are available at Target and Best Buy. They would make a unique present for kids ages 3 and up. You can learn more about the Cypher Kids Club by visiting their Facebook or Twitter pages. Remember, any time kids are on a phone or tablet, this counts towards their daily screen time.  The American Academy of Pediatrics (AAP) recommends that children 2 years old and younger be exposed to no screen time. For older children, the AAP suggests limiting screen time — including TV, video games and computer use — to one to two hours a day of active viewing time. (source)

Disclosure: I am a member of the Collective Bias™ Social Fabric® Community.  This shop has been compensated as part of a social shopper insights study for Collective Bias™ and  Cypher Kids Club #CypherKidsClub #CBias #SocialFabric  All opinions shared here are my own.

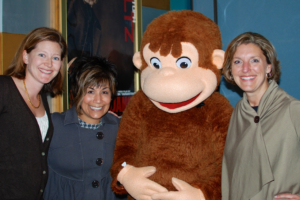
JJ was a little surprised to see such a big Curious George

Raise your hand if your kids love Curious George. In our house, it was the first TV show we let my daughter watch. It fast became a favorite and we often here, “I want to watch George!” Now, JJ is also in love with the little monkey. It really is sweet since my favorite stories (and stuffed monkey) as a child was Curious George.

Did you know Curious George is the #1 show for preschoolers? We were lucky enough to attend a screening of the new Season 7 that starts on PBS on Monday, Dec 3rd. Some of the new shows take place in Australia where Curious George and the Man with the Yellow Hat get to learn all about the animals down under.

I love this short video about how kids in fact learn from watching Curious George. It’s all about encouraging our kids curiosity, just like their favorite little monkey.  Just remember, when it comes to screen time, moderation is best.  I tend to watch George with my kids and then talk about the lessons he learns in real life situations.  The compost episode is one of my personal favorites, but it was a counting buildings example that helped teach my daughter how to count spaces on a board game.

Check your local listings for show times on PBS.  Find more Curious George adventures at the PBSKids website.

Thank you to 360PR, WGBH and Stride Rite Shoes for a wonderful event! All opinions shared here are my own, and my kids!

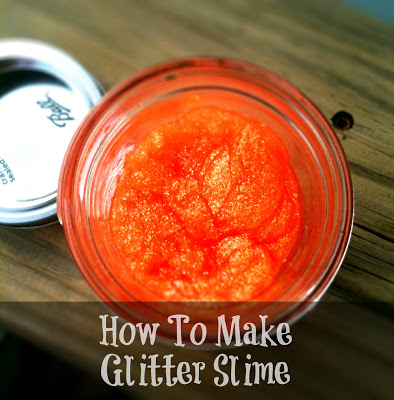
When I first spied glitter slime on Pinterest I was hooked. Such a fun project for the kids with a lasting toy to play with.  This only requires three ingredients: glitter glue, Borax, and water. It’s not too messy and it was easy to make with both a three year old and a one year old.

Ingredients
1 large glitter glue bottle (glitter glue pens are too small)
1 teaspoon Borax
1 cup of water plus 1 tablespoon

Instructions
1. Empty glitter glue bottle into a large bowl.  Add 1 tablespoon of water and swirl around to thin out the glue.

2. Mix 1 cup of water with 1 teaspoon of Borax. Add to glue mixture.

3. Let the kids swirl it all together and it instantly becomes slime!

Madison was really excited to find pink glue to make for her and a friend. It was a great sensory experience for both children.

We are storing our slime in reused glass jars. Large baby food jars are a good size too.

Easy peasy. Here is a cute Google + album sharing pictures of our experience making this project a reality.  Happy Halloween everyone!!

Image and video hosting by TinyPic
I love to hear your feedback and comments. Stop by and visit FacebookPinterest or Twitter for more conversation!  Or get posts delivered via Email or RSS Feed. This post is shared with Green Your Way.

After I mentioned making our own foaming hand soap in yesterday’s post about household cleaners, more than a couple people have asked how to make it.

Here is the super easy recipe I use to make the foaming hand soap. I use Dr. Bronner’s Magic Soaps Pure-Castile Soap as the base.  This product got an A from the EWG Healthy Cleaning Guide. Tea tree oil is also a great addition because it has antibacterial, antiviral, antifungal and antiseptic qualities.

I reuse the foaming hand soap dispenser from CleanWell.  This line of products is a favorite and when I need a fresh bottle.  They have antibacterial soaps without triclosan, which is a big environmental hazard.

DIY foaming hand soap recipe

Foaming Hand Soap Recipe

Keyword: Soap

Ingredients

  • 2 tablespoons Castille Soap
  • 2 drops of Tea Tree Oil
  • 2 drops of Essential oil I use lemongrass currently

Instructions

  • Add ingredients to empty foaming hand soap dispenser (about a 9 oz size). Fill the balance with water and shake gently.
Tried this recipe?Mention @emilyroachwellness or tag #erwellness!


DIY foaming hand soap recipe


This is a super cheap way to keep up with the kids overuse of the foaming hand soap.  I have found Madison “cleaning” the bathroom sink with half the bottle.  At about 25 cents a bottle, I don’t have to stress about it.  Plus, there’s no sodium lauryl sulfate, triclosan or synthetic fragrance involved in her cleaning project.

If you can handle making your own hand soap, now you can move on to making your own bubble soap for kids!

Happy washing!

Disclosure: Some affiliate links are included in this post. 

Reusable Squeeze Pouch

We are big fans of the applesauce squeeze pouches.  They are awesome for travel, church and the playground.  However, I’m not a big fan of the waste they create, and also the price tag.  So I asked around and discovered a reusable squeeze pouch.  My friend Amanda at The LittleLilyPad said her friend tested out five different options and this was the best one, the BEABA Babypote.

I don’t understand the name, but I do know that it works.  It’s easy to fill, easy to clean and both kids can work it.  For the little guy, I do have to help him get the last bit out, but that is no different from the applesauce squeezes sold in the store.  Plus, I discovered my choice in apple squeeze pouches  got a C+ rating from Fooducate. (an awesome iPhone app if you are interested) Turns out there is a lot of hidden sugar in each pouch.

I have only put in my homemade applesauce recipe, but I expect it would work great for traveling with your own homemade baby food.  I plan to make some mixes with fresh summer fruits, like banana blueberry or a raspberry apple blend.

Happy travels!

Image and video hosting by TinyPic
Disclosure: I bought this product on my own and was not compensated for this post. Affiliate links are included in this post. I’m sharing this post with Sustainable Ways & Your Green Resource, and Tuesday Baby Link Up.

I am in love with holiday decorating. Easter included.  Time to decorate those eggs!  This year I finally took some time to do some egg dying with natural ingredients.  Everything came from what I already had in the house.

I bought generic white eggs.  I went with hard boiled instead of blowing them out because I was wasn’t sure if my kids could handle something so delicate.  Cook for at least 15 mins on a simmer to avoid cracks.

I did some clean out of the fridge/freezer and cabinet to test out a few options.  The blueberries soaked in water for about an hour.  Others were boiled for about 20 minutes to draw out the colors.

Once the liquid was ready, I divided it up into smaller containers and added about one teaspoon of vinegar per one cup of liquid.

Cover the area with a large cloth or newspaper as this got messy when the eggs were dropped in!

We got used the following and let the eggs sit in the mixture overnight.

Spinach~ light green
Cranberries~ light pink…I would strain in a cheese cloth before doing this again.  I got funny bubbles on the eggs
Pomegranate tea~ turned green over night!  Originally was pink
Carrots~ light yellow
Red wine~ brown, almost prehistoric looking.
Beet juice~ (very) light pink
BLUEBERRIES~ dark blue. Favorite of all the eggs by far.

We drained them on a cookie cooling rack.  I didn’t care about little marks as it just adds to their character. This was an easy kids activity when adult can make the natural dyes at the stove ahead of time.  The eggs are safe to eat as long as they are refrigerated.  Find more egg dying ideas on my Pinterest Board.  Next up for me are some chalkboard eggs!

Happy Easter and Passover to all!

Strawberry Fruit roll-ups, or fruit leather, are probably the kids’ favorite snack right now.  Both get excited when they see the blender come out.  The tricky part is the one year old is so slow eating his, big sister tries to take what he hasn’t eaten yet!

Strawberry Fruit Leather
Ingredients
1 lb Fresh Strawberries  
2 tablespoons honey

Instructions
Wash strawberries and remove the green stems.

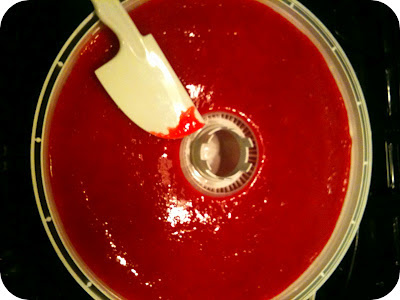
Place strawberries and honey in a blender and puree.

Pour strawberry mix on a dehydrator tray with the fruit leather tray. Spread evenly.

Cook at 135 degrees overnight, or about 10 hours.
This is a bit trickier with an oven, as friends have confirmed that getting an evenly cooked roll-up is difficult. However, you can cook it on a very low oven temp on a parchment lined baking sheet.  I would advise using a cookie sheet with no sides to allow for better air flow, or turn on the convection oven blower.

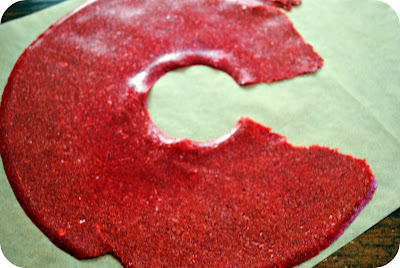
It will be done when there are no sticky spots.  You want it to be pliable, not brittle.
Let cool completely, then peel fruit leather from tray and move to parchment paper.

Little hands got to this before I could get my picture!

Roll the paper and fruit leather together into a long roll.  Cut with scissors into desired length.  Store in an airtight container or zip top bag.

Strawberry Fruit Leather RandomRecycling.com

See the previous post for the Cinnamon Apple Ring recipe.
Enjoy!

10 Non-Candy Valentines Day Ideas

Guess what.  Valentine’s Day is coming upPe.  You may not make a big deal about it, but your kids classroom might.  That means getting an updated class list, making sure you have enough Valentine’s Day cards that work for the boys and the girls.  Then you have to decide if you are going to give candy in a cute little gift bag.

As I try to limit my kids exposure to the synthetic food dyes, I’ve tried to come up with a fun list of candy alternatives for the classroom.  This list is geared to the preschool/elementary age.  If you have other suggestions, I would love for you to share them in the comment section.

  • Stickers~ get a couple of packages and give a sheet for each child on your list.  We go through stickers so fast in our house, I’m always happy to get something new to decorate paper (or people.)
  • Craft supplies~ new Crayons, Markers, Chalk.
  • Bubbles~ spring is just around the corner!
  • Temporary Tattoos
  • Bouncy Balls
  • Musical trinkets~ little kazoo?
  • Healthy Snacks~ Annie’s fruit snacks come in fun-size packages, or pretzels. (better than candy!)
  • Homemade Cookies or Granola Bars 
  • Play dough
  • Pencils. (love this cute printable!)

At my daughter’s school, the choice was made easy this year.  There are so many food allergies that there is no candy allowed.  The kids will celebrate with a big party on Tuesday and pass out Valentine’s Day cards. (see my Pin for the card I’m going to make.)  I will be making sugar cookies, and I think I’ll just pass on the Red Dye #40 sprinkles. 😉

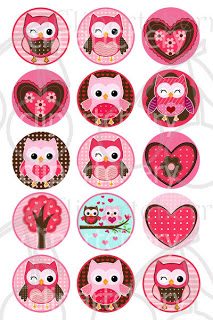
If you have a little free time and $2.50 to spend, this owl printable sheet is adorable! Print on sticker paper and cut out using a circle punch.  So cute!!

Source: Etsy via CherryClipArt


Do your kids pass around Valentine’s Day cards?