Ever hear about using a dehydrator? I hadn’t until about a year ago when I started reading blogs that talked about making dried apple slices in the fall and homemade fruit roll-ups. Before then, it never was on my kitchen wish list.
Luckily, a little birdy (thanks Christy!) told my husband I might be interested in one for Christmas. Over the past two months we have devoured not only apple slices, but also bananas, pineapples and strawberries. I’ve dehydrated potatoes, but haven’t found a great stew recipe yet to try them out. The number of items to dehydrate is massive, but we have limited it to snacks. Have you noticed a snack theme to my last few posts 😉
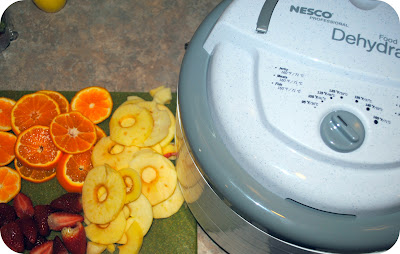
I have the Nesco Food Dehydrator. It’s round and comes with 5 trays, plus layers for drying herbs or making fruit leathers (yum!). It’s reasonably priced for anyone looking to test the water of dehydrators, compared to the more fancy Excalibur dehydrators that have square trays and a different air flow. For non-essential kitchen toys like this, I like being able to decide if I really use it before making a bigger investment.
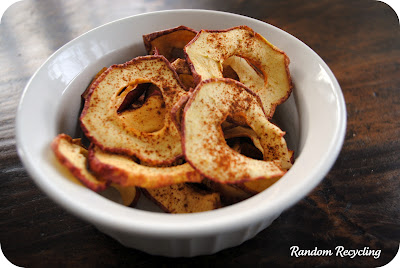
So far, our two favorite snacks have been cinnamon apple slices and strawberry fruit leather. Both are easily portable, enjoyed by both the 3 and 1 year old and also offered a great teething food instead of a store-bought biscuit. We haven’t tried it, but sweet potatoes are also supposed to be great for teething, plus the little ones get a nice dose of beta carotene.
Cinnamon Apple Rings
Wash and core about 4 large apples. We have done a mix of varieties and they all cook up similarly well.
Peel on or off is your call. I like to leave it on to increase the fiber in the snack.
Slice the apples about 1/4-inch thick, either with a sharp knife or a mandoline.
Sprinkle apples with cinnamon lightly on one side.
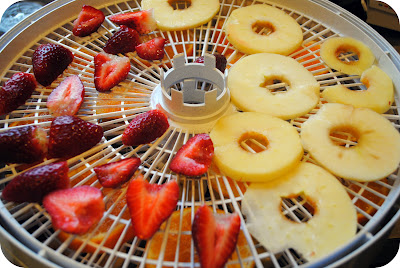
Place apples on the drying racks in a single layer. Avoid crowding the apples to allow for even drying.
Dry at 135 degrees overnight, or about 9 hours. (I suggest allowing yourself time to check them in the morning so you get a sense of how fast they cook, it depends on the size of the apple slice.)
The rings are done when they are pliable, but no liquid is squeezed out when you break it apart. You don’t want brittle rings, that means they are a bit overdone.
Store the cooled apple rings in an airtight container or zip top bags.
If you don’t have a dehydrator, you can make these in an oven on the lowest setting, either 150 or 200 degrees. The apples can be layered on an oven safe cooling rack over a baking sheet. You will need to watch the time as the difference in degrees can vary the cooking time. (more details here.)
One of my new year’s goals is to do some emergency preparation planning. You just never know when you might get a snow storm that shuts everything down. I would feel better knowing we have some food options in the house that will last for a long time, and don’t necessarily come out of a can. There will be more to come on this topic as I share the progress we have made on this goal and how the dehydrator fits into our plans. My husband wants to make beef jerky. He might be on his own with this next kitchen mission. Maybe I’ll get him to guest post. (he, he.)






Thanks for the inspriration about dehydrating and great post. I have a dehydrator but have never opened it.. I'm gonna do it..
Cinnamon apple rings are oh so yummy! Thanks for info on how to make them in the oven.
These are also a very frugal snack for kids!
We eat a lot of apple rings.
Applesauce , homemade apple tarts they are all very cheap ways to feed growing kids!
I buy very cheap cereal, popcorn (the kind they do on top of the stove and produce that is in season and this is all they find to snack on unless they find something just pennies or free with coupons and all of our kids know this well. So they coupon aggressively and try to find treats to fill in the gaps. Cereal is only bought at $1.00 or less per box. That is when I stock up. No chips unless they are dirt cheap.
They eat alot healthier due to this way of planning. I use orange peals for cleaning!