I did a large amount of holiday shopping this year online. It’s an easy way to get great prices, but also order from some unique shops on Etsy. As we sort through all the lovely gifts we received, we have a couple that need to be returned or exchanged.  January 3rd is National Returns Day. It’s kind of like a back-to-reality moment when you want to clean up your house and check those returns off your to-do list. On January 3rd, UPS will ship more than 520,000 from consumers back to retailers. As companies like Amazon report their biggest year yet, many people will line up to do their returns in the easiest way possible.

logo

Here are a couple ways to ship your packages in an eco-friendly way:

  • Skip the overnight shipping option. It increases the carbon footprint of that package’s return trip.
  • Repack in a used box. I save a few during the month in case I have any returns I need to do.
  • Use grocery paper shopping bags to wrap a return. The paper is strong and free!
  • Pack breakables in newspaper instead of bubble wrap or packaging peanuts. If you have a shredder, you can use the shredded paper.
  • UPS offers carbon offset options
  • Skip the drive to the store and have your local UPS driver pick up your returns.

While you are at UPS, see if your location will accept any packaging peanuts you received. Select locations will recycle them.

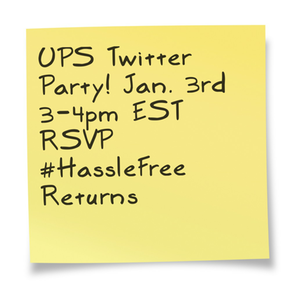
On January 3rd, I’ll be at our local Needham UPS location at 946 Great Plain Ave spreading the word about UPS’s Hassle Free Return options. They make it easy. I’ll be bringing my box to return to Amazon so I’ll give it a test run. You can follow me on Twitter @RandomRecycling and the #HassleFreeReturns. Our local sponsor is Wayfair, rsvp for the twitter party below to win a gift card for some personal shopping on their site.

There are also other events happening in Atlanta and Denver.

  • The UPS Store, 10800 Alpharetta Highway, Suite 208, Roswell, GA 30076 with Megan Cooper, @jamonkey
  • The UPS Store, 8200 S Quebec St Ste A3, Centennial, CO  80112 with Jen Goode, @jgoode

snap-2

JOIN THE PARTY FROM YOUR HOUSE!

DATE: Thursday, January 3rd

TIME: 3:00PM – 4:00PM EST

LOCATION: #HassleFreeReturns

HOSTS: @AudreyMcClellan @VeraSweeney

PANELISTS: @WhitneyMWS @JoLynneS @MyGOMOM @SavvyMommy

TWEETGRID: http://tinyurl.com/bl73oyw

PRIZES: (4) Giveaways throughout the hour!!
– $25 The UPS Store gift card
– (2) 1 $50 gift card from Sierra Trading Post
– $100 gift card from Wayfair

RSVP required to win, enter HERE.

RULES: You must be a US resident 18 and older to be eligible to win. Please see attached document for official rules.

Disclosure:

The UPS National Returns Day public relations team partnered with bloggers such as myself to help educate consumers about UPS National Returns Day. As part of this program, I received compensation for my time. They did not tell me what to say or influence opinions in my blog posts. UPS believes that consumers and bloggers are free to form their own opinions and share them in their own words. UPS’s policies align with WOMMA Ethics Code, FTC guidelines and social media engagement recommendations. 

Ford Fusion Alert Driving

Raise your hand if you ever have fallen asleep driving?  Even one of those nanosecond naps counts as falling asleep. It’s estimated that more than 250,000 people fall asleep behind the wheel a day.  As many of you travel in the coming week, I wanted to highlight some initiatives to keep you safe. I went to an event recently to test drive the new Ford Fusion. Part of the new design are a few bells and whistles to help keep you alert and safe on the road. The idea is that the advancement of technology in cars can act as preventative measures, instead of reactive.

DSC_0006

I also got to hear from John Paul, the “Car Doctor” from AAA at the Ford Driving event.  He shared some scary stats about how dangerous the “micro nap” can be. Maybe you don’t fall asleep behind the wheel, but the driver next to you might. He suggests taking a 15-20 minute nap if you are doing long distance driving. The other factors are getting a little exercise and caffeine. A large Starbucks is the most caffeinated coffee you can buy.

DSC_0017

Michael Kane, a Ford Vehicle Engineering Supervisor, shared with us the latest in technology in the Fusion. (also available in some other Ford models)

  • Lane keeping system.
  • BLIS (Blind Spot Information System)
  • Active Park Assist (I did this in the Escape driving event, loved it!)
  • Auto Start Stop (no more idling!)
  • Cross Traffic Alert (gives you a heads up when backing out of a parking lot space if a vehicle is in your way.)

This video about the Lane Keeping System explains it in this short video.

Ford Fusion Lane Keeping System Animation

Ford Fusion Lane Keeping System Animation

Driving the Fusion was a pleasant, and quiet, experience.  Besides the fact that my kids were not in the car, I noticed how extremely quiet the car drove. I love that feature. The drive was great, pick up top notch and it has all the cool Sync technology built in. Plus, I love the commitment to new safety features in an affordable car.

Love the eco friendly options in the Ford fleet!

Love the eco friendly options in the Ford fleet!

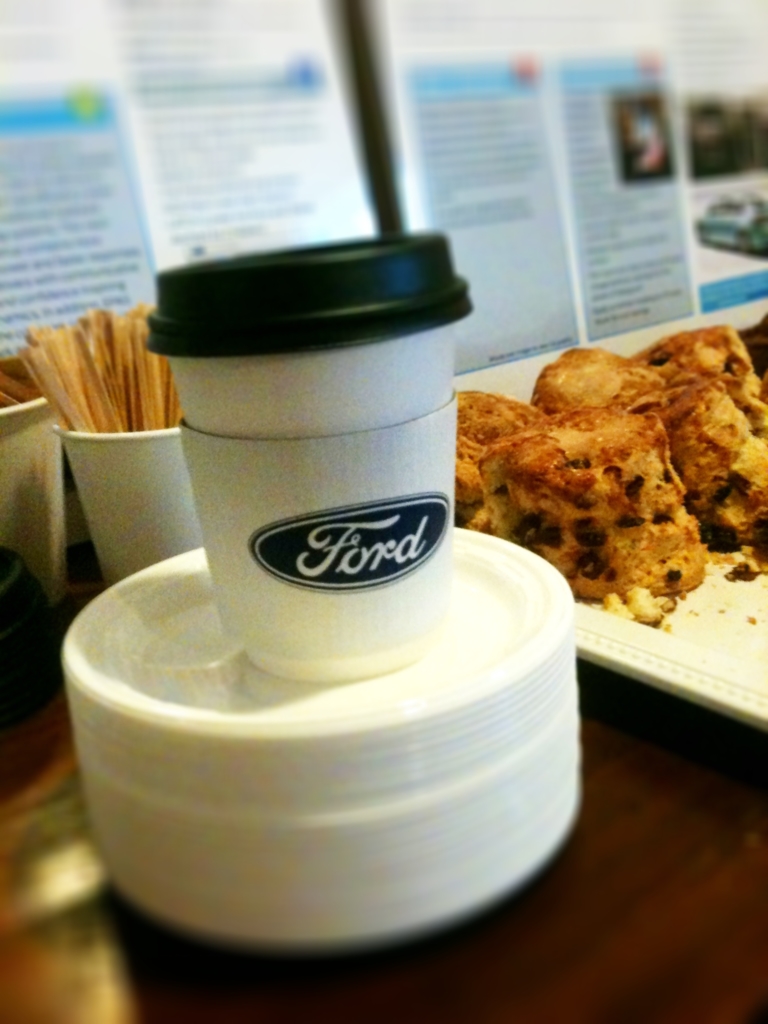
I helped coordinate this event and wanted to give a huge thank you to L’Aroma Cafe in West Newton. The scones and coffee were delicious! Urban Sitter kept the kids occupied so we could focus on learning about the Fusion. Thank you to all the participants who brought in donations for the local food pantry as well!

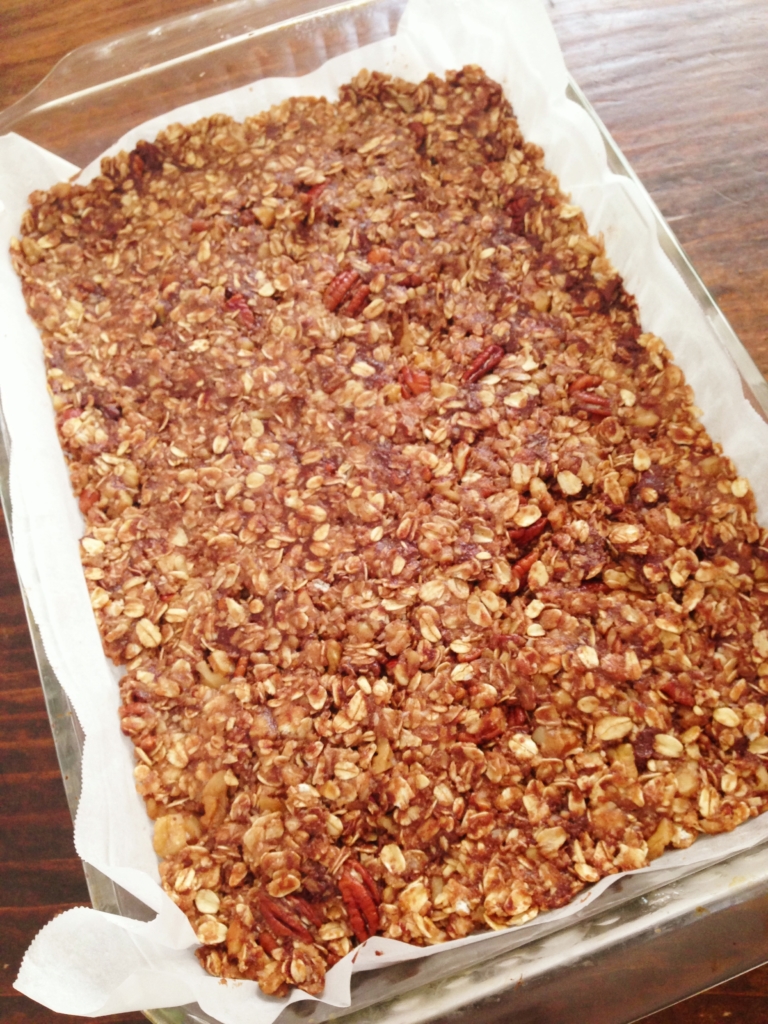
I started making homemade granola bars about a year ago and have been tweaking the original recipe ever since.  It’s finally ready to share with all of you.  Our whole family enjoys them and it’s a healthy, hearty snack for mid-afternoon to hold us over till dinner. I usually make the granola bars while I’m making my weekly batch of granola.  The ingredients are already out so I just need a second large bowl and a couple additional items.

Healthy Homemade Granola Bars

Healthy Homemade Granola Bars

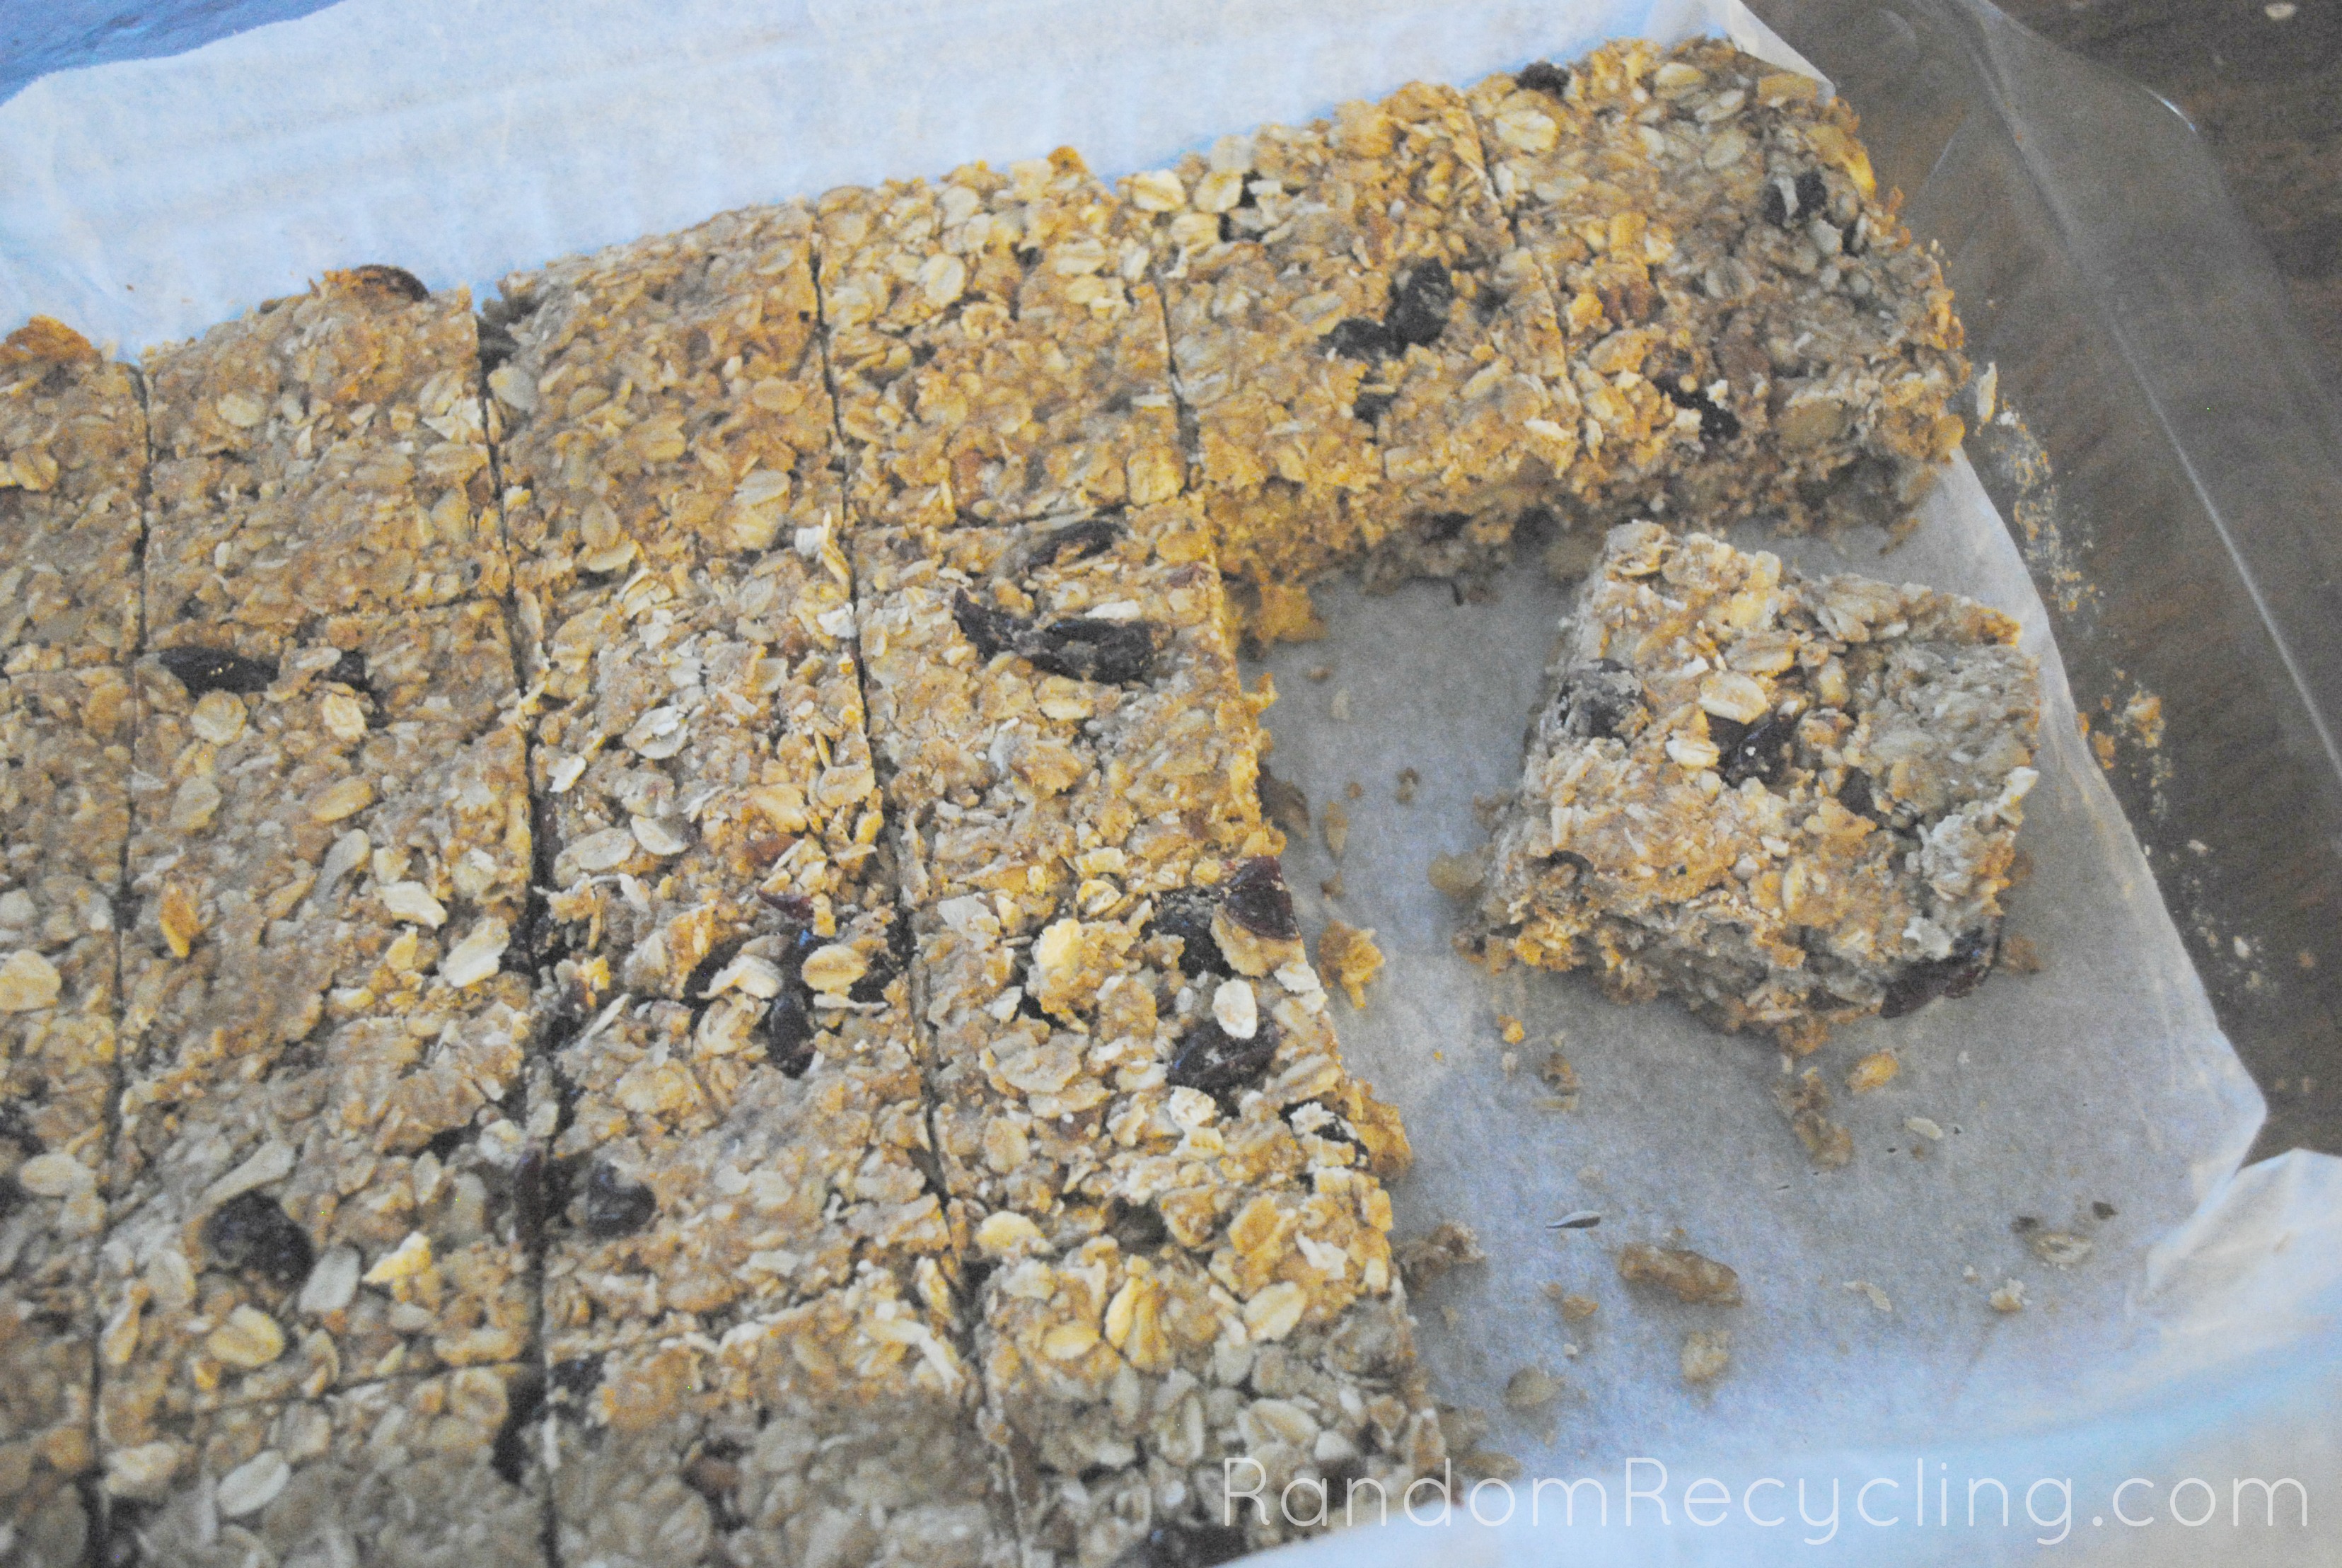
The best part of making granola bars in your own kitchen is you know exactly what inside each one. No scary ingredients you can’t pronounce. No strange preservatives and no high fructose corn syrup. This recipe uses only natural ingredients and you can doctor it up with your favorite add-ins like cranberries (our favorite), nuts, chocolate chips and other dried fruits. We also make them nut free sometimes so I can pack them in school lunches. I’ll add in pepitas instead of nuts to keep it protein heavy.

Homemade Granola Bars

Homemade Granola Bars

Kid friendly healthy granola bars
Course: Snack
Cuisine: American
Servings: 16
Author: Emily

Ingredients

  • 1/2 cup butter
  • 1/2 cup honey
  • 1/2 cup applesauce
  • 1 teaspoon vanilla
  • 4 1/2 cups oats
  • 1 1/2 cups white whole wheat flour
  • 1/2 cup sunflower seeds
  • 1/2 cup unsweetened coconut
  • 1/2 teaspoon kosher salt
  • 1 teaspoon baking soda
  • 1 cup cranberries or other add ins

Instructions

  • Preheat oven to 325 degrees. Line a 13 x 9 pan with parchment paper, or grease well.
  • Melt first four ingredients in a medium saucepan.
  • Mix balance of ingredients in a large bowl.
  • Add melted butter mixture to the oatmeal mixture. Stir until well mixed.
  • Pour mixture into prepared pan. Press down on the mixture to ensure bars stick together.
  • Bake 15-20 minutes or until lightly browned.
  • Let cool completely before cutting. Store in an airtight container.

Notes

If you bake this at 300 degrees with granola, bake for 22 minutes.
Tried this recipe?Mention @emilyroachwellness or tag #erwellness!


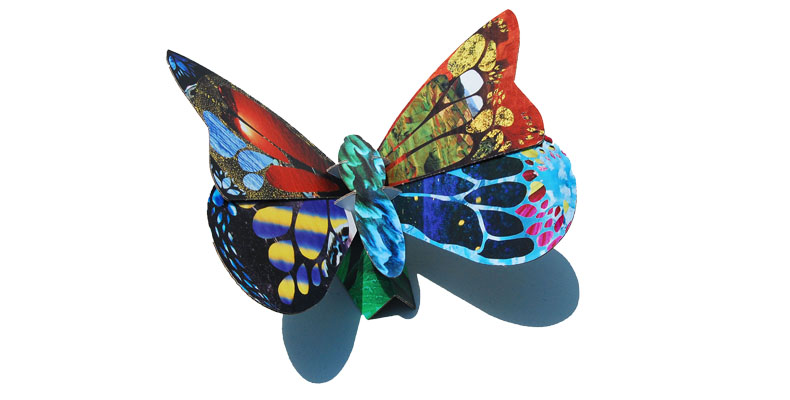
The Butterfly is my favorite Urban Canvas project.

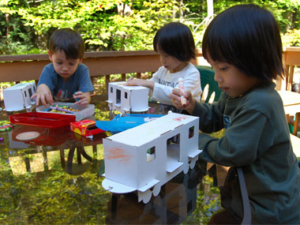
Ever notice how excited kids are to play with a box instead of the toy that came in it? There is just something magical about cardboard boxes and a child’s imagination. Urban Canvas brought these elements together to create a line of design oriented art projects using recycled cardboard. The line of art projects is designed by a mom of three who has a background in interior design and art education. She also had children who loved the cardboard box as much a my two kids. Urban Canvas just launched this year and I love their commitment to using sustainable materials, very little packaging and creating a project that eventually can be recycled.

The train set is appropriate for ages three and up.

Want to try out an Urban Canvas project with your kids? Or maybe give one as a gift? You can get 25% off using the code: COOLTOY. If you buy one now, you can also snap a picture of the finished project and enter it into a contest. All entries will get another Urban Canvas toy. You can also buy these projects in a few local retailers, including Henry Bear in the Boston area.

To celebrate the holidays, Urban Canvas is also going to give a lucky reader their choice of an art project! Take a look and see which one you like; there is also a note about the appropriate age for each project in the details. Contest is open to US residents and runs until midnight 12/22.
a Rafflecopter giveaway

Good luck!

As you work through your holiday shopping list, here is something for the tech savvy kids in your house to check out.  My tech savvy kids are little, but they do love playing around with my iPhone and iPad.  We use it as a treat but careful to make sure what they are doing is educational in some way. When I got the chance to review the new Cypher Kids Club Augmented Reality Cards, I was curious to see if my (nearly) four year old would enjoy them.

Cypher Kids Augmented Reality Cards

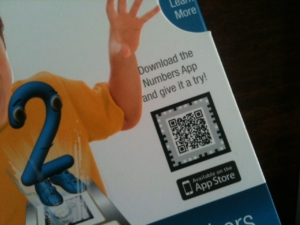
My daughter is learning how to identify her numbers so we started off with the interactive Numbers learning cards.  We downloaded the app from the iTunes store quickly and got started. (The app is free.) It’s easy to find if you have a QR scanner on your phone. The front of the box has a code that will direct you to the right app in the Apple App Store.

QR code to scan for the app

I played with the program first, which I always recommend when you are going to let your kids use a computer program. Also, I turn the phone to the airplane setting.  This reduces any possible radiation exposure to the kids using a phone.

She had fun testing out the numbers cards.

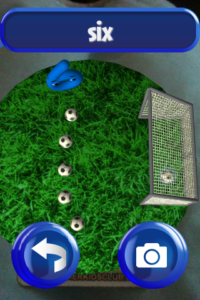
The flashcards themselves are bright and colorful. The application allows you to scroll through and pick the numbers you want to find. I mixed up the cards 10 and under for Madison to work on. Once we matched the number on the screen to the number on the flashcard we flipped it over so my phone’s camera could identify it. It’s like a kid’s version of a QR code on the back. Then the fun starts with an animated 3D-like experience where you can count the number of items from the card and watch them in action.

Screen shot from Numbers

It took me a few tries to get the hang of seeing the 3D images.  The trick is to hold the card a little further away until the entire image fills the screen.  When Madison tried it, she often held the card too close so we worked together on it so she could see the “reward” image once she was able to match her numbers.

She figured it out pretty fast.

The other cards we have are the Wild Animal Adventures and Letters. My little guy had some fun flipping through all the flash cards of the animal set without using the phone. Making the animal sounds is all he needs to practice!

Cypher Kids Augmented Reality Cards

The cards are available at Target and Best Buy. They would make a unique present for kids ages 3 and up. You can learn more about the Cypher Kids Club by visiting their Facebook or Twitter pages. Remember, any time kids are on a phone or tablet, this counts towards their daily screen time.  The American Academy of Pediatrics (AAP) recommends that children 2 years old and younger be exposed to no screen time. For older children, the AAP suggests limiting screen time — including TV, video games and computer use — to one to two hours a day of active viewing time. (source)

Disclosure: I am a member of the Collective Bias™ Social Fabric® Community.  This shop has been compensated as part of a social shopper insights study for Collective Bias™ and  Cypher Kids Club #CypherKidsClub #CBias #SocialFabric  All opinions shared here are my own.

The kids had a blast at the Royal Sonesta Hotel

I had the opportunity to check out the Royal Sonesta Boston hotel last weekend for a Boston Social Media holiday party. The hotel welcomed a group of local bloggers and their families for an afternoon of fun and great company. From the moment we entered the hotel, the staff was super nice and had the event well organized. I always love seeing hotels decorated for Christmas and took the opportunity to click a quick one of the kids in front of one the many decorated trees at the hotel.

Here are a few fun facts I learned about the Royal Sonesta Boston.

  • The hotel is great for kids. The indoor pool alone is a winner.

    Even the kids straws are special.

  • They have a composting program!
  • Lots of new green initiatives are in work for each hotel room.
  • They buy local when possible. The bar tools were purchased from a local shop in Somerville.
  • They make their own sodas. We had the Pomegranate Lime Black Pepper soda and it was amazing.
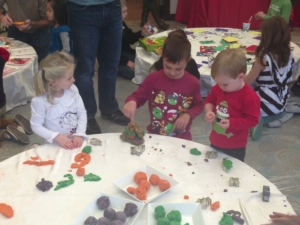
  • They give kids homemade play dough at their restaurants instead of paper and crayons.
  • The restaurants partner with local farmers to create farm to table inspired menus.

The event was a blast for both the kids and adults. The kids were entertained with crafts, play dough making, and cookie decorating. The adults enjoyed a civilized lunch while the babysitters from UrbanSitter watched our little ones. Ice cream sandwiches with homemade cookies finished off the  lovely afternoon.

Homemade play dough made in house.

Thank you to the Royal Sonesta Hotel for hosting us, and Niri and Isra for coordinating it all. Go team #BSMHoliday! To hear more about our Boston Social Media parties, here is my friend Lori from Groovy Green Livin’s recap. She shares more about what this group means to all of us.

I also want to mention our group has partnered with three charities for the holidays. Toys for Tots (we packed the bins at Burton’s Grill on Tuesday night!), Pediatric Cancer research and we adopted two families who were devastated by Superstorm Sandy.  If you are a tweeter, if you send out a tweet with the hashtag #Aflackids, Aflac will donate $2 towards pediatric cancer research for every tweet this holiday season.

Disclosure: We attended a complimentary event at the hotel. All opinions shared here are my own. 

After I mentioned making our own foaming hand soap in yesterday’s post about household cleaners, more than a couple people have asked how to make it.

Here is the super easy recipe I use to make the foaming hand soap. I use Dr. Bronner’s Magic Soaps Pure-Castile Soap as the base.  This product got an A from the EWG Healthy Cleaning Guide. Tea tree oil is also a great addition because it has antibacterial, antiviral, antifungal and antiseptic qualities.

I reuse the foaming hand soap dispenser from CleanWell.  This line of products is a favorite and when I need a fresh bottle.  They have antibacterial soaps without triclosan, which is a big environmental hazard.

DIY foaming hand soap recipe

Foaming Hand Soap Recipe

Keyword: Soap

Ingredients

  • 2 tablespoons Castille Soap
  • 2 drops of Tea Tree Oil
  • 2 drops of Essential oil I use lemongrass currently

Instructions

  • Add ingredients to empty foaming hand soap dispenser (about a 9 oz size). Fill the balance with water and shake gently.
Tried this recipe?Mention @emilyroachwellness or tag #erwellness!


DIY foaming hand soap recipe


This is a super cheap way to keep up with the kids overuse of the foaming hand soap.  I have found Madison “cleaning” the bathroom sink with half the bottle.  At about 25 cents a bottle, I don’t have to stress about it.  Plus, there’s no sodium lauryl sulfate, triclosan or synthetic fragrance involved in her cleaning project.

If you can handle making your own hand soap, now you can move on to making your own bubble soap for kids!

Happy washing!

Disclosure: Some affiliate links are included in this post. 

Ready for a no-waste lunch! How cute are these lunch boxes for kids. They were not this cute when I was little.  Best part, they are all eco-friendly.  Which one is your favorite?
Eco Friendly Lunch Boxes for Kids

How to Host a Canning Party with Friends

Please welcome my guest writer Mary who shares her experience of hosting a canning party, plus her recipe for Sassy Tomato Salsa.  Many hands make less work.  Leave a comment and share what you would make at your canning party.


When veggies are ready to be harvested, we need to take advantage of this large influx of ingredients to make delicious things to eat.  Buying these by the bushel really cuts down on the cost and it’s easy to put up a few bushels at a time but it’s definitely more fun when you do it with friends.  I’d like to share with you about one canning party I hosted at my house one summer.  As a side note, before we begin, there are quite a few sites that offer free printables for canning and even specialized invitations for your party.  Make it as fancy or relaxed as you see fit….the whole idea is to have fun!
I gathered friends I knew either loved to can or wanted to learn.  We chose the items we wanted to can that day and divvied up the ingredients amongst ourselves.  This also included what we would need for lunch and of course, the wine we’d consume *smile* but sharing the cost of things can really reduce the cost of taking on a large project like this.  Tomatoes by the bushel can be purchased at farmer’s markets, vegetable stands or sometimes even grocery stores.   Roma, or paste, tomatoes make the best tasting salsa because they are meatier.


Canning Fun
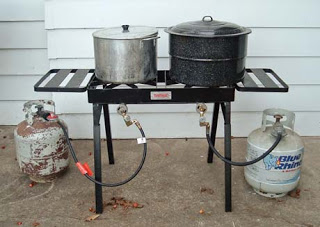
We set up stations in my kitchen, in my garage and even outside.  Tasks were divided with 2 people at each station and it was proven again that many hands make light work.  The first station worked with the tomatoes, the first step of the process.  After washing the tomatoes, place them in boiling water until the skins split, remove them from the water and plunge into a sink of ice water – this stops the cooking process and allows the skins to peel easily.  All the vegetables that are included in the making of the salsa had to be chopped into small pieces and this was done both by hand and using the food processor.  Once all the ingredients were assembled, they were put into large stock pots to cook.  Since there were six of us working together, we wanted to make sure we each had at least 6 pint jars of salsa apiece so we were cooking a large amount of ingredients and it had been divided into four large stock pots.  We set up a camp stove outside to cook two of the pots and two were cooked on the stove in the kitchen.  As preparation had taken most of the morning, while the salsa was cooking we stopped for a lunch of all the yummy stuff to eat everyone had brought and of course, bottles of wine.  It takes at least 2 hours, if not longer, to cook the salsa down to the consistency needed so we had a good bit of down time.


How to Process
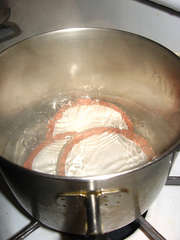
You need to prepare the jars to be filled so they need to be washed in hot, soapy water and then placed in boiling water to sterilize the jars.  Since you are doing a large amount of jars, it`s easiest to place them into a warm oven to hold the jars since you`ll have too many to hold in the canners.  You will also need to place the lids and rings in large saucepans to sterilize them and it also softens the rubber on the lids, so they will seal.  Remove a jar from the oven and fill up to an inch from the top.  You need to remove the air bubbles from the jar and you can use the handle from a spatula, a plastic lettuce knife or anything similar that you can run around the edges of the jar to make sure the bubbles are moved from the food.  Wipe the top of the jar to remove any signs of spills as this will prevent the jars from sealing properly.  Remove a lid from the hot water, place on top of jar and then screw a ring into place but not only hand-tighten.

Place jars in the canner, which has water boiling in it, and continue until canner is full.  Once the water reaches a boil again, place lid on top and set timer for 15 minutes.  As we had 4 canners going at one time (two outside and two inside), we had jars coming out at different times.  Place the processed jars on old towels to cool and as they cool, you should hear the most delightful “ping“ coming from the jars as they seal.  You can also check this by pushing on the top of the jars, if they don`t give to the touch, they are sealed but if they move up and down, this means they aren`t sealed properly and should be kept in the refrigerator for eating soon.

Disclaimer
Please note that some people may tell you that this recipe needs to be pressure canned but rest assured that the increased vinegar that is noted in the recipe makes it safe for water bath processing.  Also, there are many vegetables that do need to be pressure canned but that would need to be covered in another post.  My most important caution to everyone is to be sure and check current canning and preserving books for assistance as many of the old methods aren’t safe for today’s safety standards.  You may also find someone who says “well, that’s the way my mother did it and how I’ve always done it.”  This is strictly your decision on how to proceed but methods were updated for very good reasons and I feel safer following them.

Please note that the recipe will need to be adjusted to the amount you want to prepare.  This particular recipe makes 8 pints so we made 4 batches of it in order for everyone to have 6 jars to take home with them (there were 5 of us).


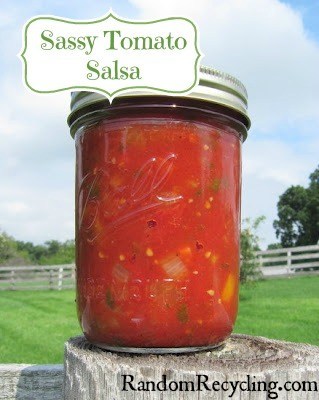
Sassy Tomato Salsa

Author: Emily Roach

Ingredients

  • 8 cups tomatoes peeled, seeded, chopped and drained
  • 2 ½ cups chopped onion
  • 1 ½ cups chopped green pepper
  • 3 – 5 chopped jalapeños
  • 6 cloves minced garlic
  • 2 tsp cumin
  • 2 tsp pepper
  • 1/8 cup canning salt
  • ¼ cup chopped fresh cilantro
  • 1/3 cup sugar
  • 1 cup vinegar
  • **See note if using a Boiling Water Bath

Instructions

  • Mix all ingredients, bring to a boil, boil; boil for 30 minutes (or longer to better marry flavors). Pour into hot jars. Wipe tops of jars to remove any lingering food, place lid on top and hand tighten rings.
  • Process in a Boiling Water Bath for 15 minutes.
  • Makes 8 pints.
  • This can also be processed in a pressure canner but for simplicity sake, I’m only providing the directions for the water bath process as it’s a little easier for a first-time canner.
Tried this recipe?Mention @emilyroachwellness or tag #erwellness!

About the Author
I am a mother and a Nana who presently lives in southern Ontario, Canada, only 15 minutes from Niagara Falls.  I came to live in Canada by way of Kentucky when I married a wonderful Canuk – unfortunately, I lost him almost 5 years ago.  I have tried to lived a fairly frugal life most of my life, a lot of it while raising my two boys by myself for a long while.  Now that I’m widowed, I find myself putting those skills to use again and am finding I’m searching for a more simple life as well.

Helpful items for the Canning Party:

**I prefer wide mouth jars when I can find them.


Reusable Squeeze Pouch

We are big fans of the applesauce squeeze pouches.  They are awesome for travel, church and the playground.  However, I’m not a big fan of the waste they create, and also the price tag.  So I asked around and discovered a reusable squeeze pouch.  My friend Amanda at The LittleLilyPad said her friend tested out five different options and this was the best one, the BEABA Babypote.

I don’t understand the name, but I do know that it works.  It’s easy to fill, easy to clean and both kids can work it.  For the little guy, I do have to help him get the last bit out, but that is no different from the applesauce squeezes sold in the store.  Plus, I discovered my choice in apple squeeze pouches  got a C+ rating from Fooducate. (an awesome iPhone app if you are interested) Turns out there is a lot of hidden sugar in each pouch.

I have only put in my homemade applesauce recipe, but I expect it would work great for traveling with your own homemade baby food.  I plan to make some mixes with fresh summer fruits, like banana blueberry or a raspberry apple blend.

Happy travels!

Image and video hosting by TinyPic
Disclosure: I bought this product on my own and was not compensated for this post. Affiliate links are included in this post. I’m sharing this post with Sustainable Ways & Your Green Resource, and Tuesday Baby Link Up.