Posts

Welcome meal plan readers! I have missed you and I’m excited to return to the weekly meal planning process after a great break. There’s lots of new recipes to try from my Pinterest boards and the magazines I devoured at the beach this month. This week is a transition from vacation life to real life so it’s pretty simple. Which is probably what everyone else  needs as we move from July into August in the week ahead.

July Week 4 menu plan

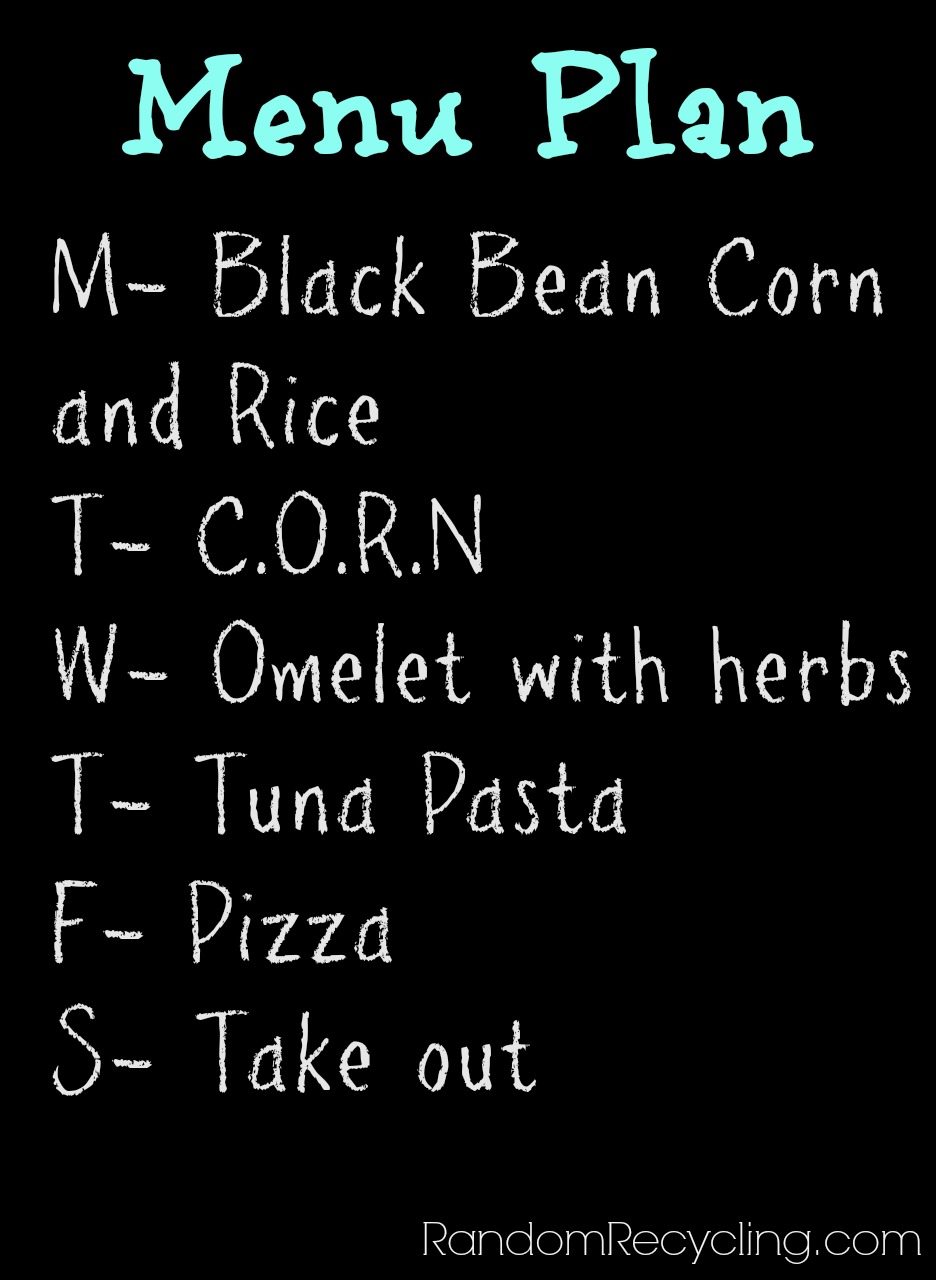
Monday~ Meatless Monday! Using up some pantry staples along with some delicious local corn. {Marshall’s in Gloucester corn isn’t to be missed.}

Tuesday~ C.O.R.N {Clean Out Refrigerator Night ~ complete clean out in this case!}

Wednesday~ moving home and hoping to have an omelet for dinner with herbs from our garden, which I have missed.

Thursday~ Campanelle Tuna Salad. A great pantry ready meal.

Friday~ Pizza night with our homemade pizza dough.

Saturday~ Regroup with an easy take out night.

Quick deal to mention—From Your Freezer To Your Family, Slow Cooker Freezer Recipes is now half off! Buy your copy here for just $4.99. I am a new fan of freezer meals and plan to make more of them before back to school business starts.  It will be half off till August 14th, in honor of Mama and Baby Love’s newest cookbook that comes out on August 8th. {This is an affiliate link which gives me a little kickback if you make a purchase. I own the book and think many of you would enjoy it as the slow cooker can make dinner time prep so much easier.}

Slow Cooker freezer cooking book

For more inspiration, see my past menus here, or the Pinterest board here, or OrgJunkie for a link-up of meal plans.

Babys First Beach Trip


Have you ever felt intimidated about bringing a baby to the beach? While it’s not always the easiest adventure, I wanted to share with you a few of our must pack items. We are preparing for our annual beach vacation, this time with a newborn in tow. Here are some tips to make life on the beach with a baby a little easier on everyone.

  • Beach Hats – always pack more than one as they often get wet or sandy
  • Coverup swim suits are much easier than trying to keep up with sunscreen on wiggly, wet babies. If your baby is old enough to play in a little water, pack two suits.
  • Beach Tent– get one with a SPF rating of 50+
  • Sunscreen Blanket – I bought one from Coolibar to try and I bought one for my sister from Isis Parenting.
  • Aden and Anais blankets are a must. They work as a nursing cover, and also to cover a stroller on a walk.
  • Umbrella – get a good one. Ours is from Coolibar that has a high SPF. The cheap ones don’t give great sun protection and they are also tricky in the wind. We also use a sand anchor with our umbrella to make it secure.
  • Water Bottle for Mom, especially if you are nursing. I love my new Lifefactory glass water bottle I ordered. The flip top cap to make it easy to me to drink it on the go.
  • Cover Up for Mom. If you stay cool, baby will stay cool.
  • Safe sunscreen for both baby and Mom. Avoid using a cheaper chemical based sunscreen on your body and just the safe stuff for baby. Babies often fall asleep against your chest and can have a bad reaction to sunscreen from your body. (Ask me how I know…)
  • Stroller- a bassinet (or pram) stroller  gives newborn babies a little more breathing room. I don’t suggest using the car seat for newborns as they get too hot strapped in during a nap.

What else would you add to the list? Let me know if you have any questions about bringing baby to the beach!

There are a couple of affiliate links included in this post, however all items featured were purchased by me and not included as a review. 

It’s hard to avoid all the articles recently talking about the safety of sunscreen. If you love to play outside like our family, sunscreen is one of those summer necessities you spend a lot of time applying and reapplying. What’s really in the sunscreen you use for your family? Here’s my cheat sheet of what to look for in your sunscreen and what to avoid. Plus I’ll share some of my favorites that all get grade of 2 or better on the EWG Guide for Sunscreen.

What do you want in your sunscreen?

  • Mineral based products using zinc oxide or titanium dioxide
  • No false promises. It shouldn’t read “sunblock” or “waterproof”. These terms are no longer allowed on sunscreen labels. Water-resistant is ok.
  • Broad Spectrum label which protects against both sunburns and aging.
  • SPF of 30-50.

What to avoid in your sunscreen?

  • Oxybenzone or any other chemical based lotion that has an ingredient ending in “one.”
  • Spray sunscreens. Aerosol based sprays contain nano particles that can be inhaled into the lungs and cause hormone disruption. Yes they are easy to use, but they are TOXIC!! The FDA is finally investigating this issue. Read more about why you should avoid spray sunscreens here.
  • Anything claiming to have an SPF over 50.

10 Healthy Sunscreens for Every Budget


For my top picks, I’m including brands that I’m familiar with or have tested out myself. I also choose sunscreen products that you can get at your local drugstore, Whole Foods or on Amazon.

  • Aveeno Baby Natural Protection Face Stick, SPF 50 (Rating 2)
  • COOLA Suncare Baby Moisturizer Mineral Sunscreen, Unscented, SPF 50 (Rating 1, this is what I’m using on my kids now)
  • COOLA Suncare Plant UV Face Moisturizer Sunscreen, Unscented, SPF 30 (Rating 1, I’m using this as my face sunscreen for everyday. Did you recently see the article about how wearing sunscreen keeps skin looking younger?)
  • Coppertone Kids Pure & Simple Lotion, SPF 50 (Rating 2)
  • Coppertone Sensitive Skin Suncreen Lotion, SPF 50 (Rating 2)
  • Dolphin Organics Naturals Mineral Sunscreen, SPF 32 (Rating 2)
  •  Kiss My Face Natural Mineral Sunscreen with Hydresia, SPF 40 (Rating 2)
  • Miessence Reflect Outdoor Balm, SPF 15 (Rating 2) (I’ve shared my thoughts before in a past sunscreen post.)
  • Mustela Broad Spectrum Mineral Sun Stick, SPF 50+
  • Seventh Generation Wee Generation Baby Sunscreen, SPF 30


Further Reading: My friend Lori shared her thoughts on finding the best non-whitening sunscreen. For a very detailed cheat sheet with product reviews you can read Kathy’s SafeMama’s 2013 recap.

Disclosure: I have received some of these products in the past and none for the purpose of this review. All opinions shared here are my own. The Amazon link is an affiliate link, if you make a purchase via Amazon it helps support this site. Thanks!

My kids are popsicle crazy.  Morning, noon and night they want to make popsicles.  In my quest to avoid unnatural food dyes and excess sugar, we started making our own popsicles.  Welcome Zoku to the family.

Zoku makes popsicles super fast.  10 minutes fast.  If you have kids, you know fast is good.  They have no patience for waiting for a treat and this is just long enough.  Plus it becomes a fun project when you start “decorating” your popsicles.

Lemonade and local strawberries

Dress up the everyday popsicle with strawberry slices.  Or go with a sweeter option and add in mini chocolate chips!

Our go to popsicle is yellow or pink lemonade.  I like the Newman’s Own Organic Lemonade which has no high fructose corn syrup or artificial colors or flavors.  Both kids love it.

Watermelon and lemonade popsicle

There are all sorts of special accessories for the Zoku.  We have a basic model with 2 moldsand if our family grows, we will be in the market for a larger option down the road.  I love the idea for making a bunch of popsicles for the kids and their playmates when they get older. They all already get excited about clicking in their “drip trays.”

I picked up my Zoku at Williams and Sonoma, plus the Zoku Quick Pops Recipe Book.  You can also find them on Amazon.

And yes, the Zoku is also good for making boozy popsicles for the grown-ups too.  Shhh…don’t tell the littles.

Image and video hosting by TinyPic


strawberry lemonade popsicles (1)

How to Host a Canning Party with Friends

Please welcome my guest writer Mary who shares her experience of hosting a canning party, plus her recipe for Sassy Tomato Salsa.  Many hands make less work.  Leave a comment and share what you would make at your canning party.


When veggies are ready to be harvested, we need to take advantage of this large influx of ingredients to make delicious things to eat.  Buying these by the bushel really cuts down on the cost and it’s easy to put up a few bushels at a time but it’s definitely more fun when you do it with friends.  I’d like to share with you about one canning party I hosted at my house one summer.  As a side note, before we begin, there are quite a few sites that offer free printables for canning and even specialized invitations for your party.  Make it as fancy or relaxed as you see fit….the whole idea is to have fun!
I gathered friends I knew either loved to can or wanted to learn.  We chose the items we wanted to can that day and divvied up the ingredients amongst ourselves.  This also included what we would need for lunch and of course, the wine we’d consume *smile* but sharing the cost of things can really reduce the cost of taking on a large project like this.  Tomatoes by the bushel can be purchased at farmer’s markets, vegetable stands or sometimes even grocery stores.   Roma, or paste, tomatoes make the best tasting salsa because they are meatier.


Canning Fun
We set up stations in my kitchen, in my garage and even outside.  Tasks were divided with 2 people at each station and it was proven again that many hands make light work.  The first station worked with the tomatoes, the first step of the process.  After washing the tomatoes, place them in boiling water until the skins split, remove them from the water and plunge into a sink of ice water – this stops the cooking process and allows the skins to peel easily.  All the vegetables that are included in the making of the salsa had to be chopped into small pieces and this was done both by hand and using the food processor.  Once all the ingredients were assembled, they were put into large stock pots to cook.  Since there were six of us working together, we wanted to make sure we each had at least 6 pint jars of salsa apiece so we were cooking a large amount of ingredients and it had been divided into four large stock pots.  We set up a camp stove outside to cook two of the pots and two were cooked on the stove in the kitchen.  As preparation had taken most of the morning, while the salsa was cooking we stopped for a lunch of all the yummy stuff to eat everyone had brought and of course, bottles of wine.  It takes at least 2 hours, if not longer, to cook the salsa down to the consistency needed so we had a good bit of down time.


How to Process
You need to prepare the jars to be filled so they need to be washed in hot, soapy water and then placed in boiling water to sterilize the jars.  Since you are doing a large amount of jars, it`s easiest to place them into a warm oven to hold the jars since you`ll have too many to hold in the canners.  You will also need to place the lids and rings in large saucepans to sterilize them and it also softens the rubber on the lids, so they will seal.  Remove a jar from the oven and fill up to an inch from the top.  You need to remove the air bubbles from the jar and you can use the handle from a spatula, a plastic lettuce knife or anything similar that you can run around the edges of the jar to make sure the bubbles are moved from the food.  Wipe the top of the jar to remove any signs of spills as this will prevent the jars from sealing properly.  Remove a lid from the hot water, place on top of jar and then screw a ring into place but not only hand-tighten.

Place jars in the canner, which has water boiling in it, and continue until canner is full.  Once the water reaches a boil again, place lid on top and set timer for 15 minutes.  As we had 4 canners going at one time (two outside and two inside), we had jars coming out at different times.  Place the processed jars on old towels to cool and as they cool, you should hear the most delightful “ping“ coming from the jars as they seal.  You can also check this by pushing on the top of the jars, if they don`t give to the touch, they are sealed but if they move up and down, this means they aren`t sealed properly and should be kept in the refrigerator for eating soon.

Disclaimer
Please note that some people may tell you that this recipe needs to be pressure canned but rest assured that the increased vinegar that is noted in the recipe makes it safe for water bath processing.  Also, there are many vegetables that do need to be pressure canned but that would need to be covered in another post.  My most important caution to everyone is to be sure and check current canning and preserving books for assistance as many of the old methods aren’t safe for today’s safety standards.  You may also find someone who says “well, that’s the way my mother did it and how I’ve always done it.”  This is strictly your decision on how to proceed but methods were updated for very good reasons and I feel safer following them.

Please note that the recipe will need to be adjusted to the amount you want to prepare.  This particular recipe makes 8 pints so we made 4 batches of it in order for everyone to have 6 jars to take home with them (there were 5 of us).


Sassy Tomato Salsa

Author: Emily Roach

Ingredients

  • 8 cups tomatoes peeled, seeded, chopped and drained
  • 2 ½ cups chopped onion
  • 1 ½ cups chopped green pepper
  • 3 – 5 chopped jalapeños
  • 6 cloves minced garlic
  • 2 tsp cumin
  • 2 tsp pepper
  • 1/8 cup canning salt
  • ¼ cup chopped fresh cilantro
  • 1/3 cup sugar
  • 1 cup vinegar
  • **See note if using a Boiling Water Bath

Instructions

  • Mix all ingredients, bring to a boil, boil; boil for 30 minutes (or longer to better marry flavors). Pour into hot jars. Wipe tops of jars to remove any lingering food, place lid on top and hand tighten rings.
  • Process in a Boiling Water Bath for 15 minutes.
  • Makes 8 pints.
  • This can also be processed in a pressure canner but for simplicity sake, I’m only providing the directions for the water bath process as it’s a little easier for a first-time canner.
Tried this recipe?Mention @emilyroachwellness or tag #erwellness!

About the Author
I am a mother and a Nana who presently lives in southern Ontario, Canada, only 15 minutes from Niagara Falls.  I came to live in Canada by way of Kentucky when I married a wonderful Canuk – unfortunately, I lost him almost 5 years ago.  I have tried to lived a fairly frugal life most of my life, a lot of it while raising my two boys by myself for a long while.  Now that I’m widowed, I find myself putting those skills to use again and am finding I’m searching for a more simple life as well.

Helpful items for the Canning Party:

**I prefer wide mouth jars when I can find them.


Zucchini Bread Recipe Quick Breads

When I think of my Nana, I usually think of her in the kitchen.  Amazing things came out of that kitchen, including a fair share of baked goods.  I recently found her Zucchini Bread recipe and gave it a try.  Zucchini is in abundance this time of year so this is a very inexpensive snack for the whole family to enjoy.

Zucchini bread ingredients
 

Grate zucchini on a hand grater or in a food processor

Zucchini Bread Recipe Quick Breads

NANA’S ZUCCHINI BREAD

Course: Breakfast
Keyword: bread

Ingredients

  • 4 eggs
  • 2 cups sugar; 1/2 white and 1/2 brown. I used slightly less of each
  • 1 cup vegetable oil or coconut oil
  • 1 teaspoon vanilla
  • 3 1/2 cups flour I used white whole wheat
  • 1 1/2 teaspoons baking soda
  • 3/4 teaspoon baking powder
  • 1 1/2 teaspoons salt
  • 1 teaspoon cinnamon
  • 2 cups grated zucchini
  • 1 cup chopped nuts
  • 1 cup raisins

Instructions

  • Pour hot water over raisins in a separate bowl and set aside.
  • Beat eggs in a large bowl. Add the sugar gradually, beating as you go and add the oil and vanilla.
  • In a separate bowl, combine the flour, baking soda, baking powder, salt, and cinnamon.
  • Add the dry ingredients to the egg mixture, alternating with the zucchini.
  • Stir in the chopped nuts.
  • Drain raisins and stir in. (Nana's note: you may substitute another cup of raisins for the nuts.)
  • Bake in a greased and floured loaf pan in a 350 degree oven for 55-60 minutes. Makes 2 loaves.

Notes

My note: since this is a double recipe, I make one loaf of bread and one pan of muffins (12). Muffins take only 35 minutes so set a double timer. I use the timer on my iPhone so I always have it with me while I'm running after the kids.
Tried this recipe?Mention @emilyroachwellness or tag #erwellness!

I plan to bake and cook my way through some more of my Nana’s recipes.  Thanks for everyone who gave suggestions of how to preserve her recipes from the Facebook page. If you have another suggestion, please leave it in the comments.

Eco-Friendly Camping for Families

Please welcome my guest blogger Elizabeth who is sharing some great sustainable camping tips.  I have been camping once so I am happy to have someone with a lot more experience share some fun ways to stay green while camping.

 
My first camping memory is from when I was seven years old.  We lived in Fort Lewis, Washington at the time and I can still recall running down the shoreline of the Pacific Ocean with my siblings and friends.  There is a vague memory of waking up in a tent and the smell of campfires.  I love talking to my father about my first encounter with a raccoon that was stealing trash through a fence right near our camp.  It was beyond exciting.

Since I have grown up, camping has taken on a whole new interesting twist for me.  Now I have a growing interest in all things frugal, but also in trying to be sustainable and take care of the same environment I’ve grown to love spending so much time in.

Basics – Follow the Rules
First and foremost, follow these common and important rules that you’ll find in most camp areas.
  • Don’t bring firewood that isn’t from that particular area.  This creates a risk of introducing disease and pests that could wreak havoc on the beautiful place you are staying.
  • Make sure you never leave your fire or hot coals unattended.  Also, if possible try to only have fires in designated areas.
  • My mom always taught us to leave the campsite cleaner than it was when we arrived, and I think it’s one of the best pieces of advice for any camper.
Reduce, Reuse, Recycle
When you start packing your camping boxes, you may find yourself reaching for paper (or Styrofoam *shudder*) plates with those white plastic forks, knives, and spoons.  There will inevitably be those rolls of paper towels and paper napkins accompanying them.  My best piece of advice is to resist this urge and the illusion of convenience.
These items are garbage, no really; they are just going to be trashed.  This inevitably is negative because obviously if you care about sustainability you don’t want to contribute to our trash problem for no reason.  You may not have considered that this trash is also inconvenient for you.  The more of these papers goods you are putting in a trash bag in your campsite, the more objects there are for our favorite camping critters and friends to smell out and then toss all over your campsite.
So let’s consider some really fun options out there.
  • BPA-Free reusable plastic kitchenware comes in all sorts of shapes, sizes, and colors.  Check out the Sea To Summit X Bowl & X Plate which is collapsible so it saves you room.  They also have the Delta Plate and Delta Bowl.
  • Check out the many metal-based products out there.  The MSR Mountain Plate is stainless steel and lightweight, while still being a bit more sturdy then the cheaper aluminum plates.  Enamelware plates are also really popular choices like this GSI Metal Rim Plate.  If you are interested in a bit more of an investment, check out this Snow Peak Titanium Plate that leaves no metallic taste in your food and will not rust.
  • Sporks are not just a fun idea for kids in school, so check around for some great multipurpose reusable utensils.  The Delta Spork with Serrated Knife is BPA-Free and is ergonomically designed for easy use.  Bamboo has become known as a great sustainable resource and so I was excited to find these Bamboo RePEaT Utensil Sets that come with cute cases in various colors, but it doesn’t just stop at bamboo.  Those cases are made from recycled PET plastic! How great is that?
  • Check out local thrift stores for hand towels you can pack with you to use instead of paper towels.  The great things with these are that you can just simply rinse them out and then you hang them up to dry and they’ll be ready to go by your next meal generally.
Cook Well, Store Well, Eat Well
A great investment option for campers is cast iron that can be used both in your home and during your great outdoor adventures.  One of my favorite pages for information on cast iron is found at Sustainable Baby Steps.  You can either purchase these beauties brand new or you can keep an eye out for friend, family, or garage/yard sales looking to get rid of older pans.
Next, invest in a real cooler.  Do not be tempted by cheap coolers because the chances are you will quickly lose money in the ice that you will have to replace.  Not all of us can go for coolers like the Coleman OptiMaxx though, which rings in around $370.  The Coleman Xtreme is a much cheaper cooler that promises to keep ice for around 5 days at 90F degrees, that isn’t bad! Be sure to test your cooler out before you purchase it as well.  Sometimes coolers makes great promises but are difficult to latch or barely stay closed at all.
Lastly, remember to eat well.  Sometimes campers are bombarded by convenience foods that are packed with unnecessary fillers, preservatives, and tons of sodium.  Before you venture out into your camping trip, make a detailed list of meals for your time.  Be sure to include snacks and drinks.  Most recipes are easily translatable to a campfire, especially if you have a cast iron Dutch oven that allows you to bake.


  • Meet your campsite neighbors.
  • See if your campsite has fun activities for the kids (or the adults – bingo anyone?).
  • Walk trails.
  • Bring your bicycles.
  • Go swimming if you can.
  • Create traditions.
Most of all – make memories with your loved ones that will last their lifetime and enjoy the time you have together in nature.

About the Author
Elizabeth Beadles is a twenty-something stay at home mom and wife.  She loves camping, writing, and playing with her son.  She believes that we are all capable of making choices to become responsible individuals living a sustainable lifestyle.  You can find her ramblings and thoughts on life, love, and sustainability at As We Grow Green.
 

Kitchen Stewardship in the Big Woods: Family Camping Handbook

Need more Camping Food ideas? Check out the Kitchen Stewardship in the Big Woods ebook with lots of real food recipes for camping. Plus tips on how to organize your campsite and what to pack to keep the kids entertained.  (Disclosure: I am an affiliate of Kitchen Stewardship ebooks. I love her recipe books and  I get a small percentage of each book sold. Happy reading.)

photo credit: bulliver via photopin cc