Please welcome my guest writer Mary who shares her experience of hosting a canning party, plus her recipe for Sassy Tomato Salsa. Many hands make less work. Leave a comment and share what you would make at your canning party.
When veggies are ready to be harvested, we need to take advantage of this large influx of ingredients to make delicious things to eat. Buying these by the bushel really cuts down on the cost and it’s easy to put up a few bushels at a time but it’s definitely more fun when you do it with friends. I’d like to share with you about one canning party I hosted at my house one summer. As a side note, before we begin, there are quite a few sites that offer free printables for canning and even specialized invitations for your party. Make it as fancy or relaxed as you see fit….the whole idea is to have fun!
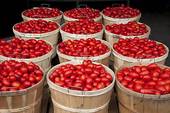
I gathered friends I knew either loved to can or wanted to learn. We chose the items we wanted to can that day and divvied up the ingredients amongst ourselves. This also included what we would need for lunch and of course, the wine we’d consume *smile* but sharing the cost of things can really reduce the cost of taking on a large project like this. Tomatoes by the bushel can be purchased at farmer’s markets, vegetable stands or sometimes even grocery stores. Roma, or paste, tomatoes make the best tasting salsa because they are meatier.
Canning Fun
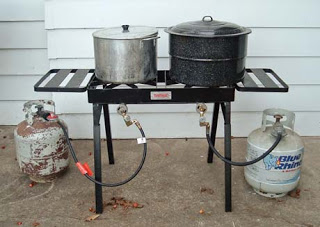
We set up stations in my kitchen, in my garage and even outside. Tasks were divided with 2 people at each station and it was proven again that many hands make light work. The first station worked with the tomatoes, the first step of the process. After washing the tomatoes, place them in boiling water until the skins split, remove them from the water and plunge into a sink of ice water – this stops the cooking process and allows the skins to peel easily. All the vegetables that are included in the making of the salsa had to be chopped into small pieces and this was done both by hand and using the food processor. Once all the ingredients were assembled, they were put into large stock pots to cook. Since there were six of us working together, we wanted to make sure we each had at least 6 pint jars of salsa apiece so we were cooking a large amount of ingredients and it had been divided into four large stock pots. We set up a camp stove outside to cook two of the pots and two were cooked on the stove in the kitchen. As preparation had taken most of the morning, while the salsa was cooking we stopped for a lunch of all the yummy stuff to eat everyone had brought and of course, bottles of wine. It takes at least 2 hours, if not longer, to cook the salsa down to the consistency needed so we had a good bit of down time.
How to Process
You need to prepare the jars to be filled so they need to be washed in hot, soapy water and then placed in boiling water to sterilize the jars. Since you are doing a large amount of jars, it`s easiest to place them into a warm oven to hold the jars since you`ll have too many to hold in the canners. You will also need to place the lids and rings in large saucepans to sterilize them and it also softens the rubber on the lids, so they will seal. Remove a jar from the oven and fill up to an inch from the top. You need to remove the air bubbles from the jar and you can use the handle from a spatula, a plastic lettuce knife or anything similar that you can run around the edges of the jar to make sure the bubbles are moved from the food. Wipe the top of the jar to remove any signs of spills as this will prevent the jars from sealing properly. Remove a lid from the hot water, place on top of jar and then screw a ring into place but not only hand-tighten.
Place jars in the canner, which has water boiling in it, and continue until canner is full. Once the water reaches a boil again, place lid on top and set timer for 15 minutes. As we had 4 canners going at one time (two outside and two inside), we had jars coming out at different times. Place the processed jars on old towels to cool and as they cool, you should hear the most delightful “ping“ coming from the jars as they seal. You can also check this by pushing on the top of the jars, if they don`t give to the touch, they are sealed but if they move up and down, this means they aren`t sealed properly and should be kept in the refrigerator for eating soon.
Disclaimer
Please note that some people may tell you that this recipe needs to be pressure canned but rest assured that the increased vinegar that is noted in the recipe makes it safe for water bath processing. Also, there are many vegetables that do need to be pressure canned but that would need to be covered in another post. My most important caution to everyone is to be sure and check current canning and preserving books for assistance as many of the old methods aren’t safe for today’s safety standards. You may also find someone who says “well, that’s the way my mother did it and how I’ve always done it.” This is strictly your decision on how to proceed but methods were updated for very good reasons and I feel safer following them.
Please note that the recipe will need to be adjusted to the amount you want to prepare. This particular recipe makes 8 pints so we made 4 batches of it in order for everyone to have 6 jars to take home with them (there were 5 of us).
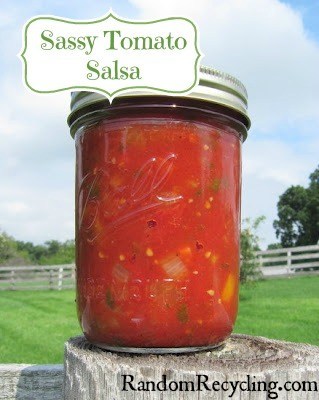
Ingredients
- 8 cups tomatoes peeled, seeded, chopped and drained
- 2 ½ cups chopped onion
- 1 ½ cups chopped green pepper
- 3 – 5 chopped jalapeños
- 6 cloves minced garlic
- 2 tsp cumin
- 2 tsp pepper
- 1/8 cup canning salt
- ¼ cup chopped fresh cilantro
- 1/3 cup sugar
- 1 cup vinegar
- **See note if using a Boiling Water Bath
Instructions
- Mix all ingredients, bring to a boil, boil; boil for 30 minutes (or longer to better marry flavors). Pour into hot jars. Wipe tops of jars to remove any lingering food, place lid on top and hand tighten rings.
- Process in a Boiling Water Bath for 15 minutes.
- Makes 8 pints.
- This can also be processed in a pressure canner but for simplicity sake, I’m only providing the directions for the water bath process as it’s a little easier for a first-time canner.

About the Author
Helpful items for the Canning Party:
**I prefer wide mouth jars when I can find them.
