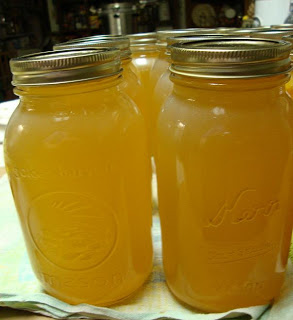
For this week’s holiday inspired Waste Not Wednesday, I wanted to share my recipe for making homemade turkey broth. You can also follow the same process and make your own chicken broth. Bones are bones and bones are great!  This is also a way to save at the grocery store since organic broth can run over $4.00 for a one quart package.

Here is what you will need:
1 Turkey carcass, stripped of as much meat as you can. (I save leftovers for sandwiches or turkey soup)
1/4 cup peppercorns
3 Bay leaves
2 Onions, skin peeled off and cut into quarters
3 Carrots, chopped in 3″ segments
3 Celery, chopped in 3″ segments
Put everything in a large pot and cover completely with water. Bring to a boil, then return to a simmer for about 3 hours.
Cool turkey broth, then strain over a large bowl.

I save some broth in the fridge and the balance is frozen in 2 cup amounts.  I often freeze the broth in glass containers, either mason jars or leftover spagetti sauce jars.

One note, I do not salt my broth. I find that using a turkey which was salted during the cooking process gives me enough flavor. I also tend to add salt to the recipes that I will use the broth for, so I try to eliminate doubling up on the sodium.

I recently learned that you can make broth from the bones more than once. Anyone have any experience trying this out? The flavor won’t be as strong, but what a great way to maximize your leftover bones. The second round broth would be well suited for cooking rice or beans.

I hope everyone has a delicious and relaxing Thanksgiving. I’ll be enjoying dinner in Florida with my in-laws and then flying back to Boston in the evening. Just in time to prepare for “second” Thanksgiving with my Mom and Grammy on Sunday!

This post is part of Frugally Sustainable’s “Frugal Days, Sustainable Ways” link-up.

Image Source

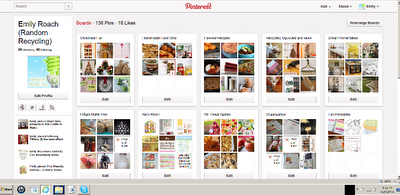
I am just slightly addicted to Pinterest.  It’s a visual bulletin board, but with out all the clutter of having one in your home.  This week I read that some people are using Pinterest to plan out all their Thanksgiving day recipes.  I thought this was such a great idea and plan to use it for my next big party. The possibilities are endless, from fashion boards to kids craft ideas, there are many ways to be inspired.

One board I think you all may enjoy is my Recycled, Upcycled and more board.

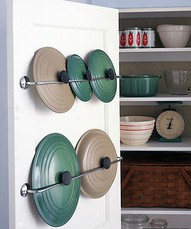
How brilliant is this easy way to store pot lids? This is originally from Kitchenisms. My favorite things about Pinterst is how easy it is to organize all these fun ideas.  For an avid magazine and blog reader like me I think this may eliminate my massive piles of swipes and printouts in favor of my digital boards. 

…and now I’m back.  I so easily get sucked into the main board of Pinterest that it always distracts me from my current task.  My new rule is to only go online at the end of the evening so the power of sleep will eventually call my name and make me turn the Ipad off.

Are you using Pinterest?  Is it helping you organize any part of your life or just a fun distraction at this point?  If you need an invitation, please let me know in the comment section along with your email address.

Image and video hosting by TinyPic

As the holiday season fast approaches, we are trying to get the house in order and clear out some clutter.  We try to stay on top of our donation pile by gathering it in the basement in one place.  Once the pile looks like it’s going to fall over (yes, it’s happened), we schedule a pickup from Vietnam Veterans.  We have been sending our donations there for years, both to support their cause and also because they offer the home pickup service.

Here is a list of what they accept:

  • Clothing of all types & sizes (men’s, ladies, children’s, baby’s)
  • Clothing accessories
  • Shoes (all kinds)
  • Baby items
  • House and glassware
  • Books, toys, bikes
  • Stereos, radios, portable TVs
  • All bedding, draperies, curtains
  • Kitchenware
  • Usable small furniture & rugs
  • Small appliances
  • Tools (all kinds)
  • Jewelry and cosmetics
  • ALMOST ANYTHING!

To schedule a pickup, you can do it online at http://www.scheduleapickup.com/ or you can call your local office, get the number here.

How do you get your home ready for the holidays? 

Image and video hosting by TinyPic

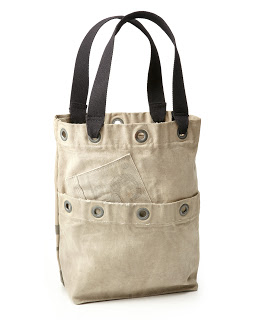
I am a firm believer that you can never have too many bags.  Big ones, little ones and all sizes in between.  Lately, my husband has been asking for nondescript tote that he can bring his lunch or shoes to work in.  This upcycled mail sac tote fits the bill.

Each tote is made from a repurposed mail sack that contains a mix of stamped graphics, rivets and softened edges from years of use.  You can find the tote over at uncommongoods.com, the Tote is $79, but they also have a cut pouch for $18.

Image and video hosting by TinyPic

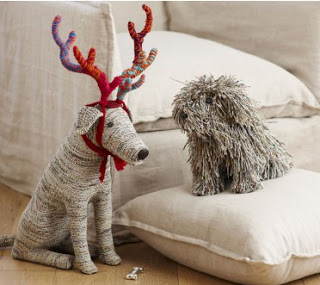
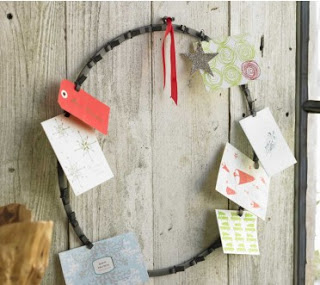
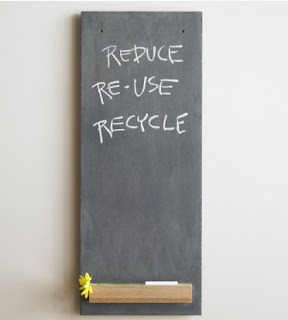
I got a couple of quiet moments to enjoy the latest Viva Terra catalog and put together my own wish list of fun recycled holiday gifts.  There are so many unique gift ideas in this catalog that always make me smile.

~Recycled Newspaper Dogs. These super fun dogs are made from recycled newspaper and the antlers are made from fabric scraps.

~Holiday Card Wreath. Cute idea to display some of the smaller, more unique holiday cards that will soon be arriving. Plus it’s made from recycled metal.

~Vintage Slate Chalkboard.  These boards come from old schoolrooms and then fitted with a recycled wood ledge. I would love to use this to keep track of all the comings and going in the wonderfully crazy month of December.

Have you started putting together a holiday gift list? In the coming weeks I’ll be sharing some fun new products I am testing for both kids and parents.  Plus I’ll be sharing some eco-friendly travel ideas as we make the annual trip to Florida for Thanksgiving.

Don’t forget to enter to win a package of Dr Drip Coffee on my giveaway post here.

Image and video hosting by TinyPic

Disclosure: I was not provided anything for this post, although I would love anything from Viva Terra, hint hint.

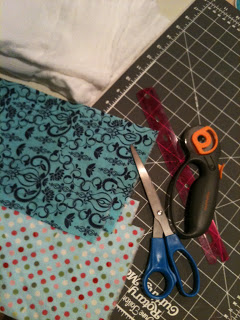
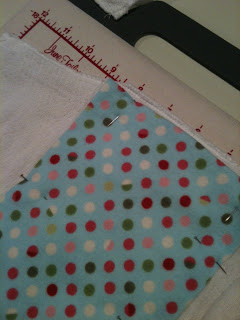
Here is a quick project to use up some fabric scraps you may have laying around.  I love these fun burp cloths.  They look a little better than the plain old cotton ones.

1. Wash all fabrics and burp cloths you want to embellish.  Dry and iron everything.

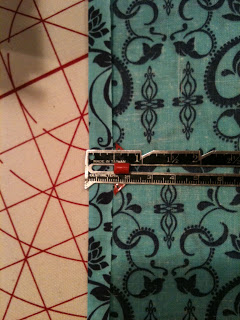
2. Measure the length of the burp cloth, add 1″ to get your length.  Measure the width of the interior panel of the burp cloth, add 1″ to get your width measurement.

3. Cut fabric scraps to size.  Pin or iron a 1/2” seam allowance all the way around.

4. Pin fabric scrap to the mid section of the burp cloth.

5. Sew fabric scrap to the burp cloth, I used a 1/4” seam allowance.

Don’t forget to enter the Dr. Drip Coffee giveaway here!


This post was linked to the Green Resource, hosted by The Greenbacks Gal, SortaCrunchy, Live Renewed, and A Delightful Home.

I have to admit, I love coffee. Good coffee. Not roofer’s coffee as my Dad use to call his black tar-like coffee. I started bringing a cup of coffee on the drive to school with me in 11th grade, so it has been part of my morning habit for a long time. Thankfully, my husband drinks strong coffee like I do. In the morning, I love making a big pot to share and fill the travel mug as he heads out to work. While pregnant and also nursing, our morning routine gets more complicated as I drink decaf during this time. This is where Dr. Drip Coffee will be very handy.

I love the idea of individual brewing options, especially for the regular versus decaf challenge. What I don’t like is the waste created by the plastic pods that are needed for the individual brewing systems. I researched Keurig pods a while back and learned they are trying to develop a recyclable pod, but it just doesn’t exist yet. Dr. Drip Coffee offers an individual brewing experience, AND a recyclable filter and packaging.

I tested out their decaf option during nap time for the kids. I boiled water in the microwave first. Meanwhile, I set up the Dr. Drip over my mug. The coffee grinds are exposed so use caution. Once the water is boiling, slowly pour it over the grinds. It’s a slower process than I would like, as you have to wait for the water to drain before adding more. I let it rest about a minute after I finished pouring the water through to get a stronger finish.

Taste test time. I was a little skeptical after the pouring process that this coffee would be good. I was wrong, it was great. No grainy “instant” flavor (like Via) and it wasn’t watered down at all. I was surprised that it was so good, especially since tasty decaf coffee can be hard to find. Dr. Drip uses organic, fair-trade coffee and offers a variety of flavors to suit your morning habit.

The best part was clean up. I put the outside package and filter in my recycling bin and the filter went into the compost. No waste.

For me, I think this is a great product to pack on vacation when you may be staying somewhere with less than acceptable coffee. I think I’ll stick with my french press coffee for now, which also is no waste as the grinds just go into the compost when we are done.

Want to try it? A lucky reader will get a package of Dr. Drip Coffee to experience themselves. Visit their website and comment with what flavor you would like. For additional entries you can enter a comment for the following:
1. Follow Random Recycling on Facebook.
2. Tweet about this giveaway. Please include the Tweet URL and @RandomRecycling in the tweet.
3. Follow Random Recycling on Twitter.
4. Follow Dr. Drip Coffee on Facebook
5. Subscribe to Random Recycling via email. Please include email address in the comment to confirm.

A winner will be picked on November 15th via Random.org. (US residents only)

Enjoy!

Disclosure: I was provided samples of Dr. Drip Coffee to review. It in no way influenced my opinions shared here. 
Top photo image credit

I am really excited about starting a Wednesday series called Waste Not. My intention is to share ideas of how to reduce waste in our lives by offering clever projects, recipes and more. If you are a reader with an idea to share, please consider being a guest blogger and email me at RandomRecycling (at) gmail (dot) com.

With that being said, my first Waste Not project is to use my pumpkin seeds I saved from our friend’s annual Pumpkin Carving party. I always pack my own Tupperware container to save my seeds. (Yes, I still have some plastic containers in my storage rotation. They are perfect for projects like this.) My husband was kind enough to weed out the seeds from the guts of the pumpkin. We carved a very large pumpkin and typically the insides are not worth saving to eat, but they are great for our compost pile.

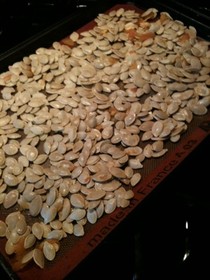
Once all the seeds are cleaned off, I leave them to dry overnight on a baking sheet covered with a non-stick pad or parchment paper. Do not use paper towels, the seeds will stick to them!


The next day I’m ready to roast the seeds.
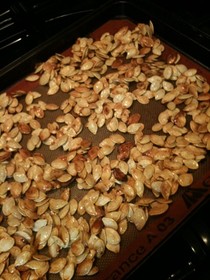
Preheat the oven to 350 degrees. Bake seeds in the oven (naked) for 20 minutes.

Next, choose your salt and spice preference. You can’t go wrong with a tablespoon of olive oil and kosher salt to taste. If you want to kick it up a notch, I like to add a 1/4 teaspoon of cayenne pepper.


Sweet & Salty Pumpkin Seeds
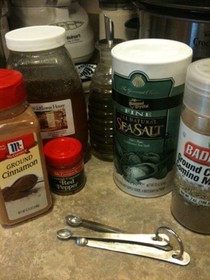
My favorite roasted pumpkins seed recipe is a mix of the following ingredients:
1 Tbl olive oil
1/2 Tsp Kosher salt
1 pinch cinnamon
1 pinch cumin
1 pinch cayenne pepper (gives the seeds a nice color)
1 Tbl honey

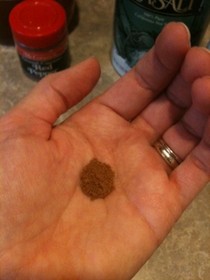
Wondering how much is a pinch? Here is a picture of a pinch of cinnamon.


While the pumpkin seeds are roasting, I mix all ingredients in a large bowl. After the first 20 minutes of roasting, add seeds to the bowl and mix thoroughly. Transfer seeds back to baking sheet and cook for another 15 minutes. Let cool completely before eating or storing. Stir the seeds while they cool as the honey makes them VERY sticky.


How do you like your pumpkin seeds?
Hope everyone is excited for the Halloween weekend ahead!

Today is a gloomy day.  The kind where you get up and have to put lights on because it’s so dark in the house.  We were blessed with some Indian summer weather here in the Northeast, so this cool rainy day feels especially gloomy after enjoying the last of the brilliant summer sun.
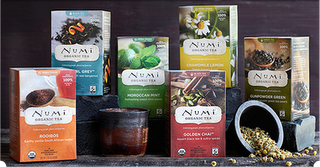
Luckily, my samples of Numi Organic Tea arrived today, including Moroccan Mint, Jasmine Green and Aged Earl Grey.  I made a cup as soon as the kids went down for their afternoon nap.  The tea bags were labeled with the caffeine level, so I choose Jasmine Green with medium caffeine amounts.  I steeped mine for about 3 minutes, as I tend to like stronger tea, and 2-3 minutes is recommended.  It smelled so yummy while brewing, and was so cozy to hold as the rain poured down.  Once it finally cooled off, I was delighted by the fresh taste of the tea.  Plain green tea generally doesn’t appeal to me as I find it bitter.  With the addition of the jasmine, it creates a smoother tea flavor.  Now, if only I had time for a second cup before the kids wake-up…

In the evening I tried the Moroccan Mint after dinner.  I’m a big fan of an after dinner cup of tea, as my parents did the same thing when I was younger.  It was still raining, and the Mint tea was a relaxing addition after (finally) getting both kids to bed.  Mint is great for anyone suffering from eating too much at dinner; have some tea instead of popping a Tums.

There are a couple of details about Numi Organic Tea that warms me up even more.

1. They are Fair Trade Certified and have been named the largest brand importer of Fair Trade tea in the US for 2010.
2. The tea bag is made from biodegradable filter paper so it can go right into my compost when it’s done.
3. The packaging is made from 72% recycled content. (Side note, it’s rather difficult to open the package. Mine do not open cleanly at the notch provided so I needed scissors.)

October is Fair Trade month so join the party and celebrate with a mug of hot tea from Numi Organics.  Check out their Facebook page and become a fan.  This will entitle you to enjoy a 15% discount off all Fair Trade Certified teas and teasans.  Enter code NUMIFAIR at checkout, available through numitea.com only. This offer is valid until October 17, 2011.

What is your favorite tea flavor?  Hot or iced?

Image and video hosting by TinyPic

Click here to visit Simple Blogging.

Disclosure: I was provided samples of Numi Organic Tea, this in no way influenced my opinions shared here.

We go through a lot of yogurt in our house.  It may be from a large 32 oz tub, a kid size container, or a squeezy tube that works wonders to calm a two year old.  We typically have our yogurt with my homemade granola recipe and fresh fruit that is in season.
Sadly, our local recycling center does not accept #5 plastic containers, which nearly all yogurt containers are made from.  I save them and drop off a bunch at the Gimme 5 drop box at my local Whole Foods.  This isn’t always practical as it takes even more planning to remember both the old yogurt cups and our reusable bags.

We recently got the opportunity to try the new Wallababy yogurts.  It’s hard for a two year old not to like a little cup with a kangaroo on it, but I didn’t expect tears when I couldn’t offer any more banana yogurt one morning.  Clearly, we found a winner in the new yogurt category.  I’m a big fan of organic, whole milk options, as I believe the less we process our dairy products, the more beneficial they are too our health. Also, my daughter is growing tall, but doesn’t gain a pound.  I figure whole milk is best for her growing bones and weight plateau.  I tried a taste of the banana yogurt myself, and I was pleased that it was not too sweet.  It baffles me how sweet and artificial (and colorful) kids yogurts have become. I found the Wallababy products at my local Whole Foods…which just opened another location even closer to my house, yeah!

With all the random yogurt containers waiting to be recycled, I thought I would share some favorite ways to reuse them.

 
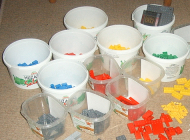
Use the yogurt as a paint holder, especially good for little spillers.

You can never have too many craft containers.

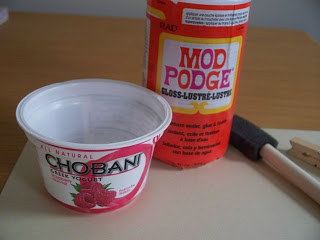
Glue holder, which I use for my own craft projects.  (And is there a better glue than Mod Podge, I think not!)

How do you reuse your yogurt containers?  (Or can you recycle them locally?)

Image and video hosting by TinyPic
Disclosure: I was provided samples of the Wallababy yogurt to review.  It did not influence my opinion, or my two year old’s as well. 🙂

Click here to visit Simple Blogging.